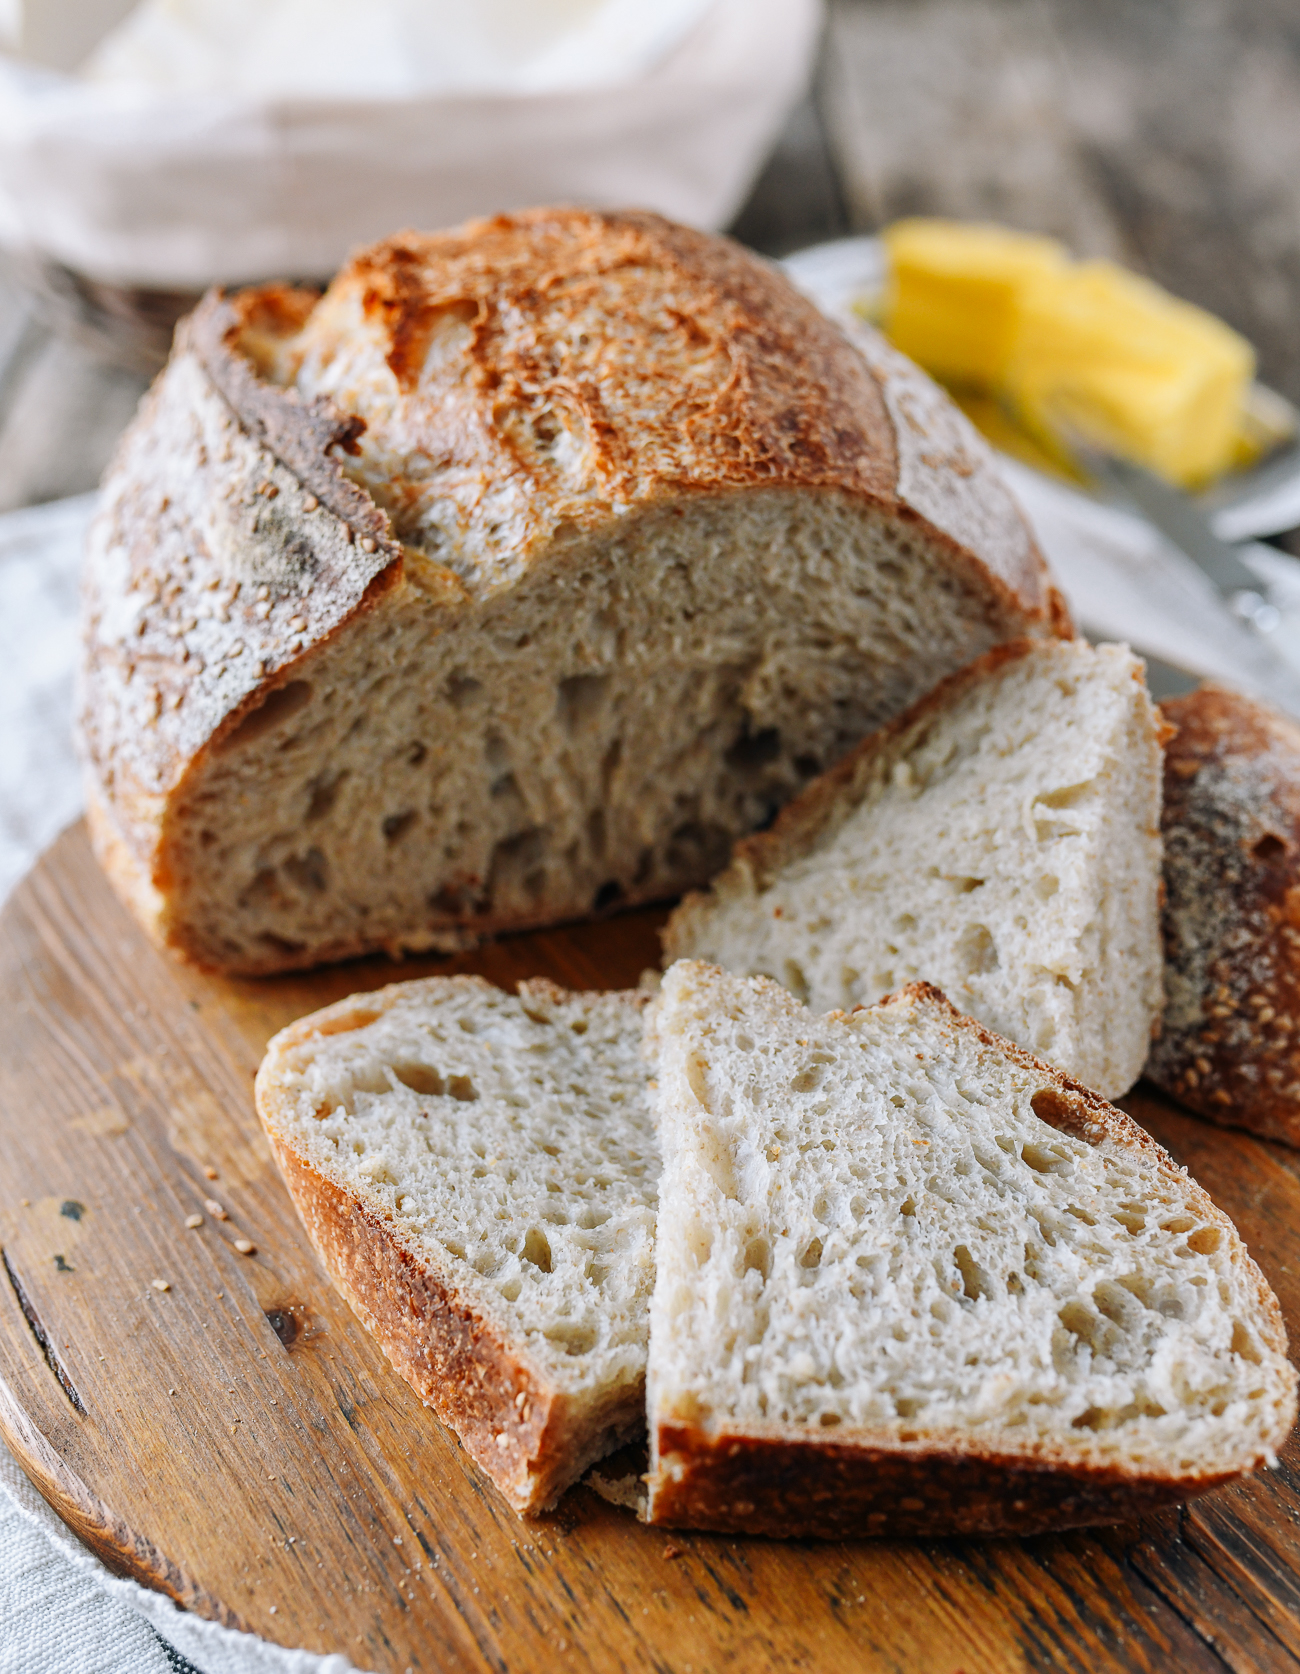
Welcome to our Homemade Artisan Sourdough Bread recipe, and my journey from hapless home bread baker to getting consistently professional results!
Mastering the art of baking breads has been on my list of things to do for a very long time. While I dabbled in no-knead bread, crusty dinner rolls, and Portuguese rolls, I’d only ever baked bread casually, and decided that it was time to get serious and advance to an artisan loaf.
Breakfasts usually consist of avocado toast or morning PB&J, and we often like to slice a few pieces for snacking on cheese and olives before dinnertime, so learning how to make sourdough bread just made sense.
Take it from a former engineer…
After a YEAR of experimenting in lockdown—and many mediocre or outright failed loaves—I finally got into the groove of making a very reliable and delicious artisan sourdough worth documenting.
I now make a loaf once a week with consistent quality! And we almost never need to go to bakeries, where bread quality and costs can vary.
I will humbly say that I’m the only engineer of the family, so take it from me. I’ve made the mistakes and ran the numbers. And I’ve even attempted the shortcuts.
But now, I’ve finally nailed down the right formula, and this sourdough bread recipe is the result of a year’s worth of intensive lockdown bread baking!
Below, we’ve made a quick diagram of the different stages across the 1 1/2 days it’ll take to bake this bread. (As long as you have a sourdough starter ready to go. If not, see my guide on How to Make a Sourdough Starter!)
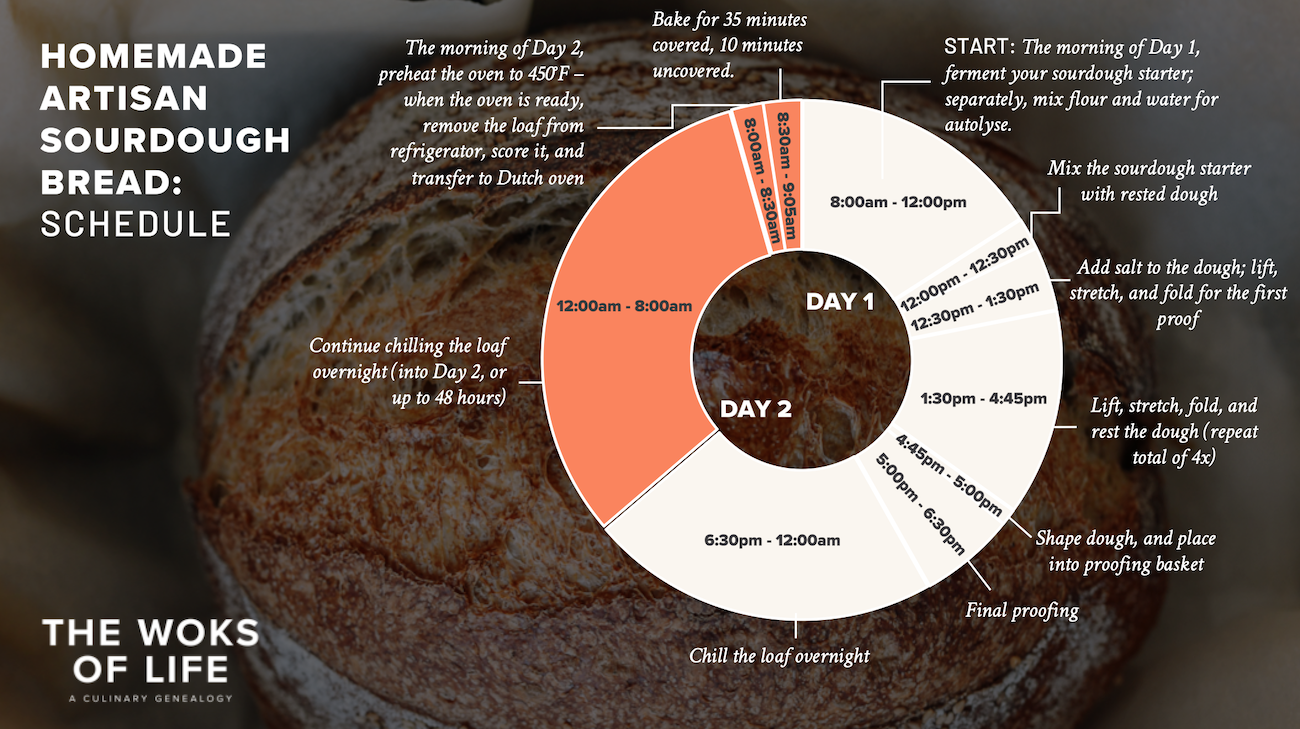
The process on Day 1 does take about 10-12 hours (mostly inactive time), so we recommend starting your bread in the morning—probably no later than 12:00 noon!
An Easy Hobby to Get Into
Bread baking isn’t just about following instructions. It’s more of a hobby that requires time, attention, and love throughout the day, though the actual active time is relatively little.
This isn’t one of those no-knead bread recipes that have become popular over the last year. But in my opinion, when it comes to bread, a little extra effort and time means reaping big benefits.
Baking sourdough is a perfect background task when working from home or around the house, so you can bake any day of the week. If you can step away from work for a few minutes at a time over the course of a day and a half, baking sourdough may just be the perfect hobby for you.
Sourdough for gluten intolerance?
Another potential advantage to making your own sourdough bread:
If you, a family, or friend have a gluten intolerance (i.e. a digestive sensitivity to gluten…NOT a serious gluten allergy or Celiac Disease), you may find that sourdough bread does not result in adverse symptoms!
This is because sourdough naturally ferments for hours, allowing the yeast and bacteria in your sourdough starter to break down the gluten proteins in the flour. This in turn makes it easier to digest! Everyone is different, and some people may need their dough fermented longer than others. Read more about this phenomenon: “Why Some Gluten-Sensitive People Can Still Eat Sourdough Bread”
As always, consult your doctor before trying anything new, but we have a family member who has a gluten sensitivity and can eat our sourdough bread without issue. Cool, huh?
A Detailed Step-by-Step Sourdough Bread Recipe for Beginners
All that said, there are plenty of great recipes out there. I started with Claire Saffitz’s guide on How to Make Sourdough on NYT Cooking. It helped me gain hands-on experience, which is the only way to truly master bread baking—it definitely won’t be a slam dunk the first time.
It probably took me 5 or 6 loaves until I got what I thought was a perfect loaf and another 10 or more to get consistent results.
There were some things that I noticed, adjusted, and tweaked over time with numerous iterations on flour types, starter volume, the mix of seeds to coat the outside of the loaf, and even the pattern of cuts on the dough before baking. I wanted to document my experience for family and our readers.
I see this as a detailed step-by-step sourdough bread recipe, designed specifically for first-time bread bakers.
A Disclaimer!
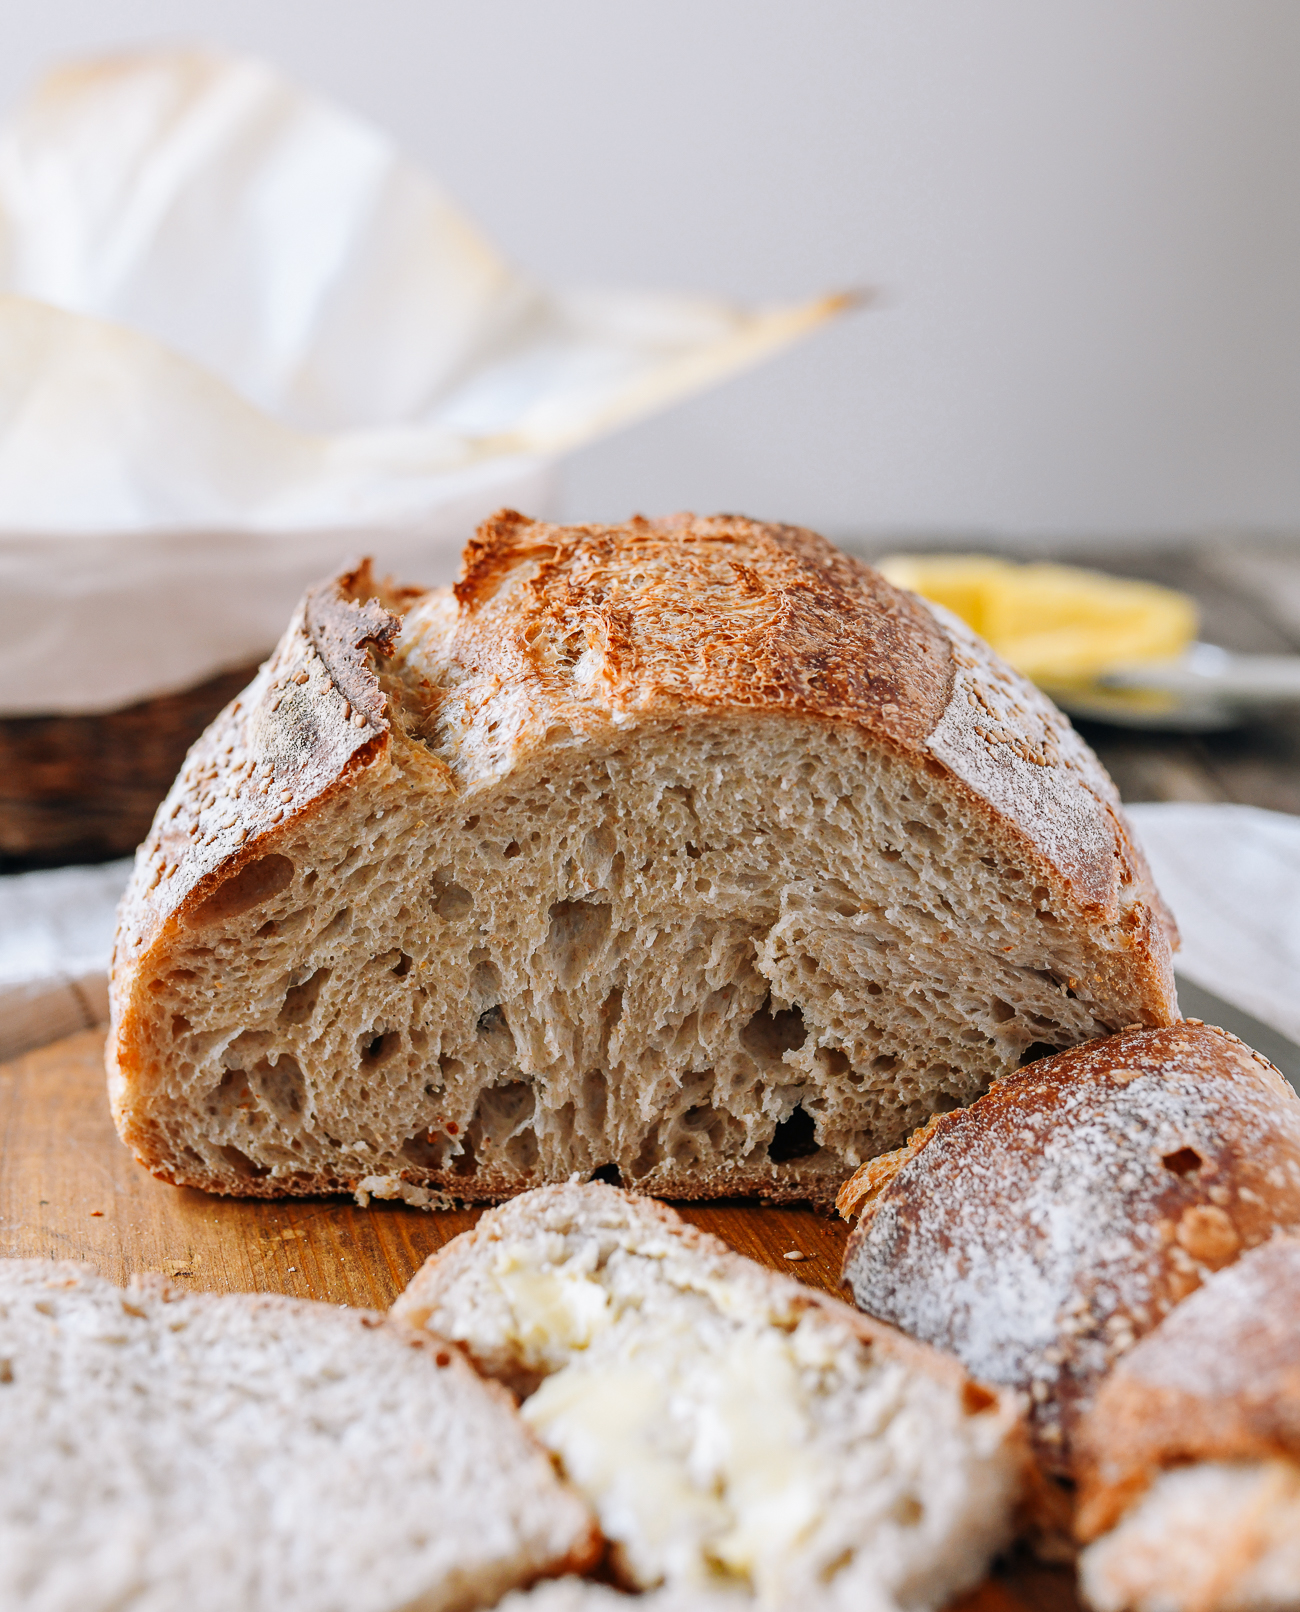
There are many styles and variations of sourdough bread out there. This is what I call an “everyday” sourdough loaf. It has great chew with an airy structure, a nice crispy crust, and a very light sourdough flavor that doesn’t hit you in the face! (If you want your bread to be more sour, you can cold ferment it longer, but we’ll get to that in the recipe.)
It’s great for sandwiches, any kind of toast, crostini, making breadcrumbs (if it’s gone stale!), and more. Take a look at the photos, and decide if this type of recipe is what you’re looking to make.
Sourdough FAQs
1. Why do I need a digital scale?
Most bread recipes require using a digital kitchen scale for the most accurate measurements. I also highly recommend you purchase one. Measuring flour can vary greatly depending upon how you do it, but a quality digital scale is always accurate and easy to use.
I can’t tell you how many questions we’ve gotten in comments about varying results in dough texture and final results due to differences in measuring flour. (You’ll see that all of our new baking recipes include weight measurements.)
When measuring by weight, there’s no losing count of how many cups you’ve put in, no variations in measuring cup size or measuring methods, and I get the exact same amount of flour and water every time, which results in consistently delicious bread.
If you’re itching to make this bread and you don’t have a digital scale yet, we do include cup measurements. If using cup measures, spoon the flour into the cup rather than scooping it, which can pack down the flour and result in too much being added to the recipe.
2. How do I make a sourdough starter?
You need a natural yeast starter to make sourdough bread. We have instructions in a separate post: How to Make your Own Sourdough Starter.
Another tip—ask a friend who has a mature starter to divide theirs and give some to you. With the 2020 we had, chances are you can find someone without too much difficulty!
3. What kind of flour is best for sourdough?
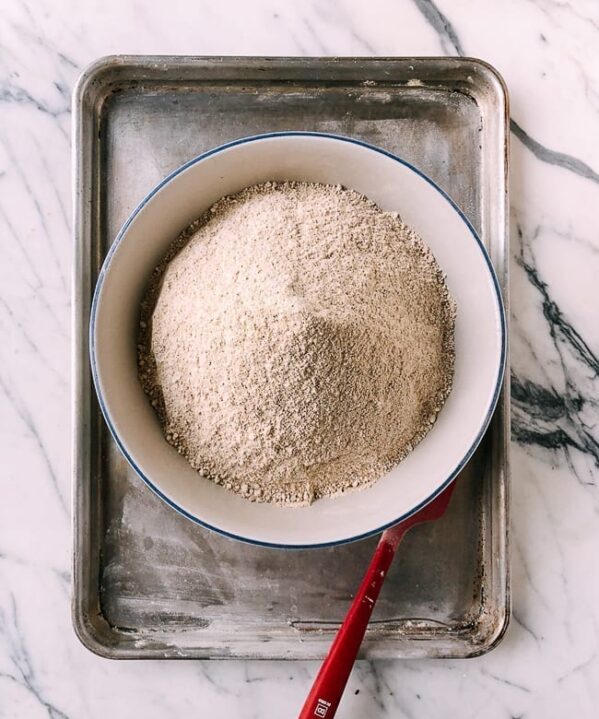
In my experience, a combination of white unbleached bread flour (75%) and whole wheat flour (25%) has the best balance of flavor and texture.
If you’d like to prioritize a springier, softer texture, you can use a larger percentage (80% or more) of white unbleached bread flour.
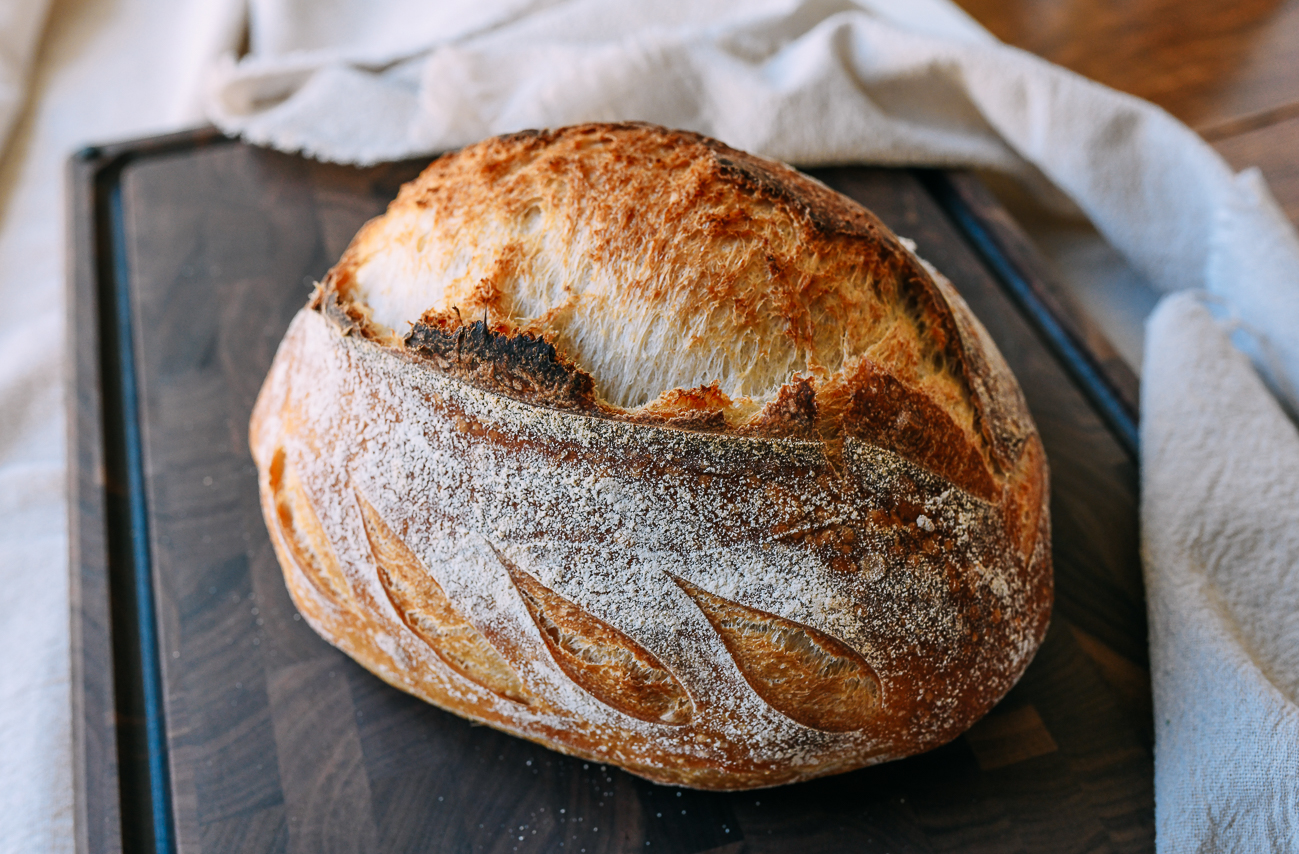
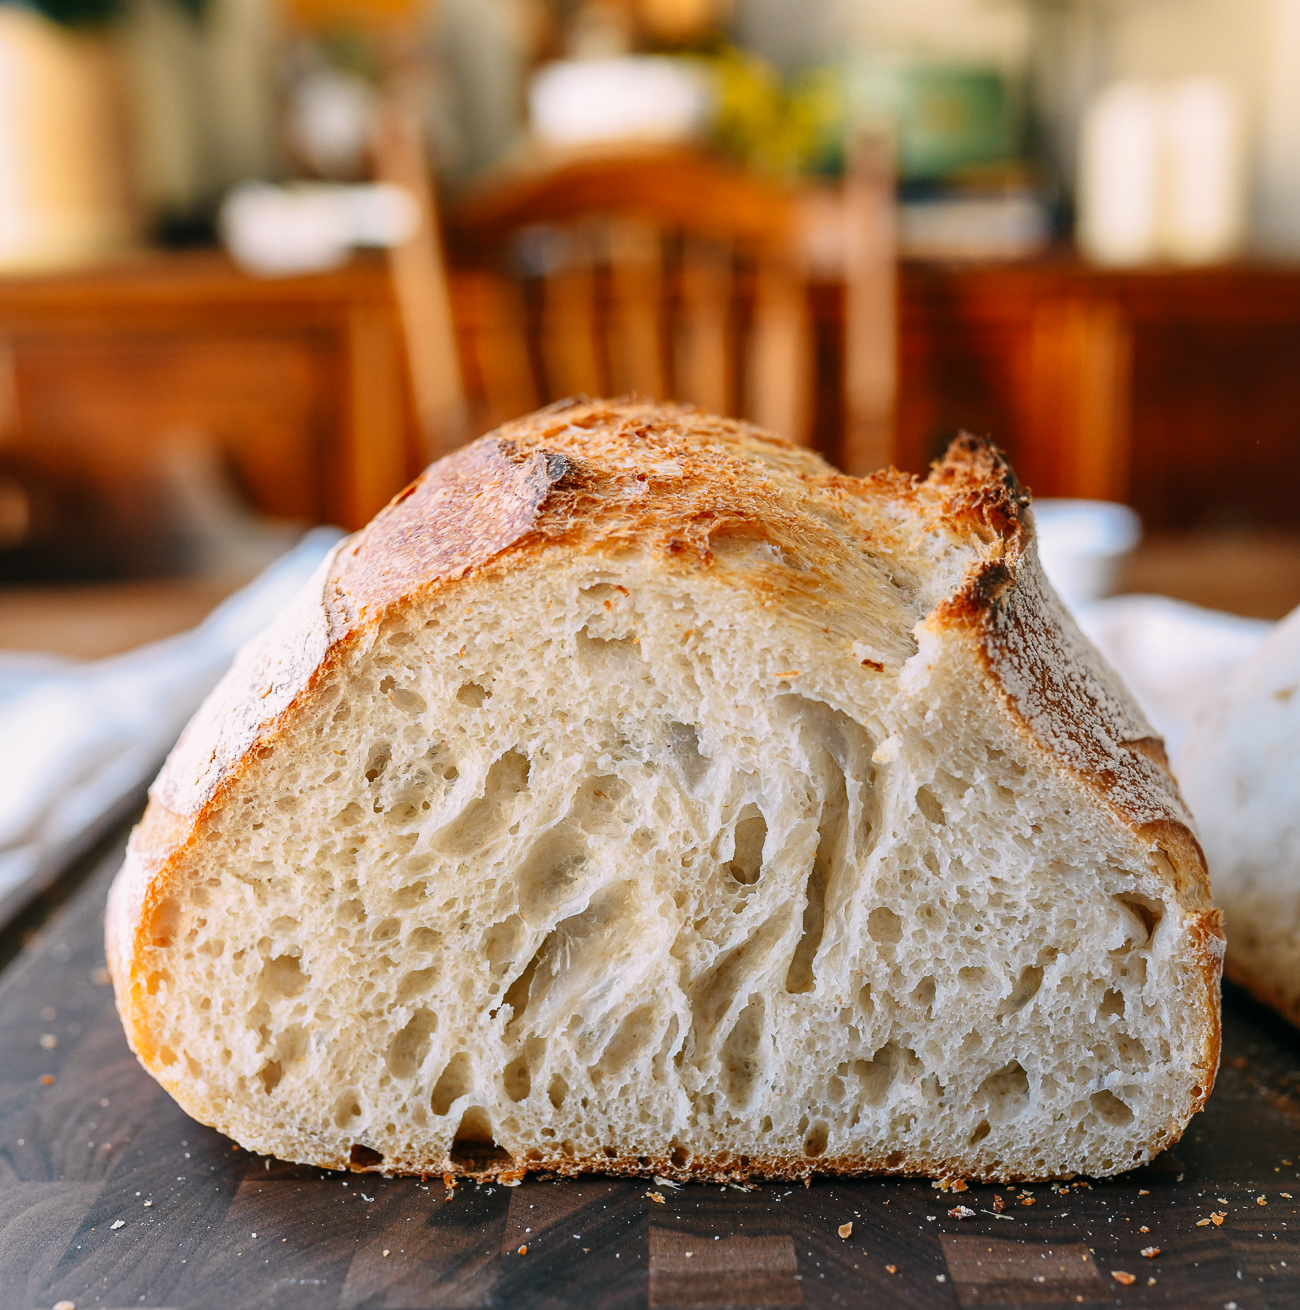
Using more whole wheat flour, on the other hand, will result in a heavier, flatter loaf with not as much of a rise or “oven spring” (a term for the growth of a loaf after it is put into the oven, but before the crust hardens).
If you use stone ground wheat, graham, or coarser artisan flour, you may have to add even more water. You will also need more starter. I’m working on perfecting that, so stay tuned for my whole wheat sourdough recipe!!!
We do not recommend using all-purpose flour instead of bread flour. (See FAQ #5.)
4. What is dough hydration – and why is it important?
Dough hydration is the percentage of water to flour, a common metric for bread baking. Sourdough breads generally have a minimum of 75% hydration.
At first glance, we have 375g water/500g of flour, which makes the hydration 75%. However, if you take into account that our sourdough starter is made with equal amounts of flour and water or 100% hydration, a more accurate calculation would take that into account. 375+60g water/500g+60g flour = 78% hydration, which is perfectly fine.
Now you can understand why having a digital kitchen scale to make precise measurements is so important. Following my advice and directions carefully will save you time and frustration!
5. Can I use all-purpose flour to make sourdough instead of bread flour?
We called out this question here, because we know our readers will ask!
Long story short, we do not recommend substituting all-purpose flour for bread flour in this recipe. All-purpose flour absorbs less water than bread flour, so if you do make the substitution, you’ll end up with a wetter, stickier dough.
All-purpose flour also has less protein/gluten, which will affect the texture of the bread. If you have it, you can make an approximate substitution for bread flour by replacing 5g of all-purpose flour with 5g (1 1/2 teaspoons) vital wheat gluten per cup (125g) of flour.
That said, we have tried this in the past, and found the resulting bread to be much more dense due to the fact that all purpose flour absorbs water less well. If you try the AP flour/vital wheat gluten substitution in a pinch, use 350g water rather than the 375g we call for in the recipe.
Tools you’ll need:
- Digital kitchen scale: A must for baking, and especially bread baking.
- Large stainless steel bowl: You can also use a glass bowl, but I like using stainless steel because it is lighter, easier to work with, and often comes in larger sizes than glass bowls.
- A stiff silicone or rubber spatula: It minimizes mess and waste when mixing the water and flour together to form the dough, and when mixing in the sourdough starter. A stiff spatula will be easier to work with than one that’s more flexible/bendy. Also, we like spatulas that are in one piece, rather than silicone tips glued to a wooden or metal handle. Stirring dough can put quite a bit of strain on them, and we’ve found that the ones with a handle glued on can break easily.
- Oven timer (or your phone timer): This one is easy!
- Dutch oven (6 quart or larger to give the loaf enough room): A Dutch oven with a cover is what the bread will bake in. It retains heat well, and helps achieve the hot, steamy environment needed for artisan bread with a nice crust. Make sure to check your manufacturer’s instructions to ensure that the knob/handle on the lid of your Dutch oven can take the high heat (most are ok). If it is a Le Creuset steel knob, it’s safe up to 500°F. Most Staub lids with handles are also safe up to 500°F. That said, it’s best to check your model, as handles vary. If you’re Dutch oven is uncoated cast iron, any cast iron handle is safe. If you’re not sure, it’s best to check the manufacturer’s instructions.
- Parchment paper: It’s the best way to move your sourdough loaf into the Dutch oven.
- Heavy duty Aluminum Foil: Crinkled and folded in half, use it as a liner in the Dutch oven to prevent the bottom of your loaf from scorching. It also prevents the bottom crust from getting too tough/thick.
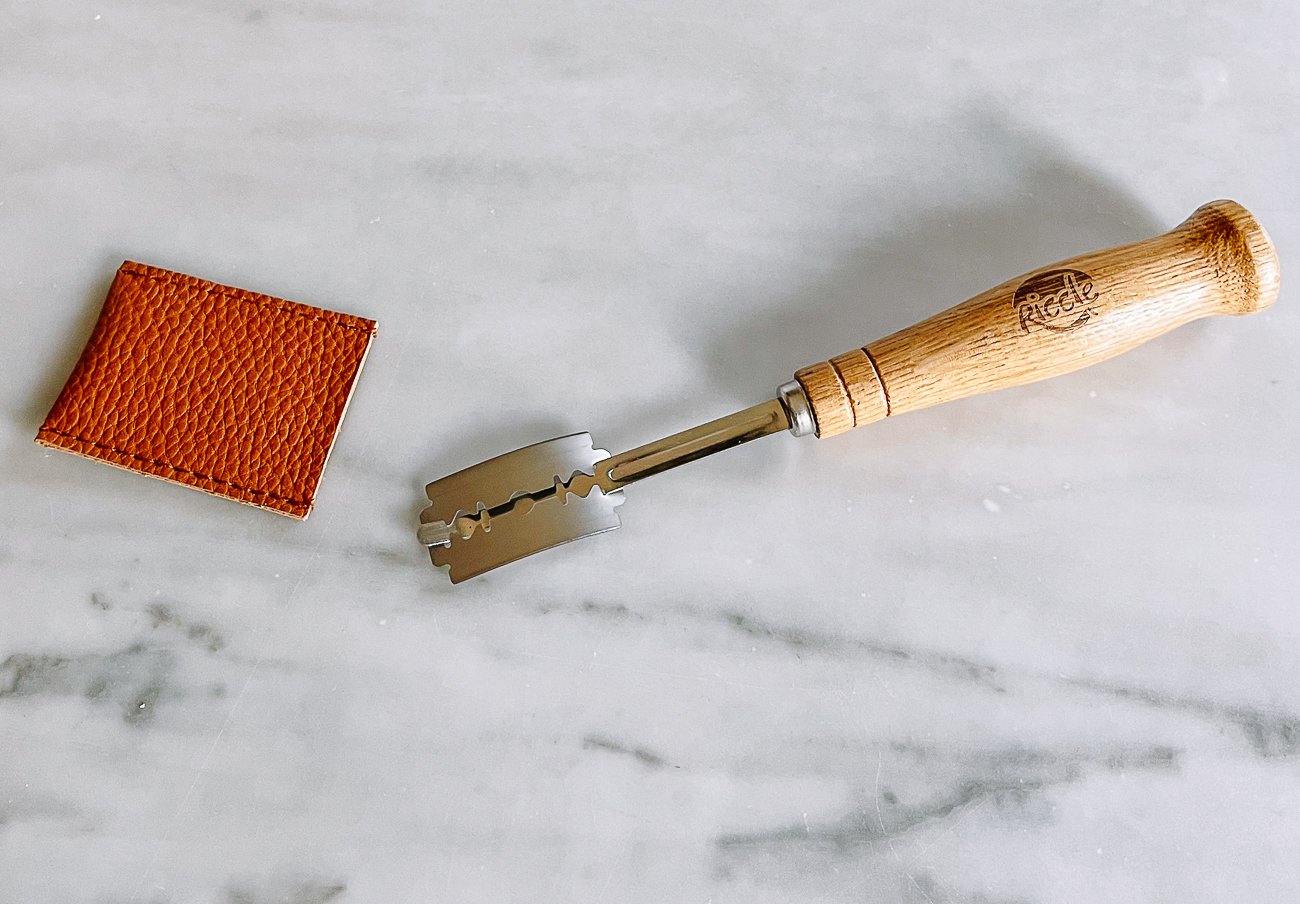
- Single edge razor blade or other scoring tool: I like using a one-sided razor blade that I set aside specifically for precise bread slashing. You can also buy a lame, which is a specific tool for scoring bread dough, for around $10. If you don’t have either of these options, you can use a very sharp paring knife in a pinch.
- Dough scraper/bench scraper: This tool will help you lift and transfer the dough to the proofing basket without disturbing the air bubbles inside!
- Oval or round banneton (proofing basket): The first time I tried making sourdough, I tried to use a bowl with a cheesecloth. The cheesecloth was way too delicate. Don’t do this and just buy a proofing basket! If you can’t find one or really don’t want to purchase one, we recommend using a round wood or metal bowl lined with a heavy linen cloth, similar to the kind of cloth that bannetons are sometimes lined with. Sarah has used a medium wooden salad bowl lined with heavy linen with decent results.
- Large, clean plastic shopping bag – I use a sturdy plastic shopping bag that I have been reusing for baking for months now. A clear bag is ideal, so you can view the progress the dough is making without disturbing it. It shouldn’t have any holes in it, and if you use a sturdy reusable one, it will last. If you’re worried about cleanliness, you can wash it and hang it to dry before using.
Sourdough Bread Recipe Instructions
Ferment Your Sourdough Starter: 8:00am
To make it easier to visualize the timing of these steps throughout the day, I’ve added sample times for each step. Note that they are approximate times, and serve only as a guide!
The first step is to ferment your starter to bring it up to full strength.
Don’t have a starter yet? You’ll need a week or so to make one (or you can get some discard from a friend who bakes in order to start your own). Head to our Sourdough Starter Recipe to see how it’s done.
Update: If you stored your starter in the refrigerator for a week without feeding, take the sourdough starter out of the refrigerator the night before assembling the dough, and feed it with equal parts (25g) of water and flour. This gives the starter the time to warm up and activate overnight, and will improve your bread’s rise and drastically reduce the time it needs to get going the next morning.
Take the starter out of the refrigerator, and stir in 60g lukewarm water and 60g of bread flour or whole wheat flour until well-combined. (For reference, I usually keep about 70g of starter as a baseline.)
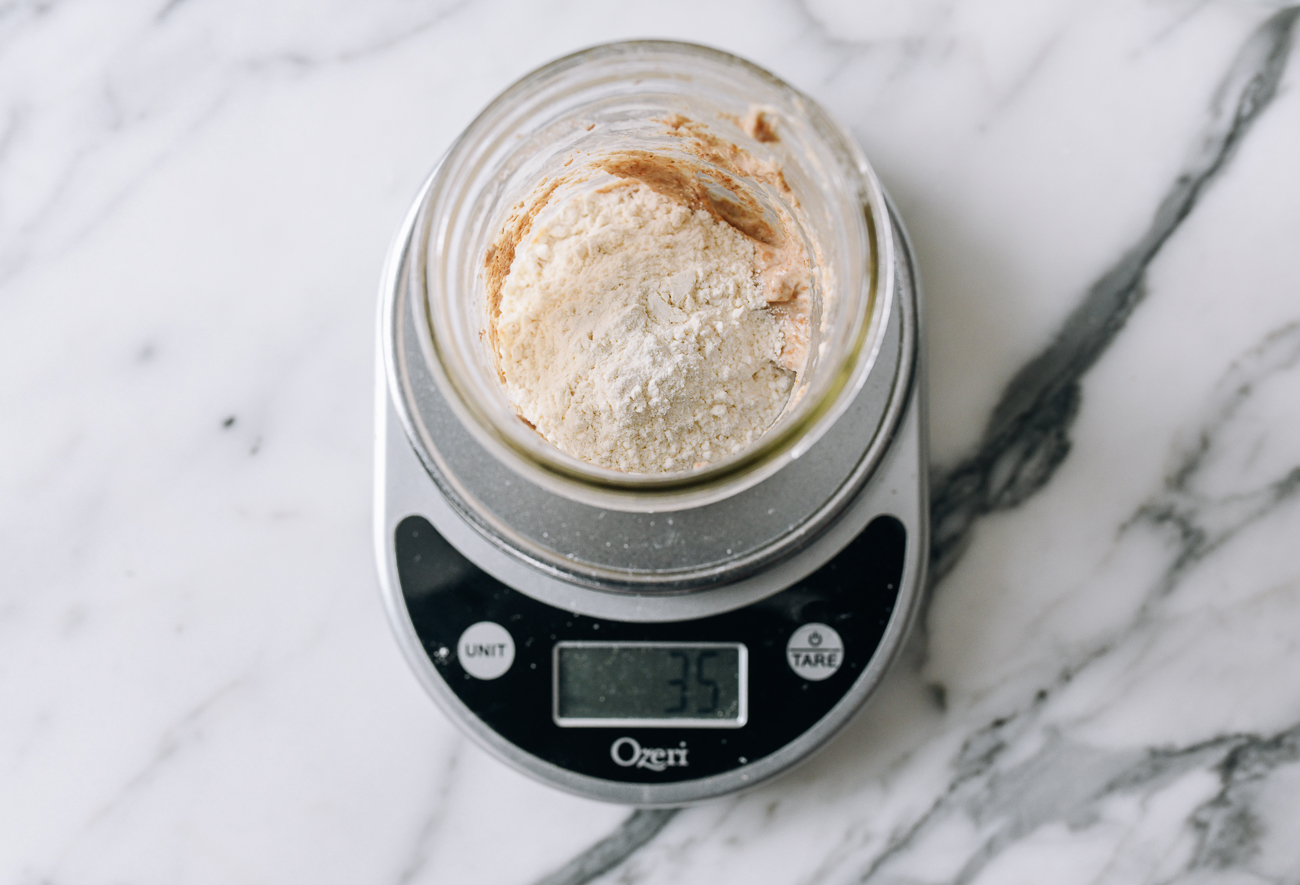
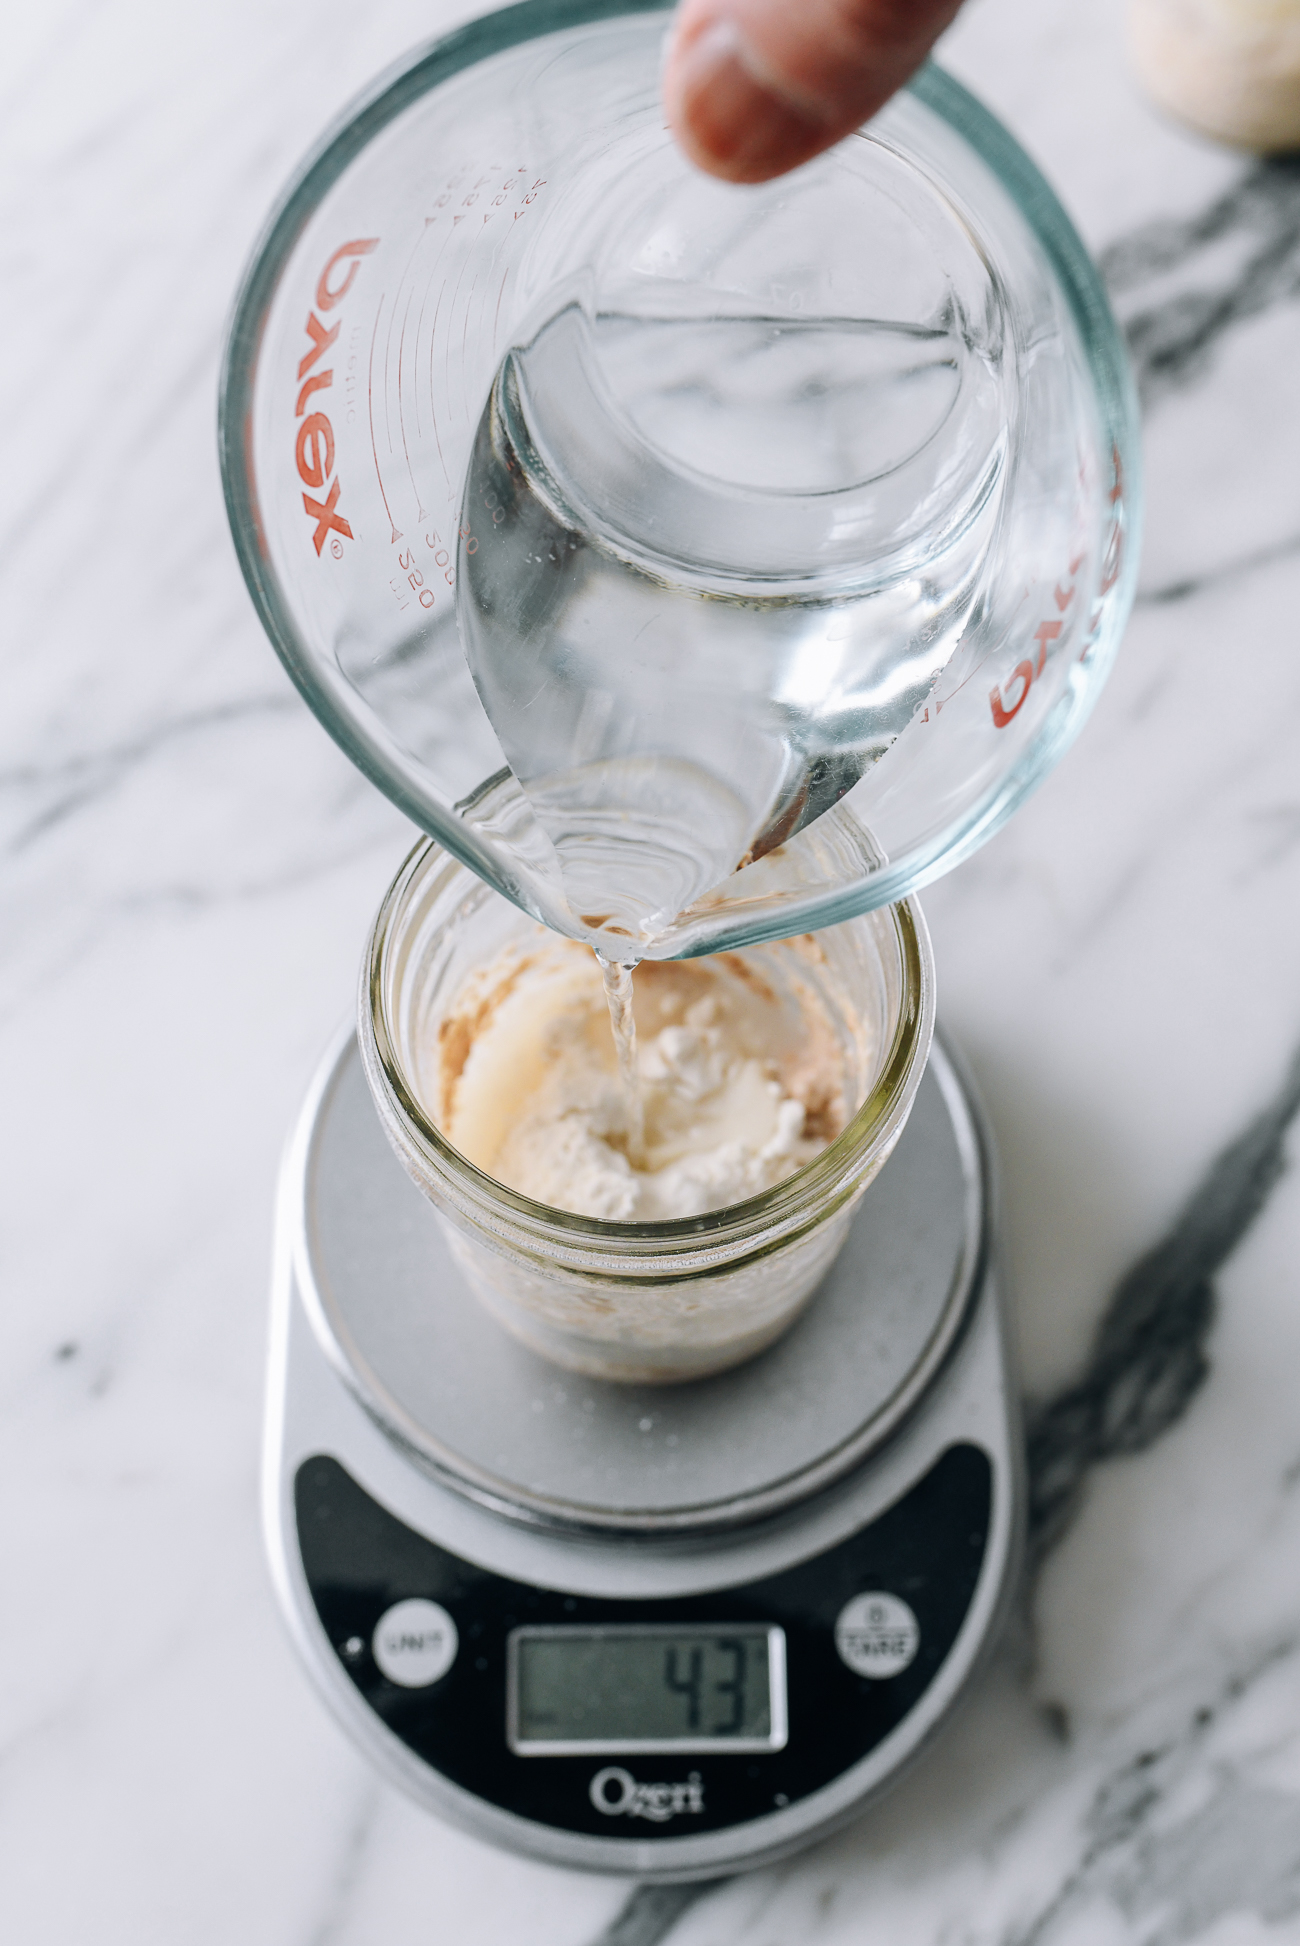
Cover it back up, and let it sit at room temperature for 4 hours, or until it doubles in size and just starts to fall again. This means it is at maximum strength. If your starter does not double in size, then you may need more time and another feeding before it is ready to use.
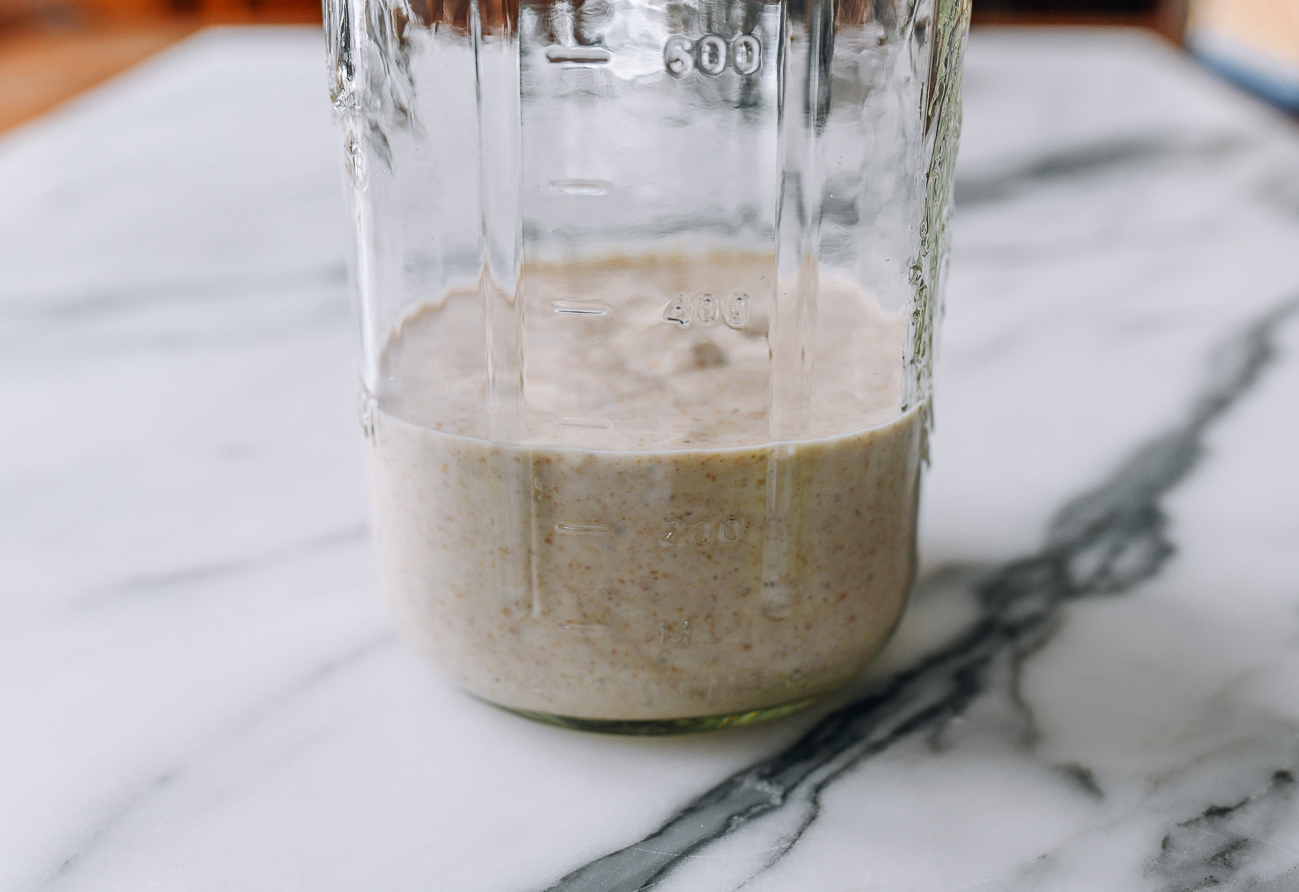
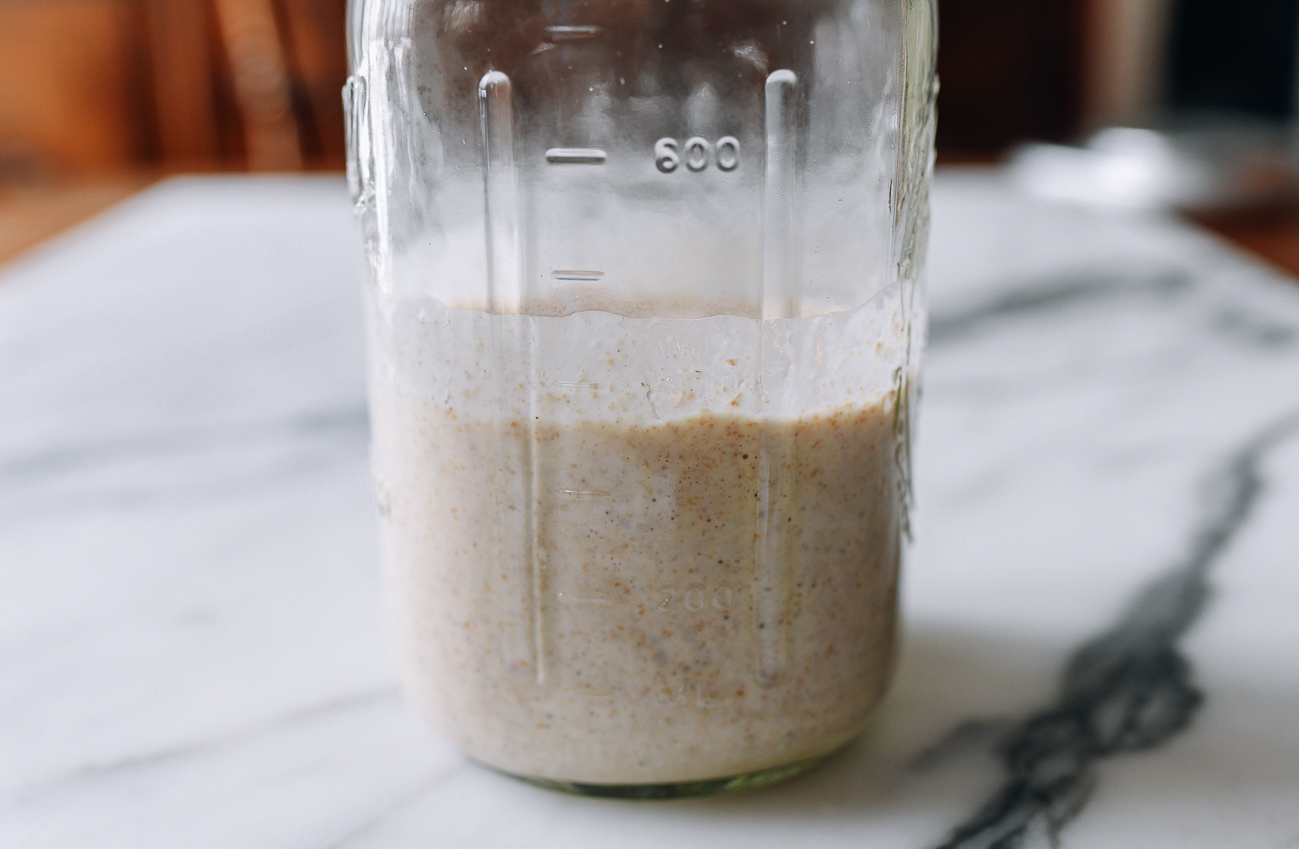
If you see a grey or light brown liquid floating on top of your starter when you take it out of the fridge, this is called “hooch.” This is the alcohol that the yeast produces when it has run out of food (i.e. flour). If you bake bread regularly (and feed your starter regularly), hooch will not form.
Just pour it off, or stir it back in for a more sharp-tasting (i.e. sour) sourdough. It’s a personal choice, but I recommend you pour it off before feeding, since the hooch can make your bread taste a little bitter.
Mix Flour and Water to Autolyse: 08:10am
What is the Autolyse Method?
An autolyse is the process of mixing water and flour and letting it rest. This process allows the water to fully absorb into the flour while allowing gluten to develop, making the dough easier to work with. An autolyse is also technically a fermentation step that helps develop more flavor.
There are many articles that share information on how long to autolyse, but in my short experience, 90 minutes versus a few hours does not make a significant difference. For convenience, I start the autolyse process right after I refresh the starter in the morning.
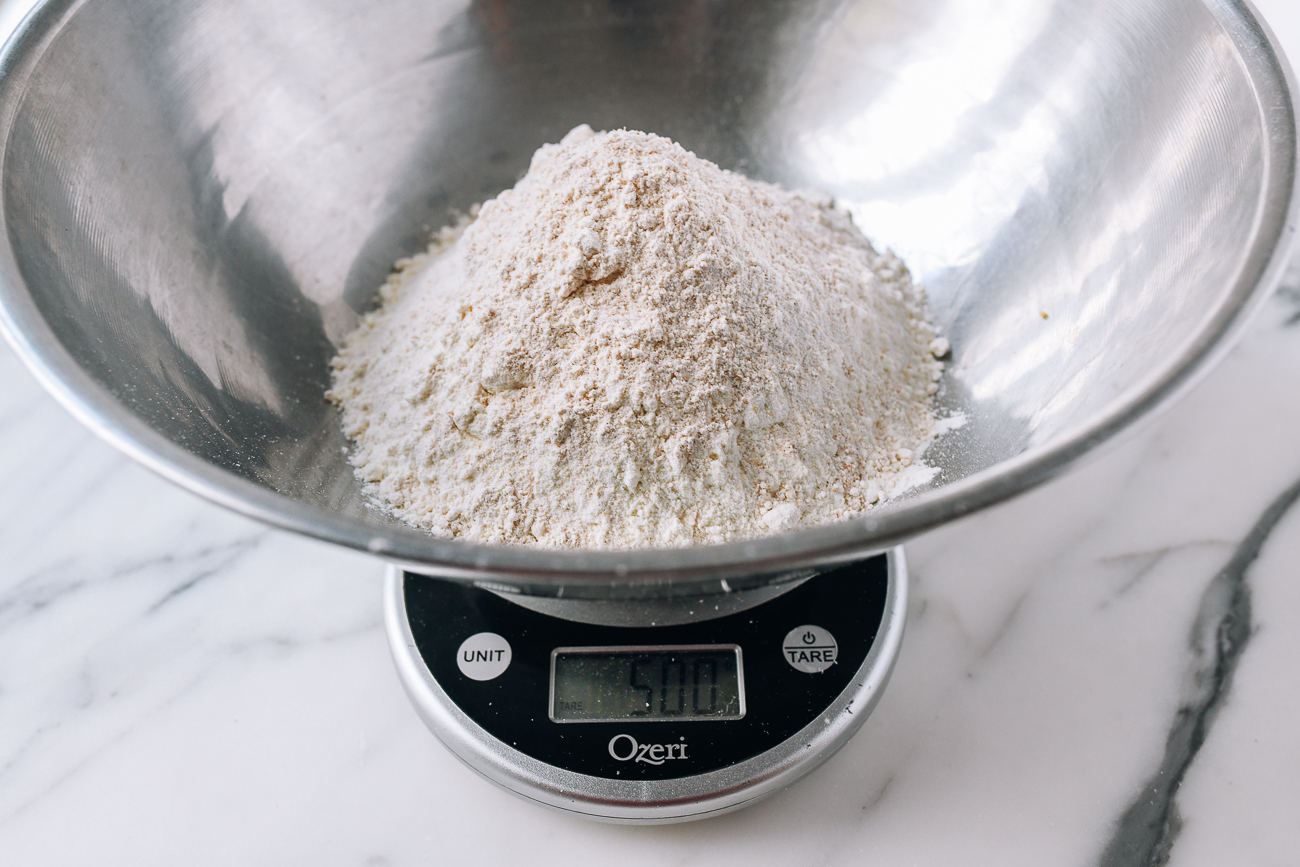
After your sourdough has been fed and has started to ferment, measure out the flour. The easiest, most accurate way to do this is to place a mixing bowl on a digital scale, zero it out, then add 375g of bread flour, zero it out again, and then add 125 g whole wheat flour (500 g total).
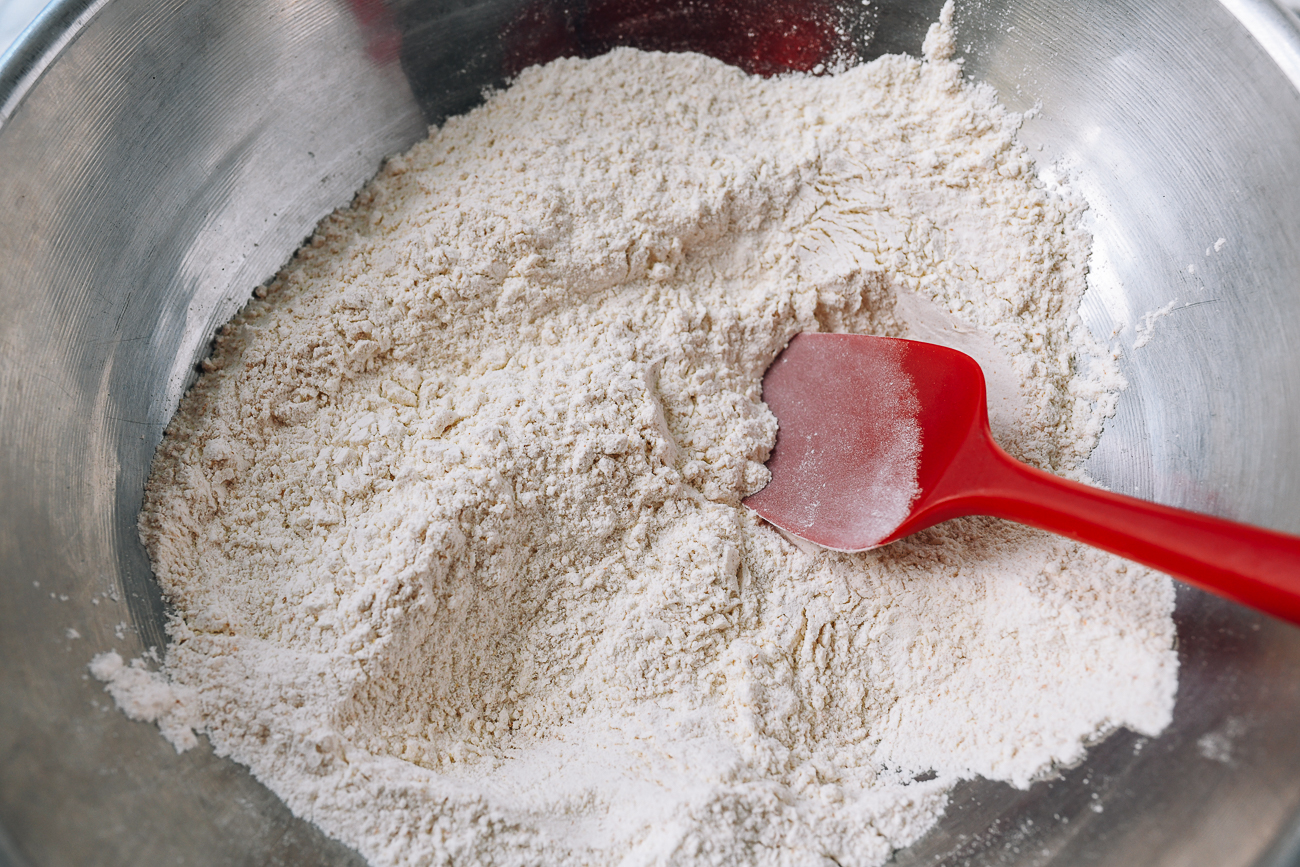
Use a stiff rubber spatula to mix the flours until combined.
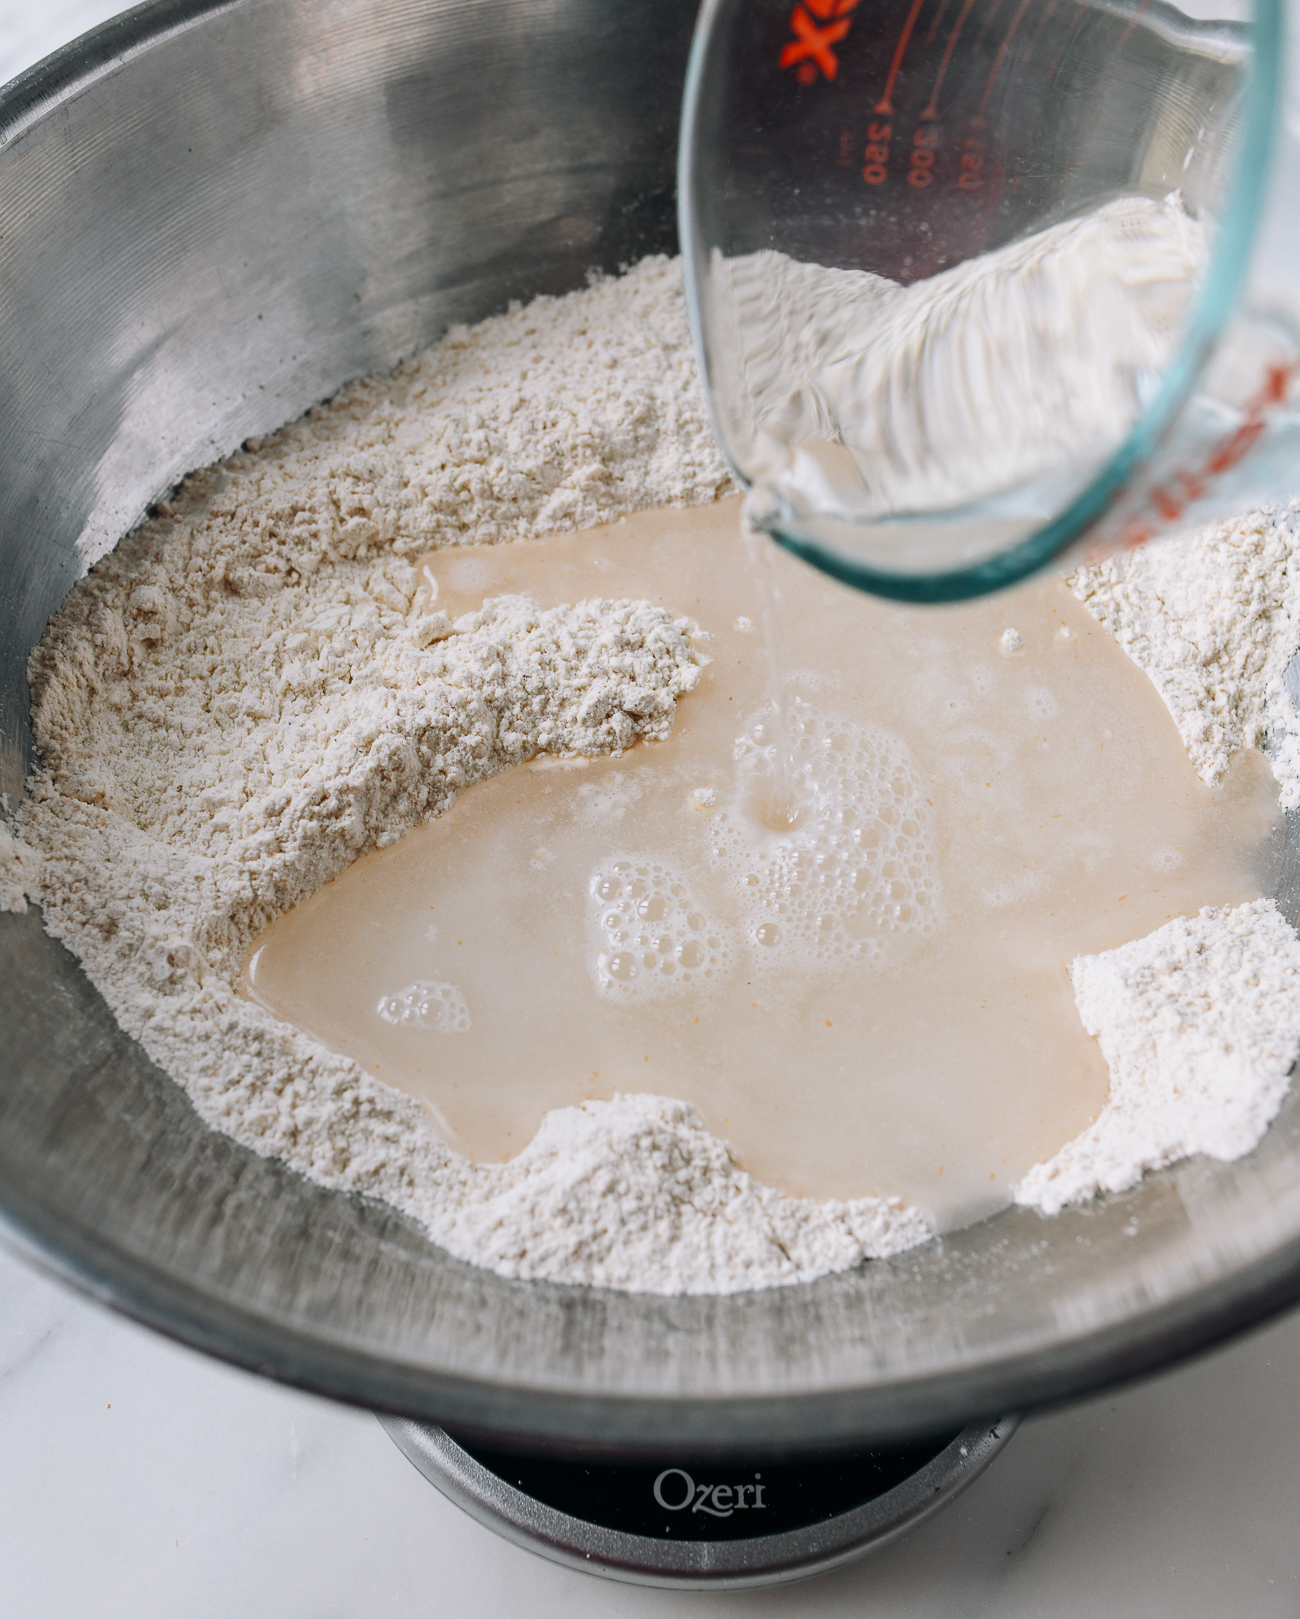
Add 375g of water, again using the scale if you can.
Important tip about Humidity!
During humid weather, you may very well have to reduce your water or your dough will be too wet. I reduce the water from 375g to 350g in the humid summer months here in the Northeast USA. After your first stretch and fold, if you wet your fingers and the dough still sticks to and does not come off your fingers, then your dough is probably too wet. You can add a tablespoon of bread flour and check if the dough is still too sticky on your next stretch and fold. A sticky dough won’t spring in the oven and you’ll get a flatter, denser loaf!
Mix the flour and water until all the flour is moistened…
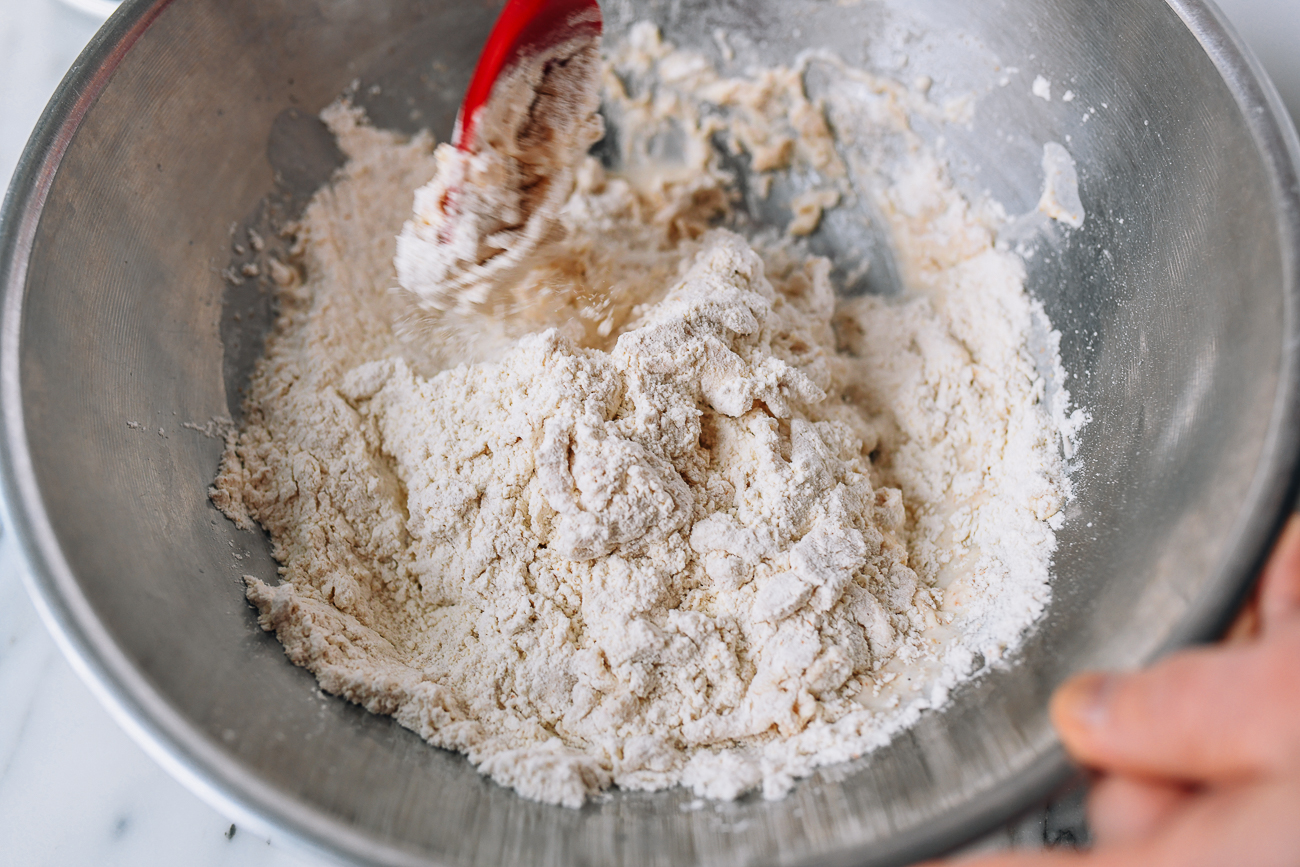
You should have a scraggly dough that looks like this:
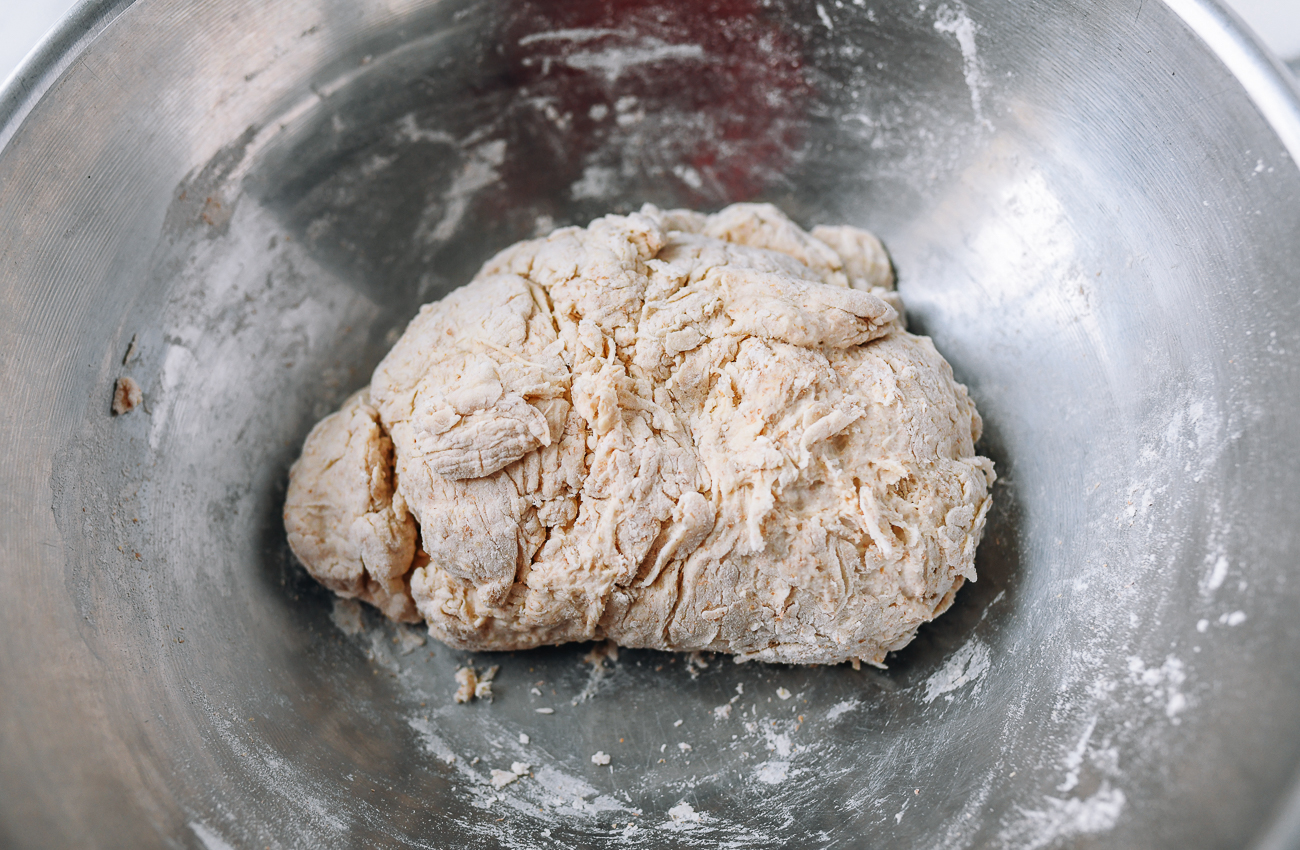
No need to overwork it at this point. Cover the bowl with your clean plastic bag, and let the dough rest for about 90 minutes, or until your sourdough starter is ready.
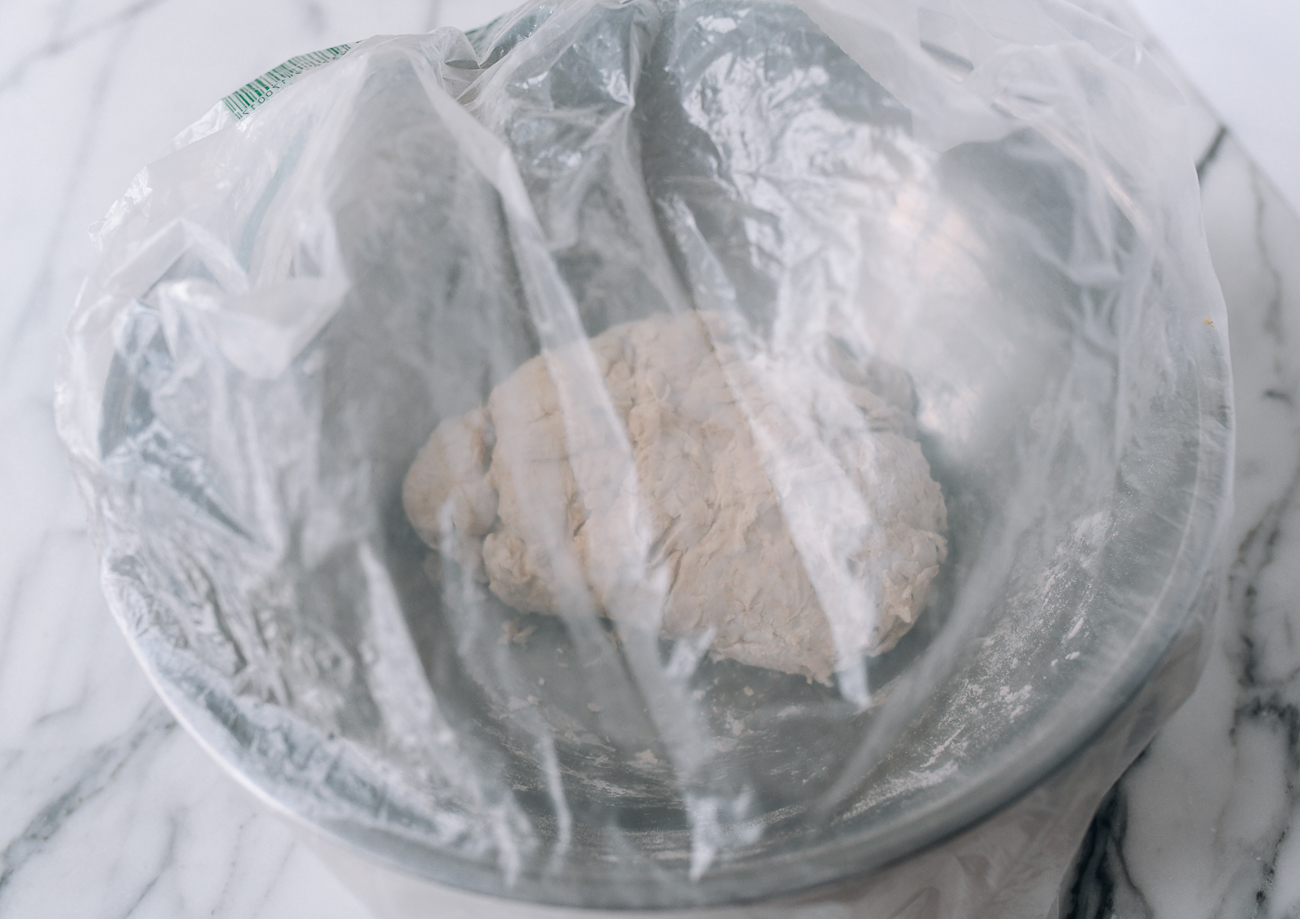
Reminder, it will take up to 4 hours for your starter to warm up and double in size after the 8:00am feeding.
Mix the sourdough starter with the rested dough: 12:00pm
Once the sourdough starter has bloomed to its optimal state, pour 120g of it into the bowl with the rested dough. Feed the starter with 15g each of water and flour to keep it healthy, cover it back up, and stash it in the refrigerator for future loaves.
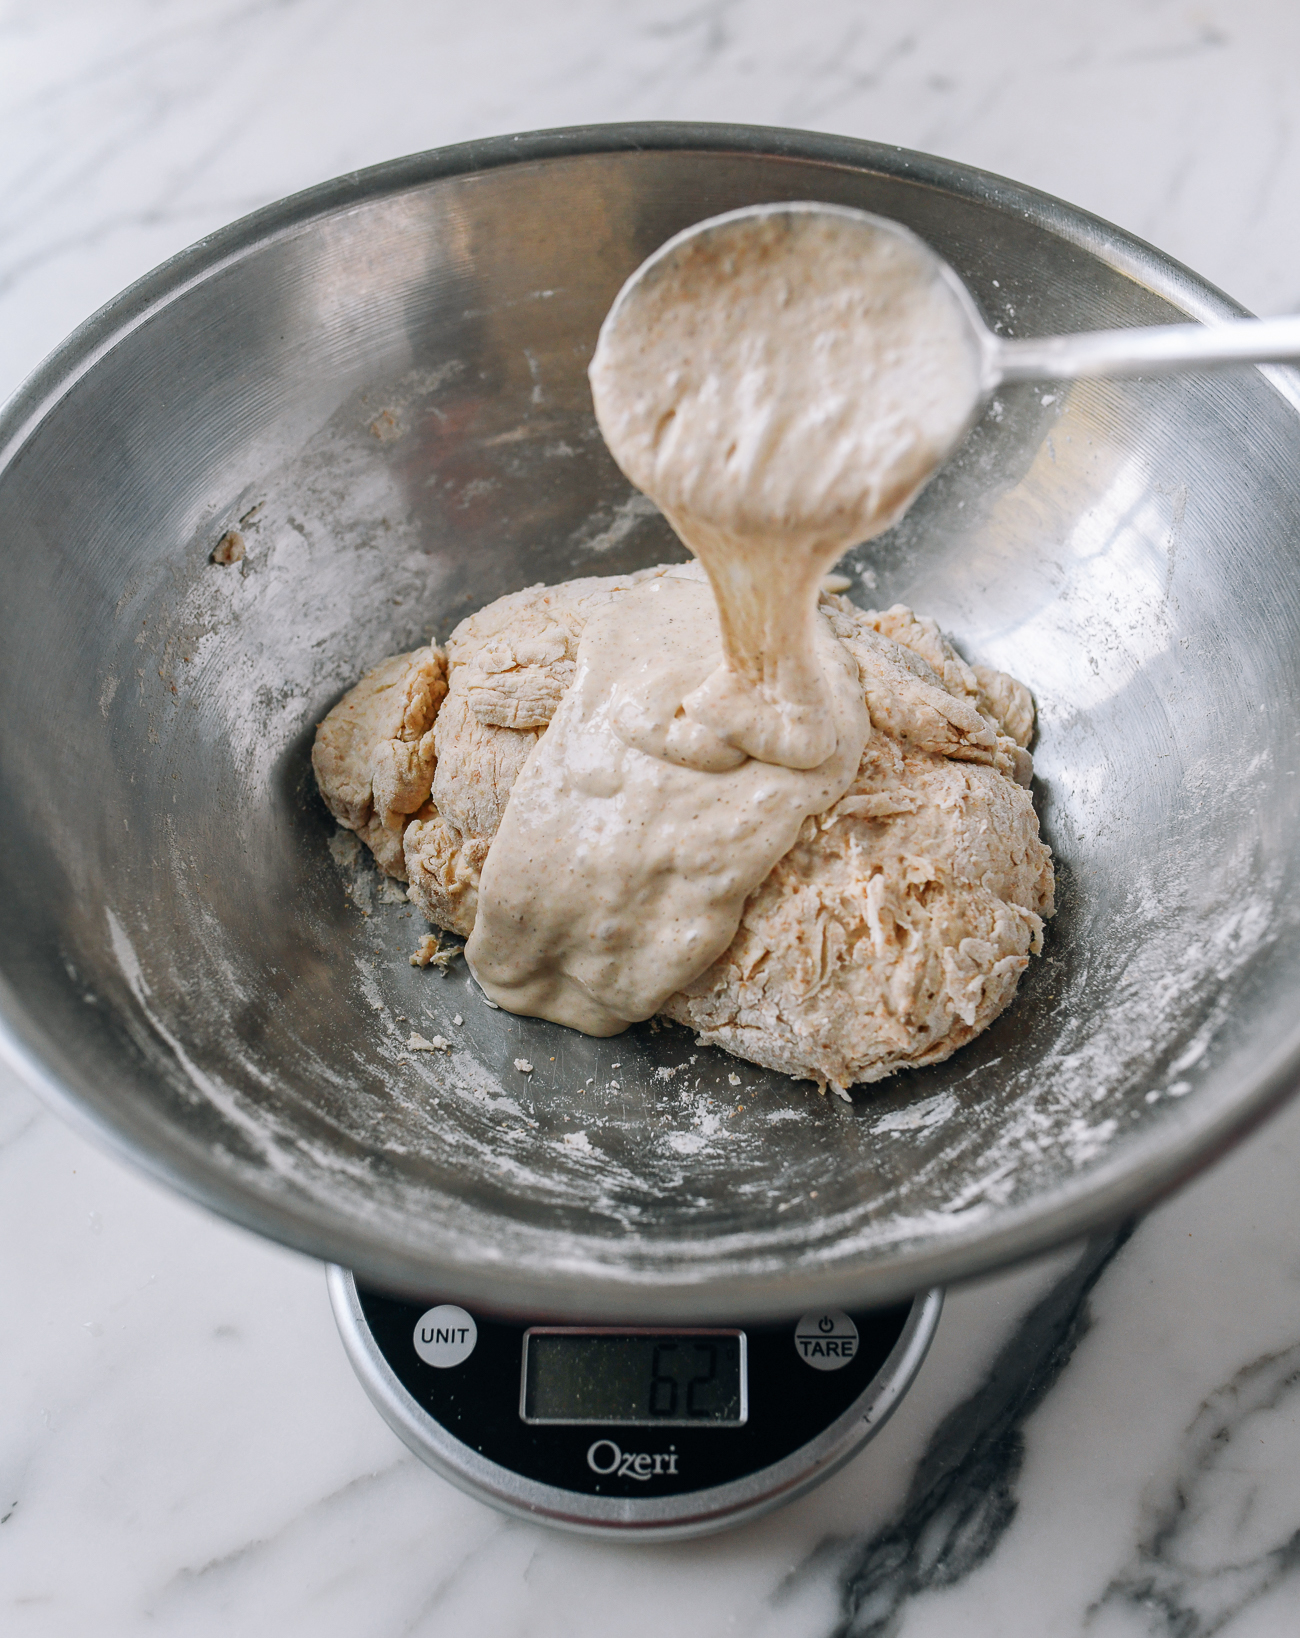
Using a stiff rubber spatula, fold and mix the dough and starter for 2 to 3 mins until combined.
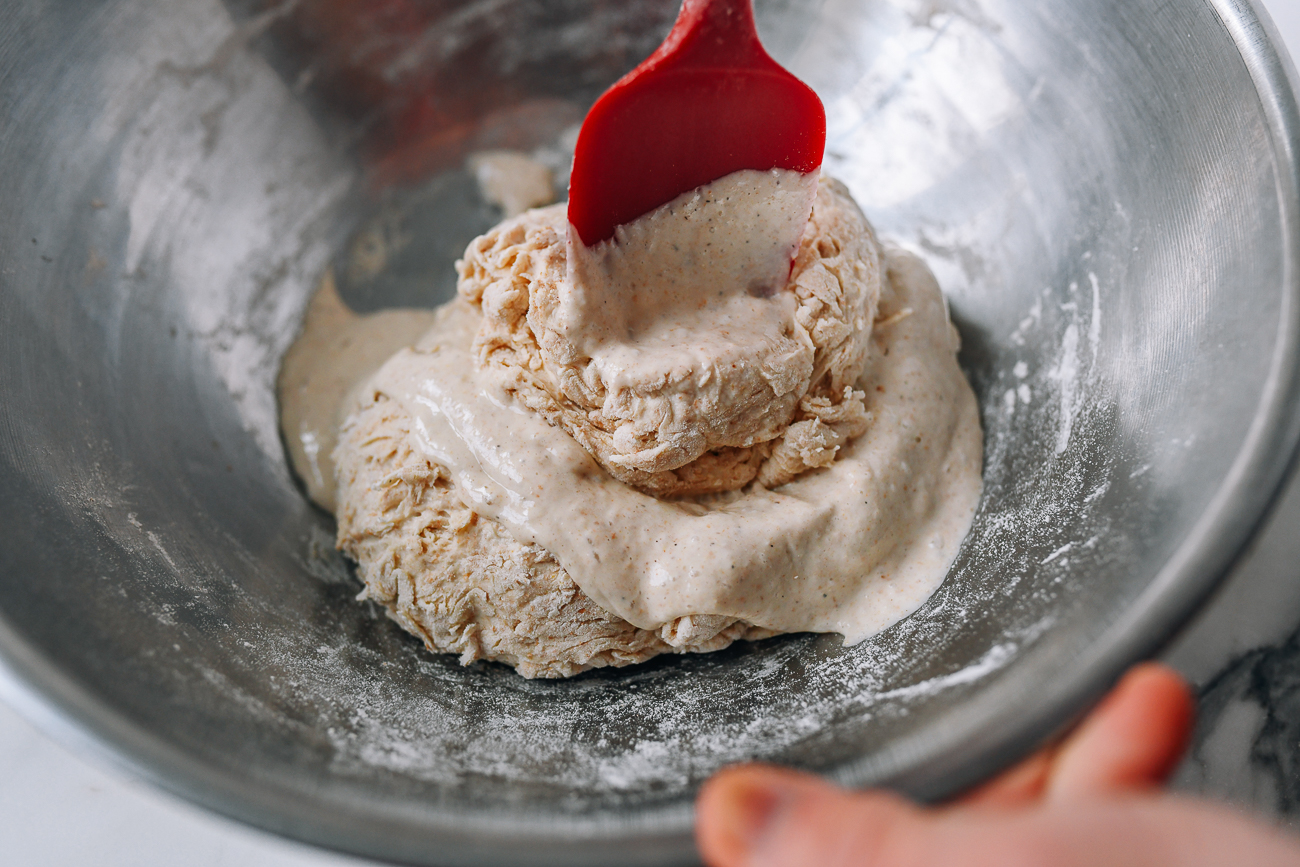
The dough will be very sticky, which is why we recommend using a rubber spatula.
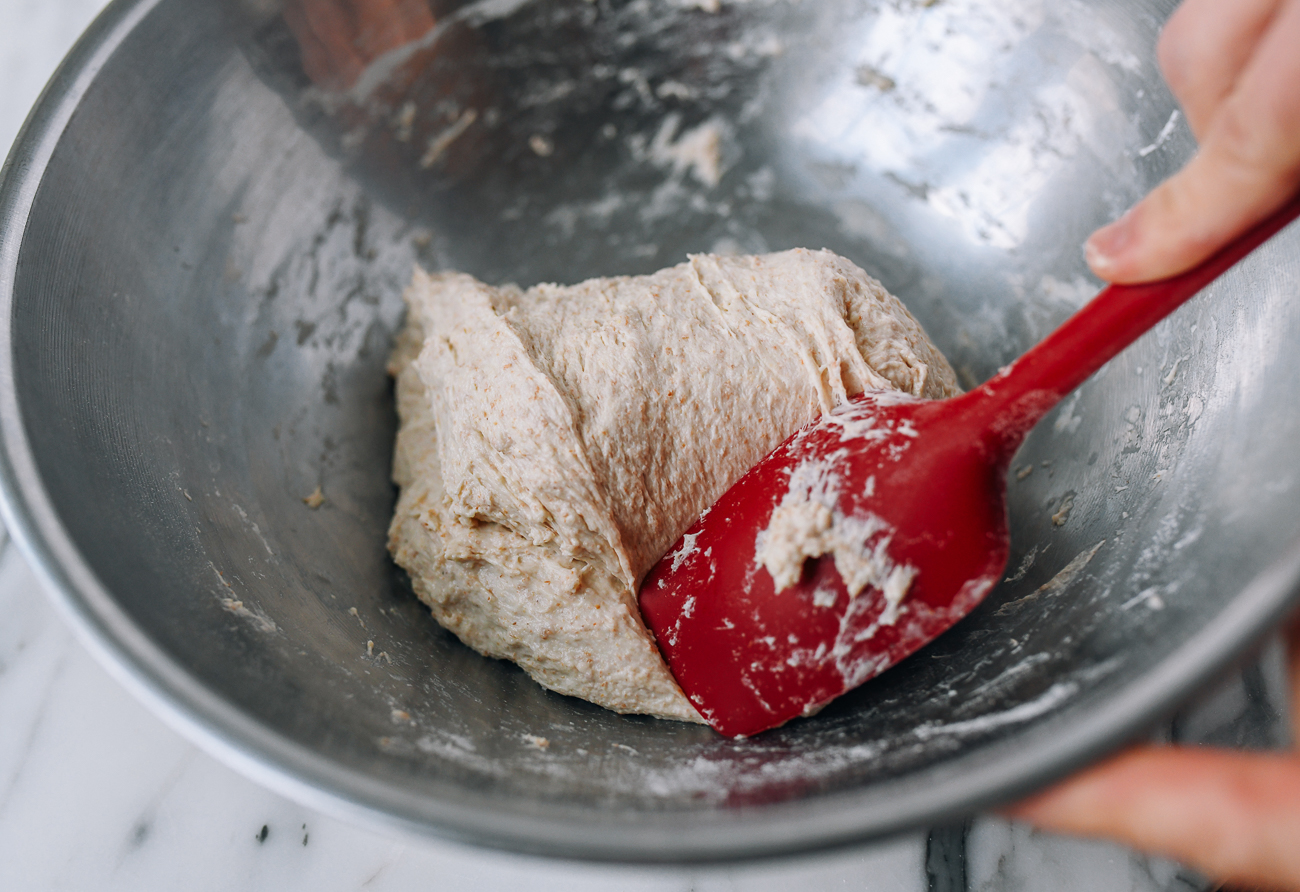
Cover the dough with your clean plastic bag, and let it rest again for 30 minutes.
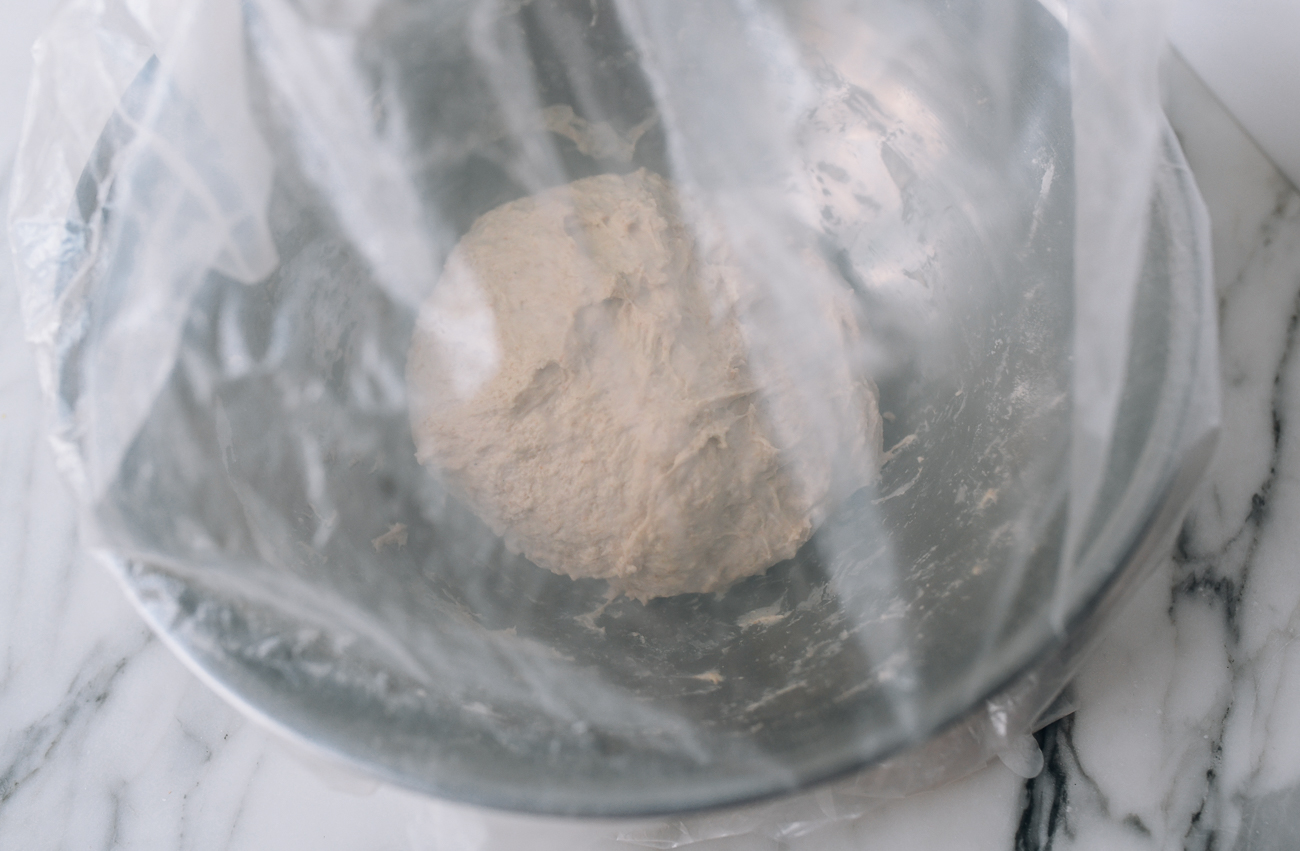
Add salt to the dough & lift, stretch, and fold for the first proof: 12:30pm
This is the last step before bulk fermentation (the first proof/rise) begins. Expert bread bakers say salt tightens up the gluten, which is why we add it before the first proof, not during the autolyse. This is one of those golden rules I learned from better bakers!
Sprinkle half the salt evenly on top of the dough. It will seem like a lot, but salt is key to flavorful bread.
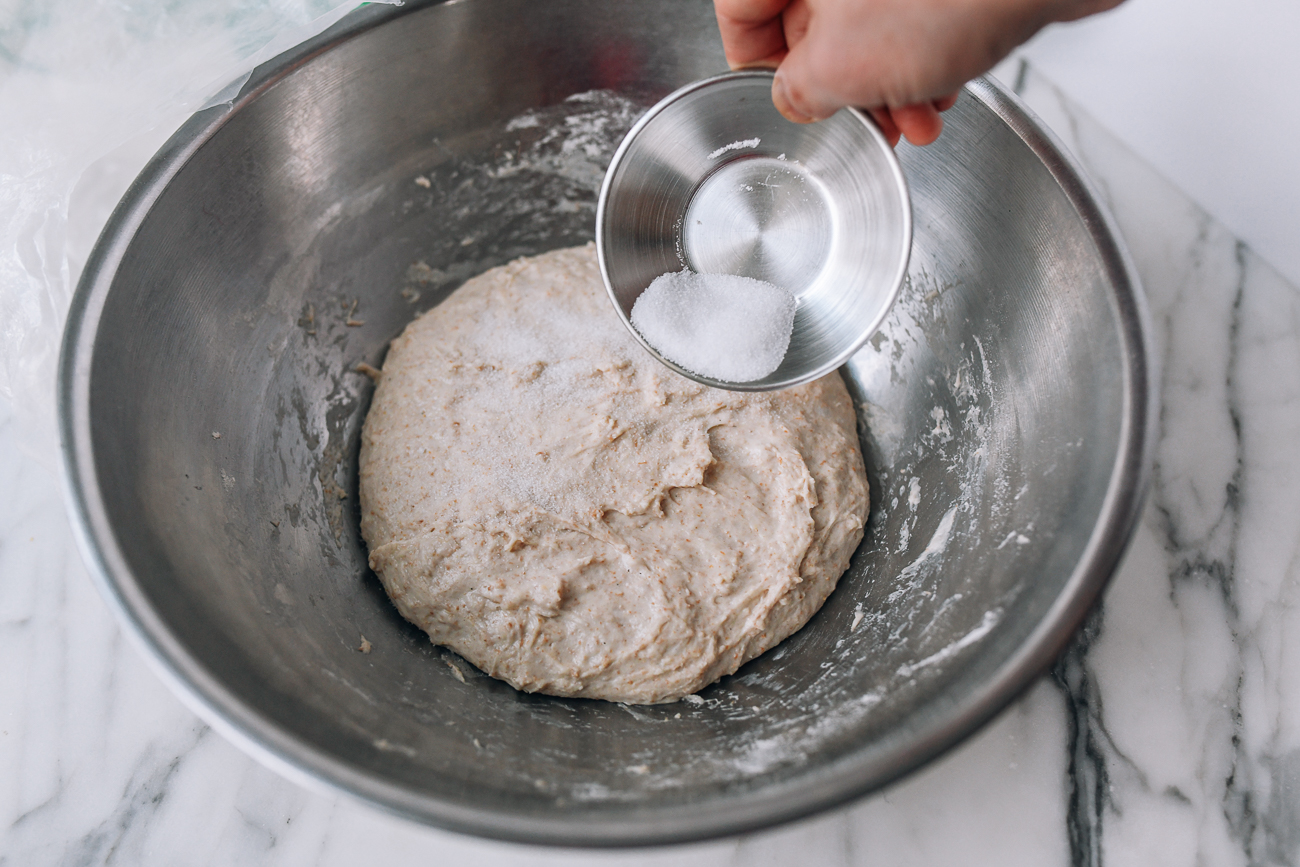
Wet your fingers and use one hand to grab a piece near the edge of the dough, steadying the bowl with the other hand. Lift the dough vertically, stretching and folding the dough over to the other side.
Sprinkle the other half of the salt over the dough and stretch and fold the dough again.
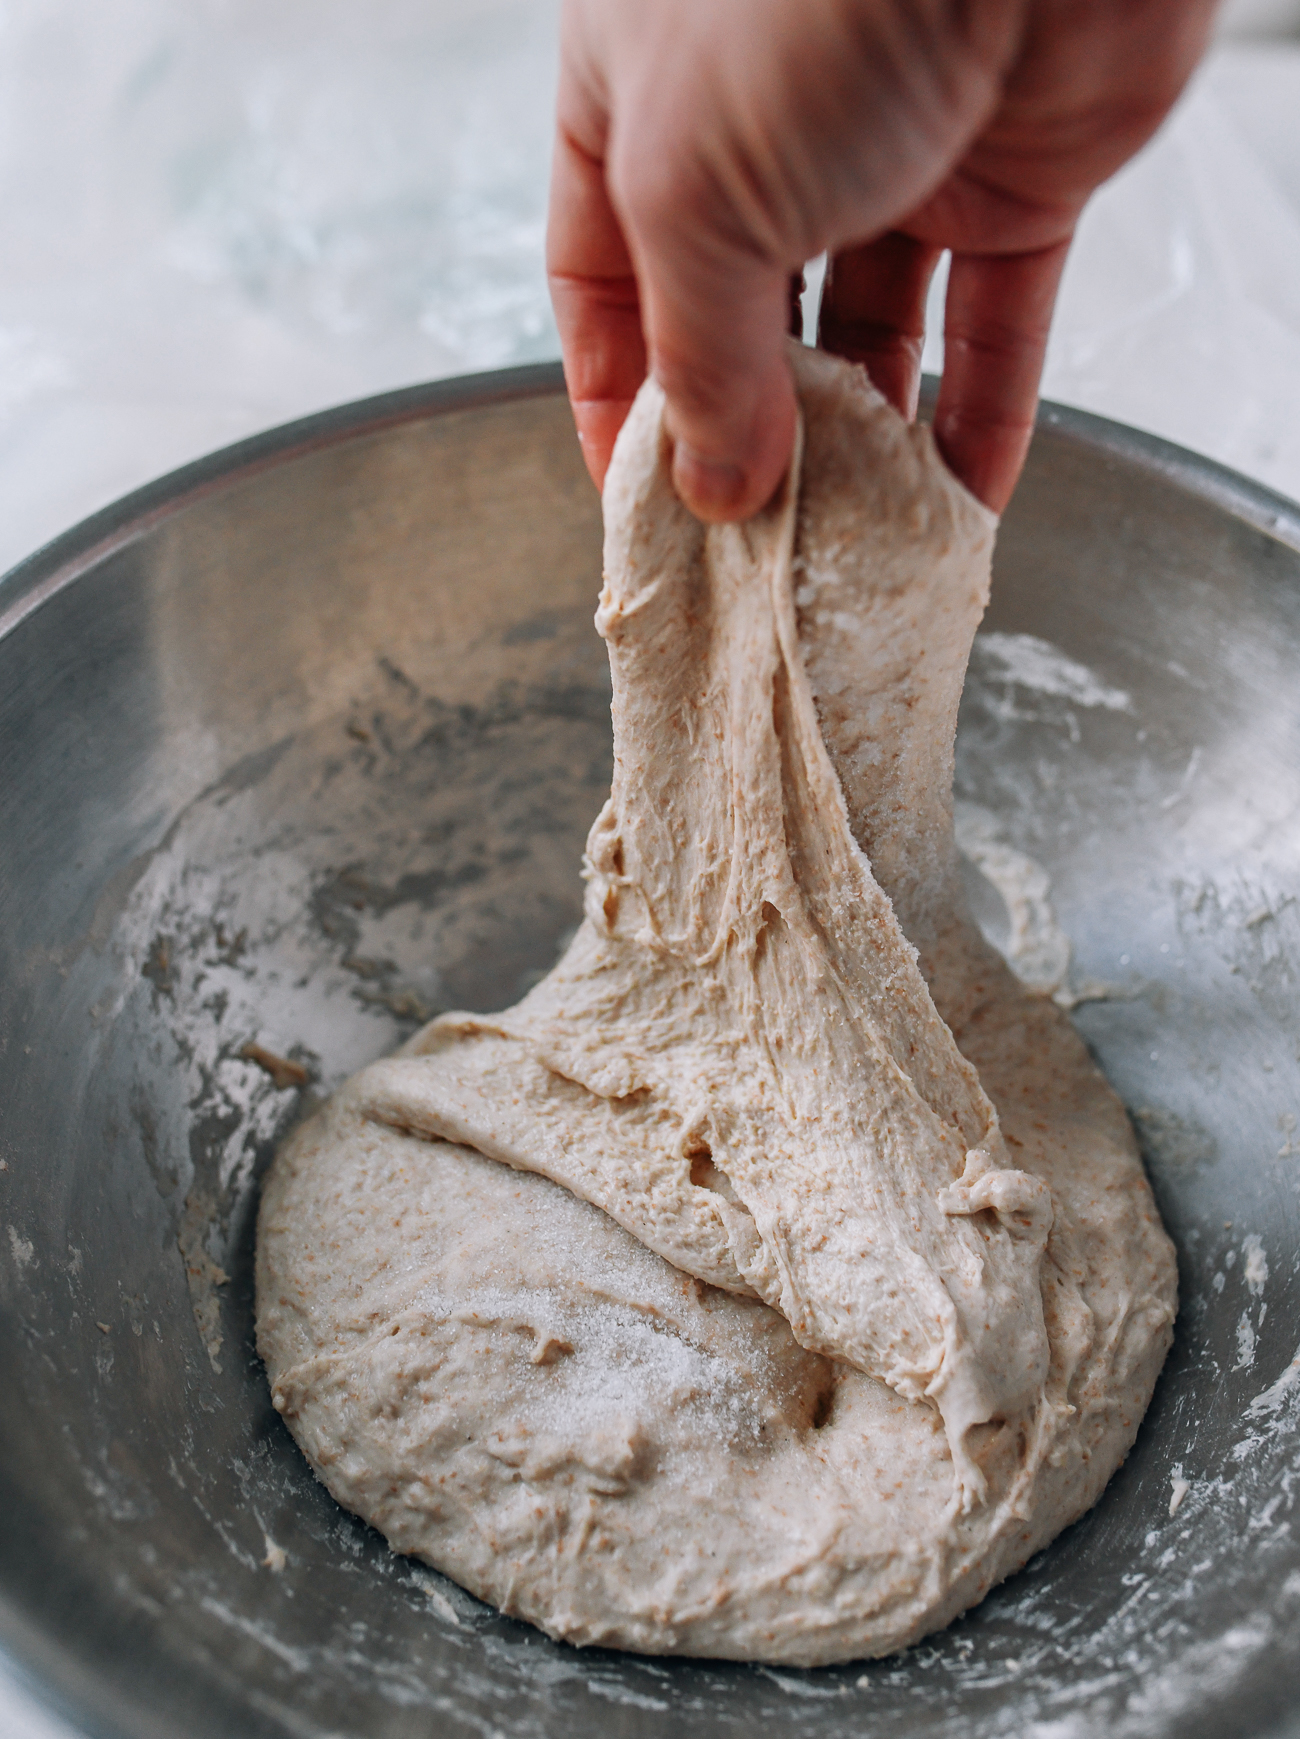
Continue to repeat this lift, stretch, and fold motion 4-5 times, rotating the bowl each time. As you incorporate the salt, the gluten will tighten up, and it will not stretch as much.
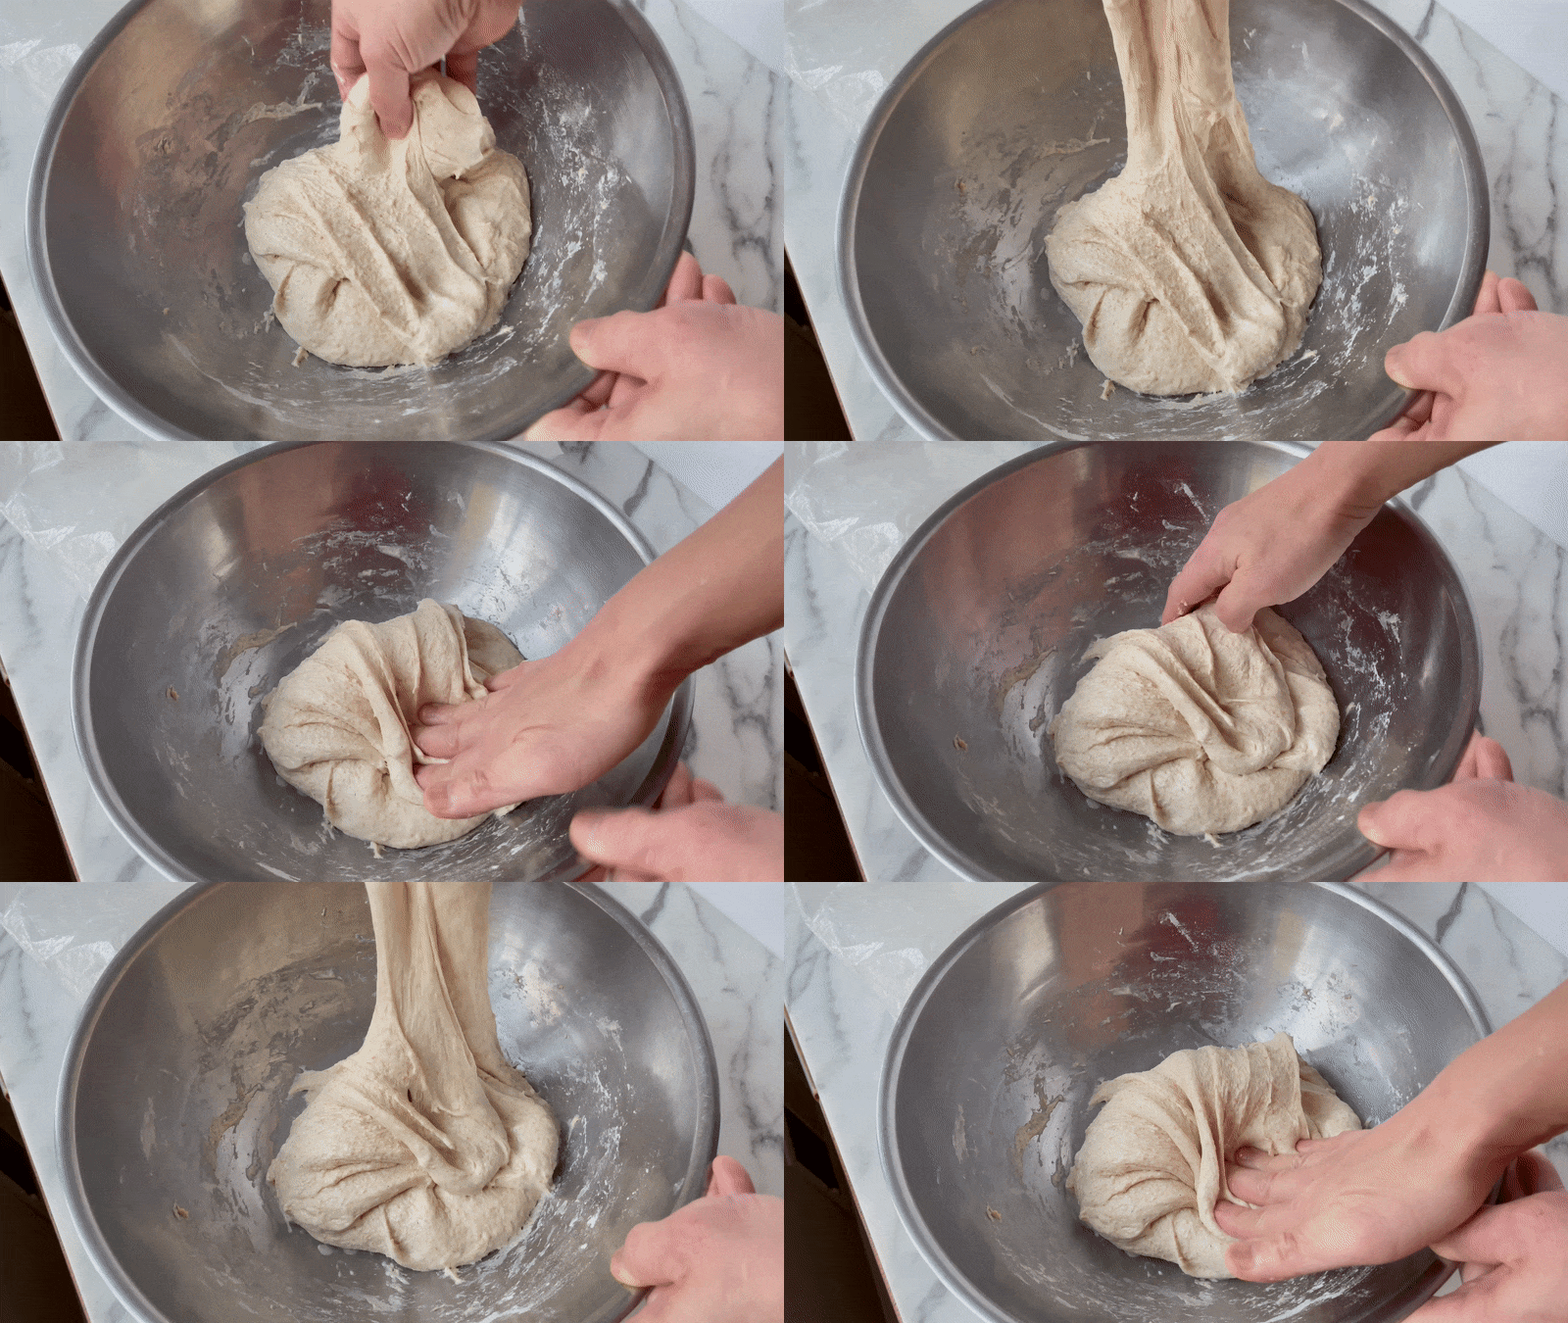
At this point, lift the dough ball off the bowl, drop it, fold it over, and press in a motion similar to kneading.
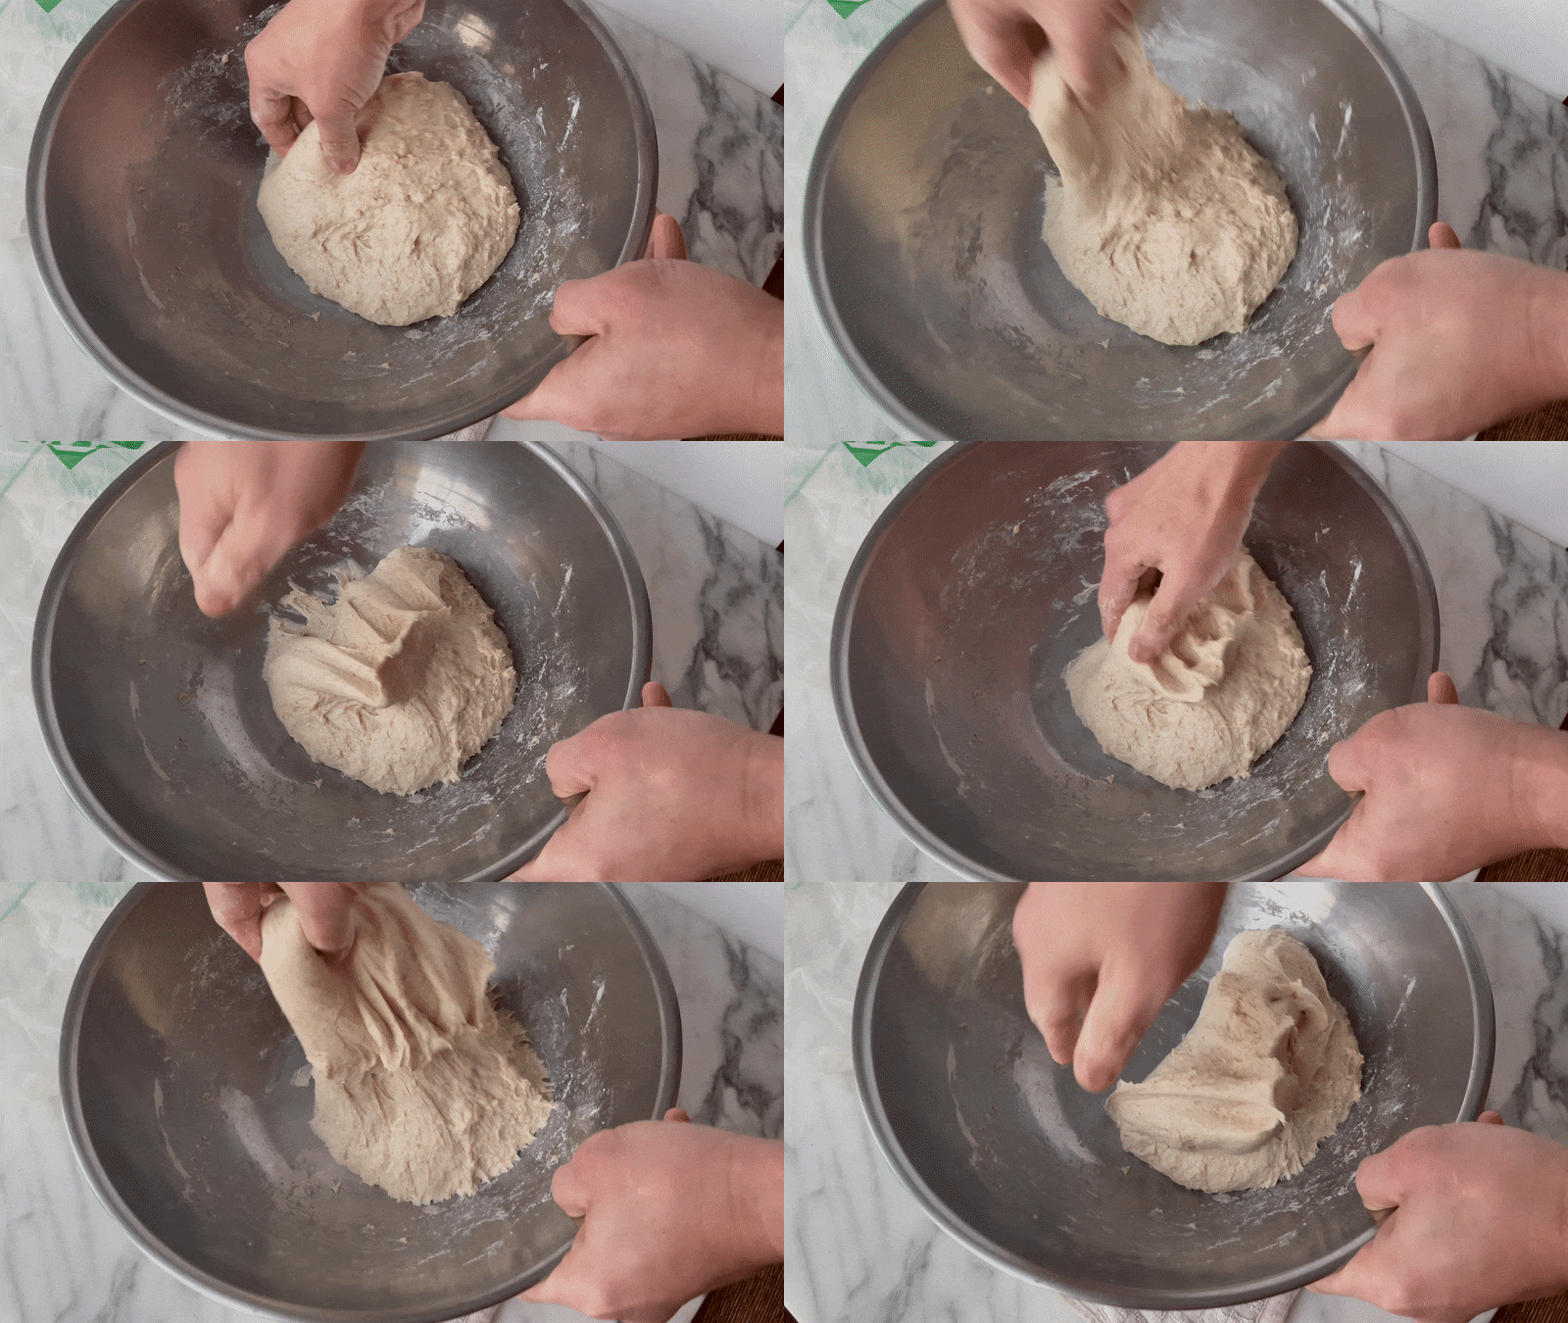
You can also do this with your rubber spatula if you don’t want to get your hands sticky. Continue for 2 to 3 minutes, or until you feel the salt is incorporated into the dough.
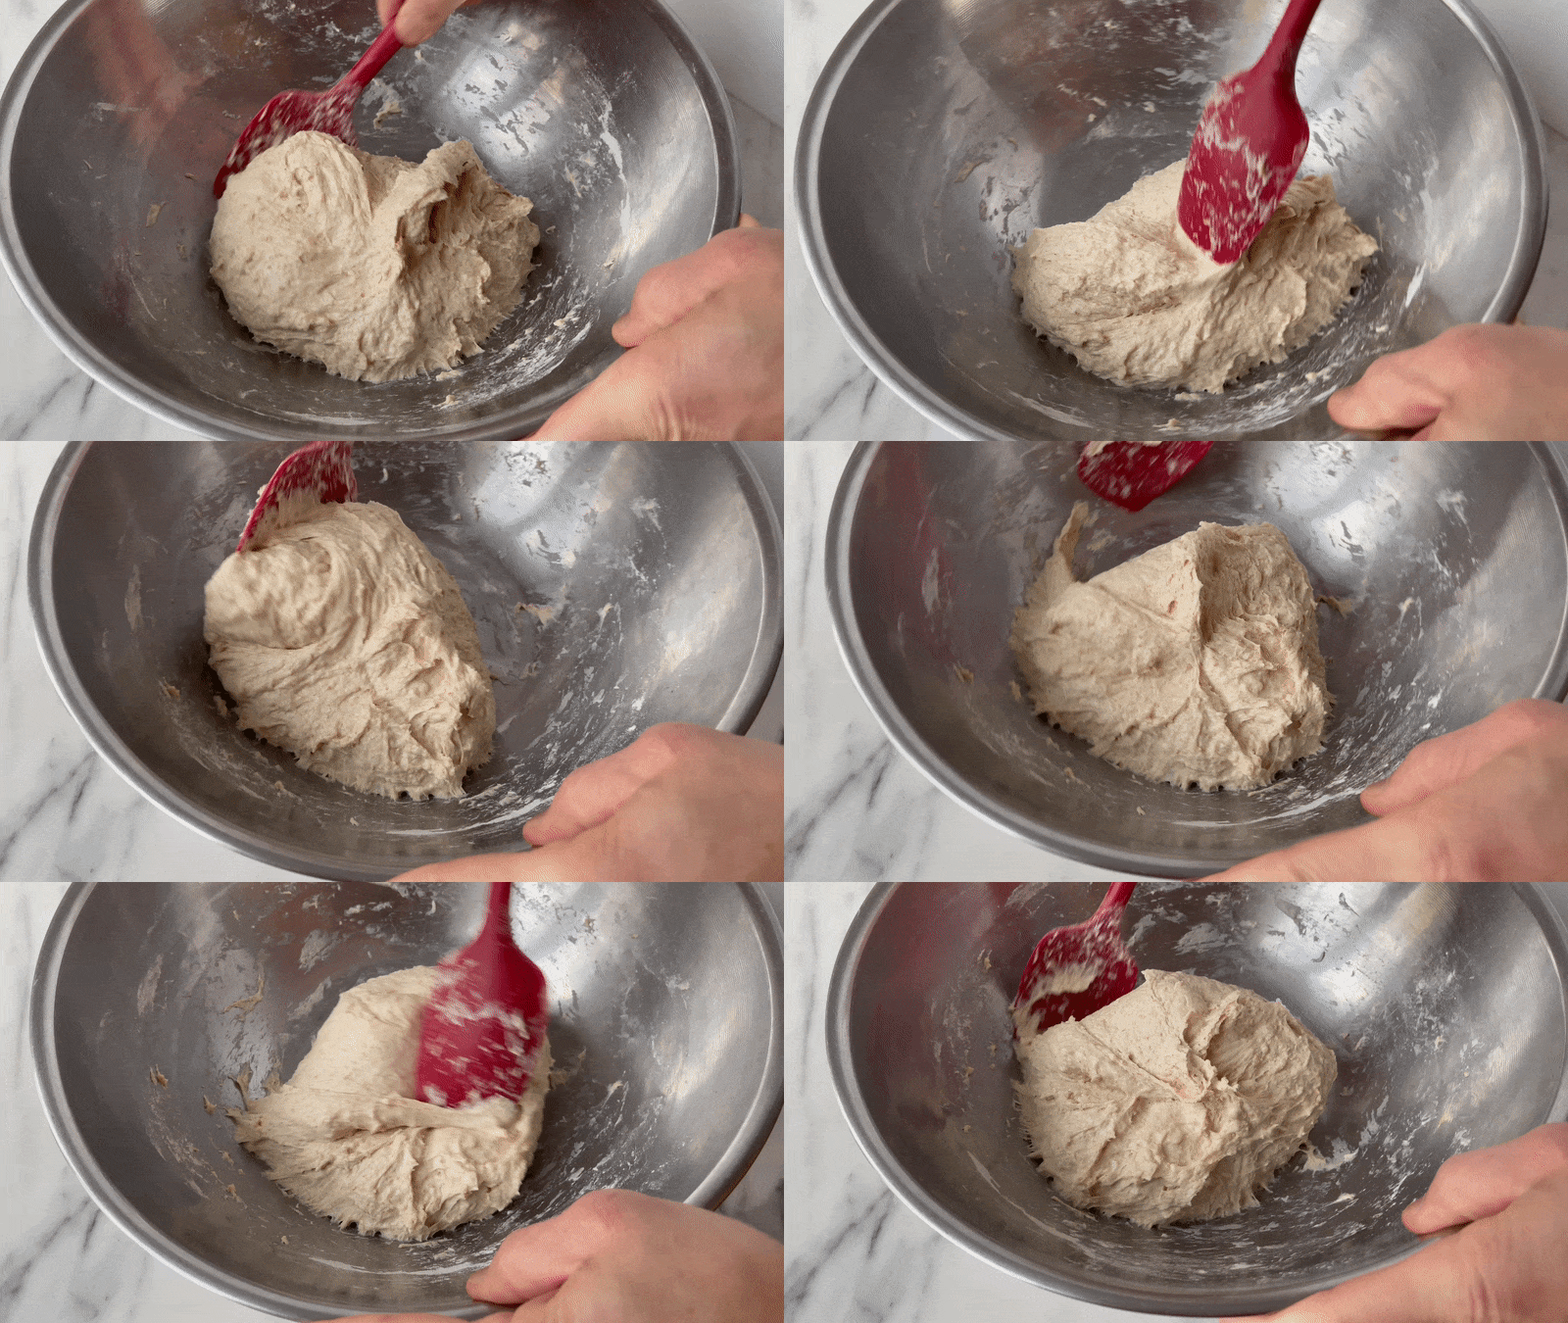
Cover with the clean plastic bag, and rest for 1 hour. This starts the first rise, or bulk fermentation stage. Your dough will do its best at 75°F/23°C, so if your house is cool, you can put the dough in the oven with a bowl of just boiled water to keep it warm and moist.
Lift, stretch, fold, and rest the dough 4x: 1:30 pm
Remove the plastic, wet your fingers, and repeat the lift, stretch and fold motion 6 to 7 times until the gluten tightens up and the dough is no longer easy to stretch or lifts completely out of the bowl.
This time, make sure the fold allows the dough to fall gently upon itself and do not press and degas (punch air out of) the dough.
This only takes about one minute to perform. Cover the dough with plastic and rest for 45 minutes. Repeat this stretch, fold, and rest process 3 more times, for a total of 4 times, as follows:
- 1st – 1:30pm
- 2nd – 2:15pm
- 3rd – 3:00pm
- 4th – 3:45pm
Each time, your dough will proof, ferment, and grow in size. It will get lighter/puffier, and become less sticky.
By the 4th time, you should start to see bubbles forming. You’ll also know good amounts of gluten have formed when the dough stretches nicely without tearing. It’ll also start smelling buttery and delicious!
After the last lift, stretch and fold, cover the dough again and rest for 1 hour.
The dough should end up about 1.5X to 2X the size of the original and should show some air bubbles with a puffy, light feel. If you are unsure, you can do another stretch, lift and fold and continue to let it proof for another hour to be safe.
Shape the dough, and place it into the proofing basket: 4:45pm
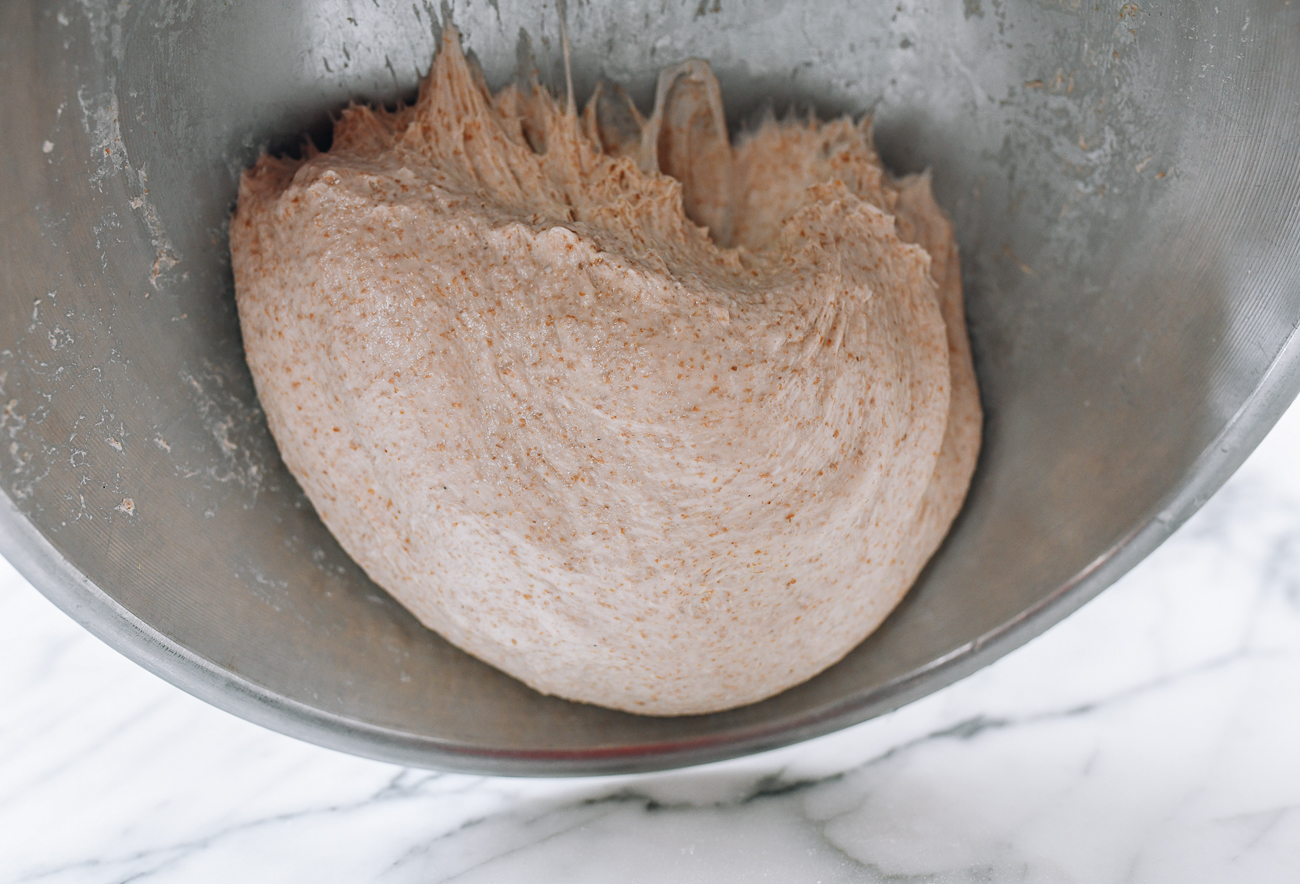
Once you have determined your dough is ready for the next step, lightly flour your counter or work surface, and pour the dough out of the bowl. Just let gravity do its work, letting the dough fall slowly onto the counter—don’t rush it!
Tip!
Over the next steps, take care not to degas the dough (don’t accidentally work the air bubbles out of the dough). The bubbles will be the basis of an airy crumb in your final loaf.
Lightly dust your hands with flour, and keep more flour close by. With both hands, gently grab the side of the dough opposite you and pull it away from you slightly. Then fold it towards you onto itself, to the center of the dough. If the dough sticks to the counter, gently loosen it with a floured dough scraper.
Next, grab the right side of the dough. Stretch it slightly to the right and fold it to the middle. The dough should be wet enough to stick to itself. Do the same with the left side, stretching it slightly to the left and folding it to the middle.
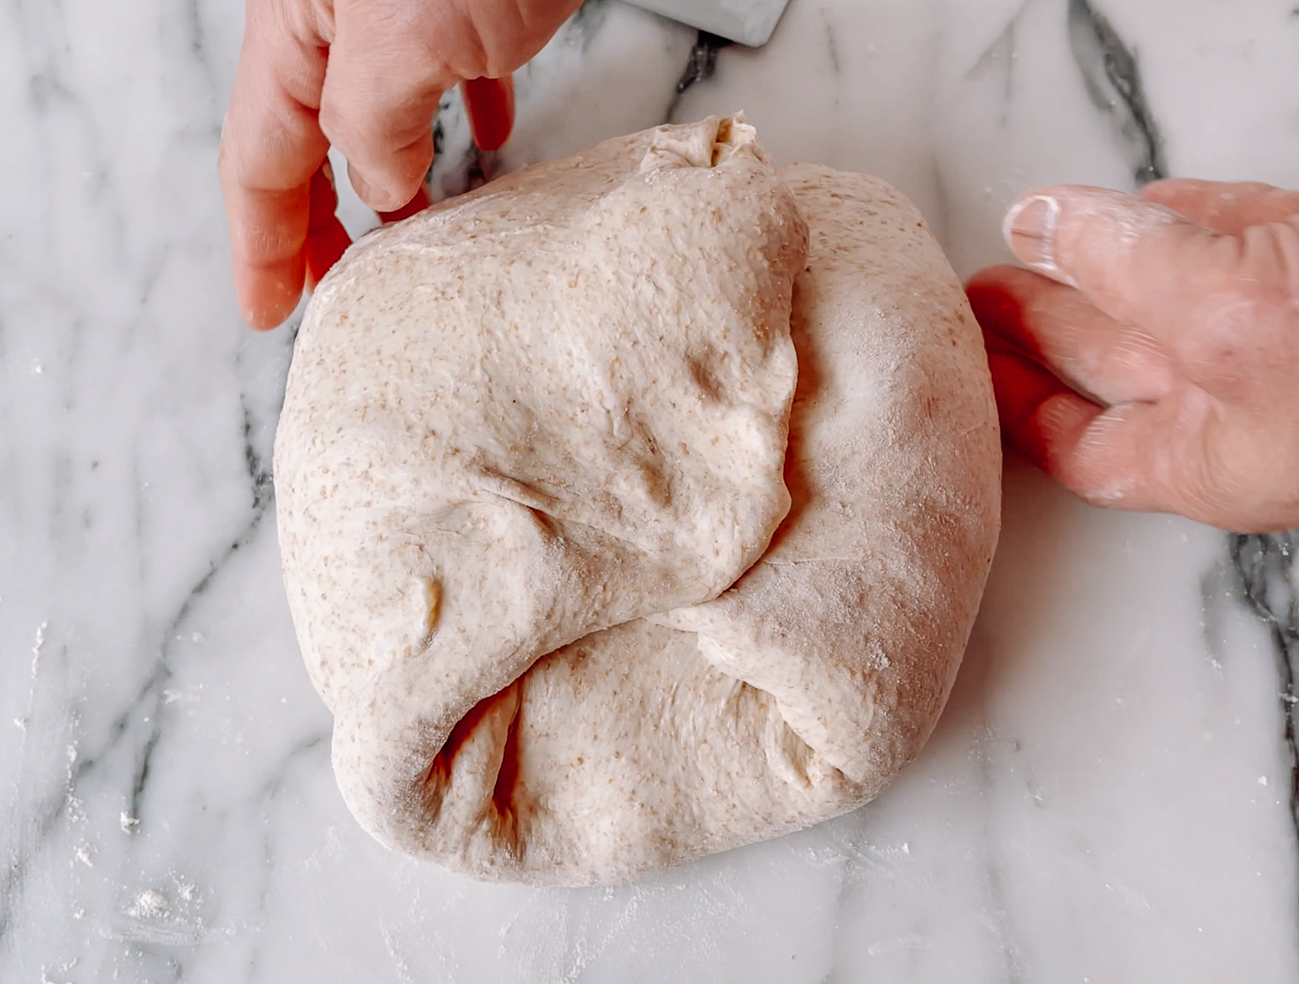
Finally, use both hands to grab the bottom of the dough closest to you. Roll and fold it away from you, pulling it slightly towards you as you do (there should be some tension on the dough).
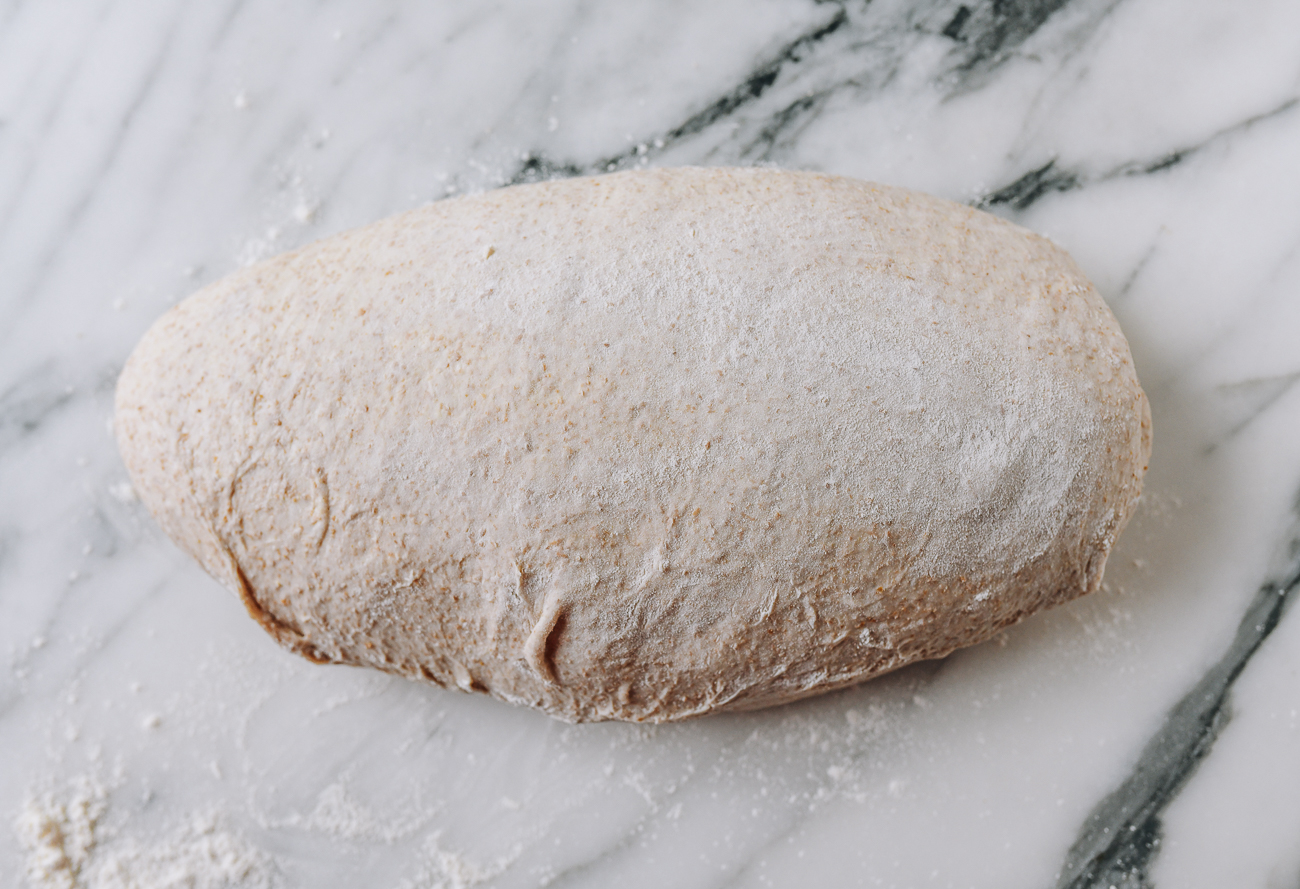
After you’ve completed rolling, you can further shape your dough by gently sliding your dough scraper underneath it. This creates tension on the surface, allowing you to shape it into an oval shape or round boule.
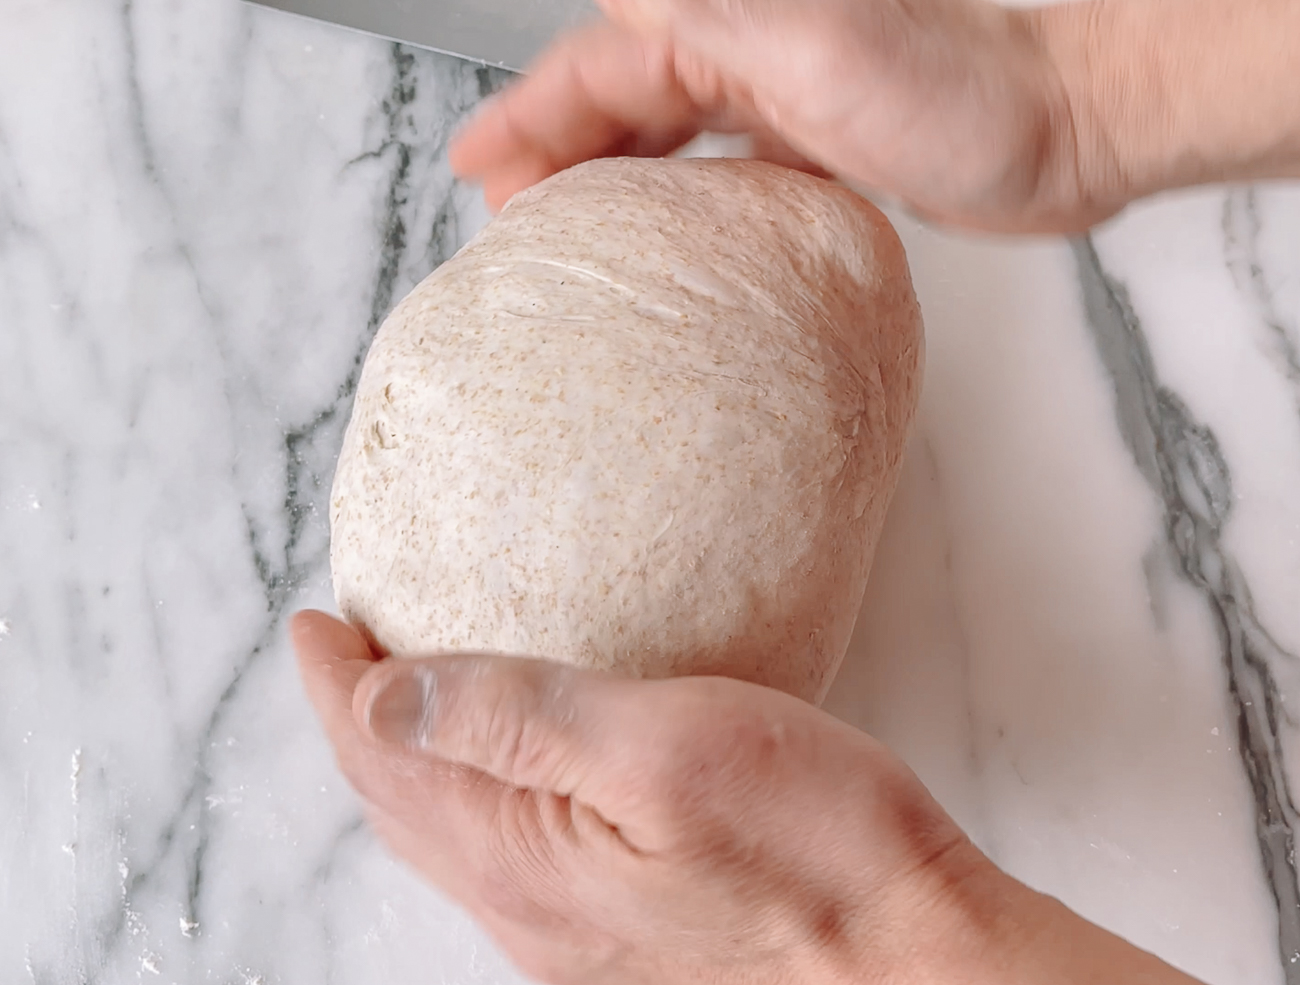
See the video in this post to watch how I shape the dough. The method I use in the video is a little more complex, involving a twisting motion to create more air pockets. You can use that method, or the simple folding method described in the paragraphs above.
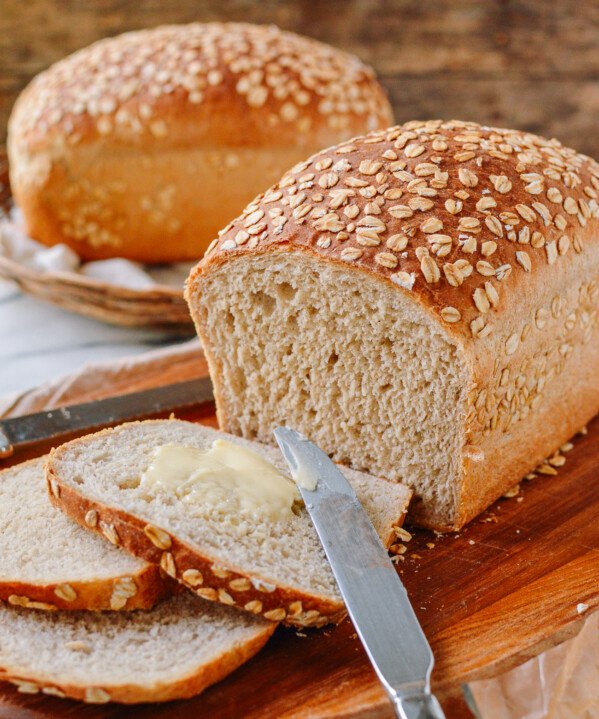
If you like seeds (sesame, flax, sunflower, etc. or other toppings like oats), now’s the time to sprinkle them on top. The dough should have enough moisture for the seeds to stick to it.
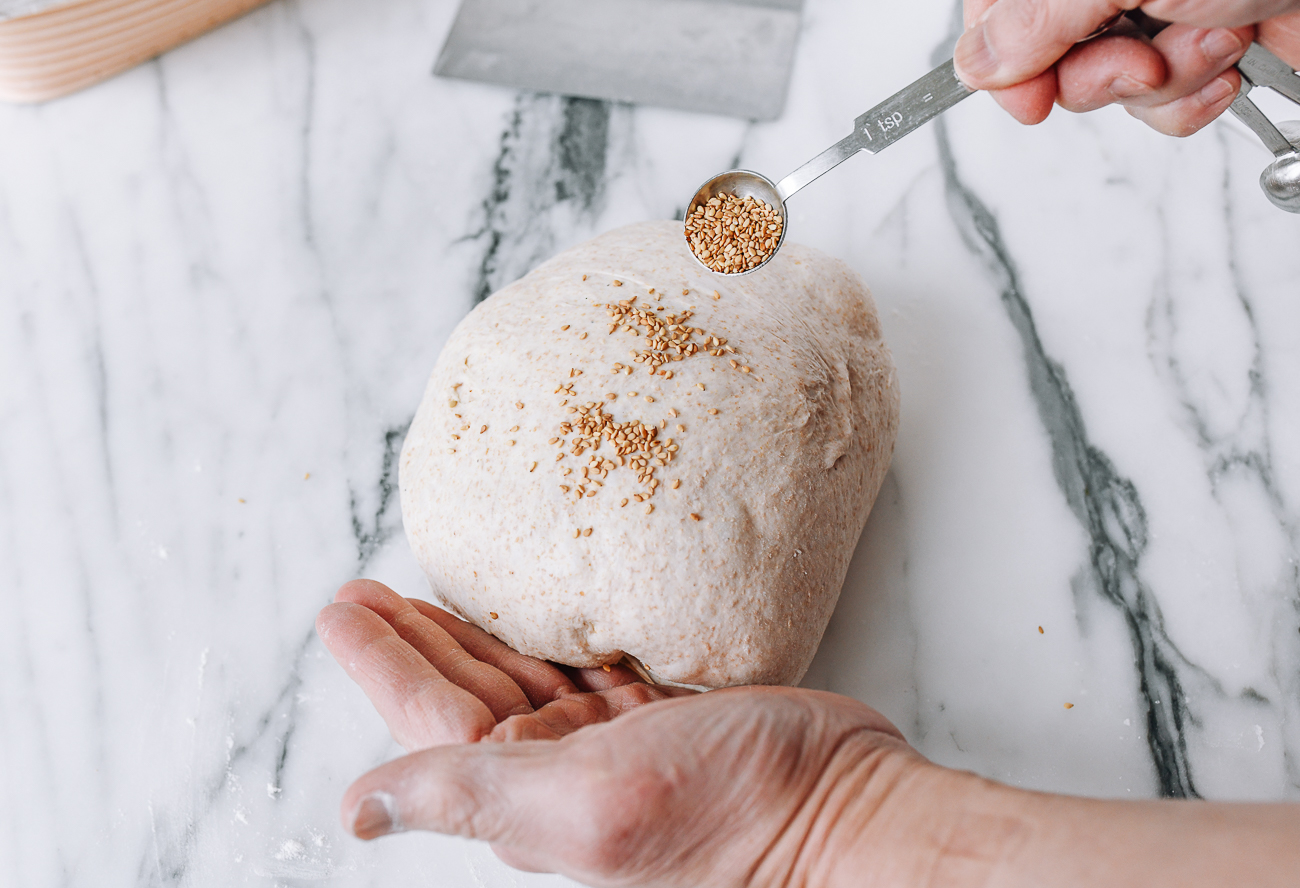
If you are not using any seeds, lightly flour the top of the dough.
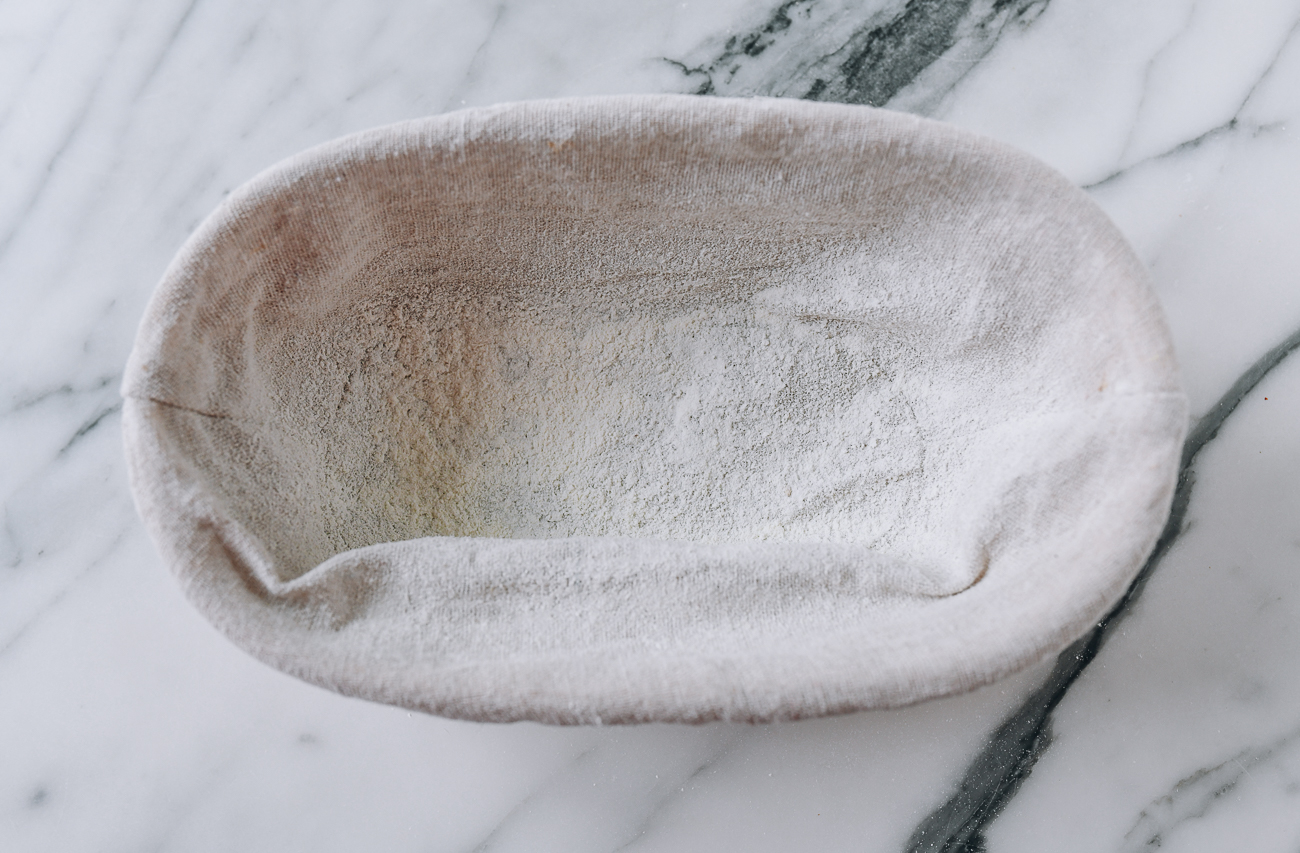
Sprinkle all-purpose flour (about 2 teaspoons) into your proofing basket (I use one with a cloth liner). Some recipes recommend using rice flour and you can use it if you have it but I found that it’s not essential.
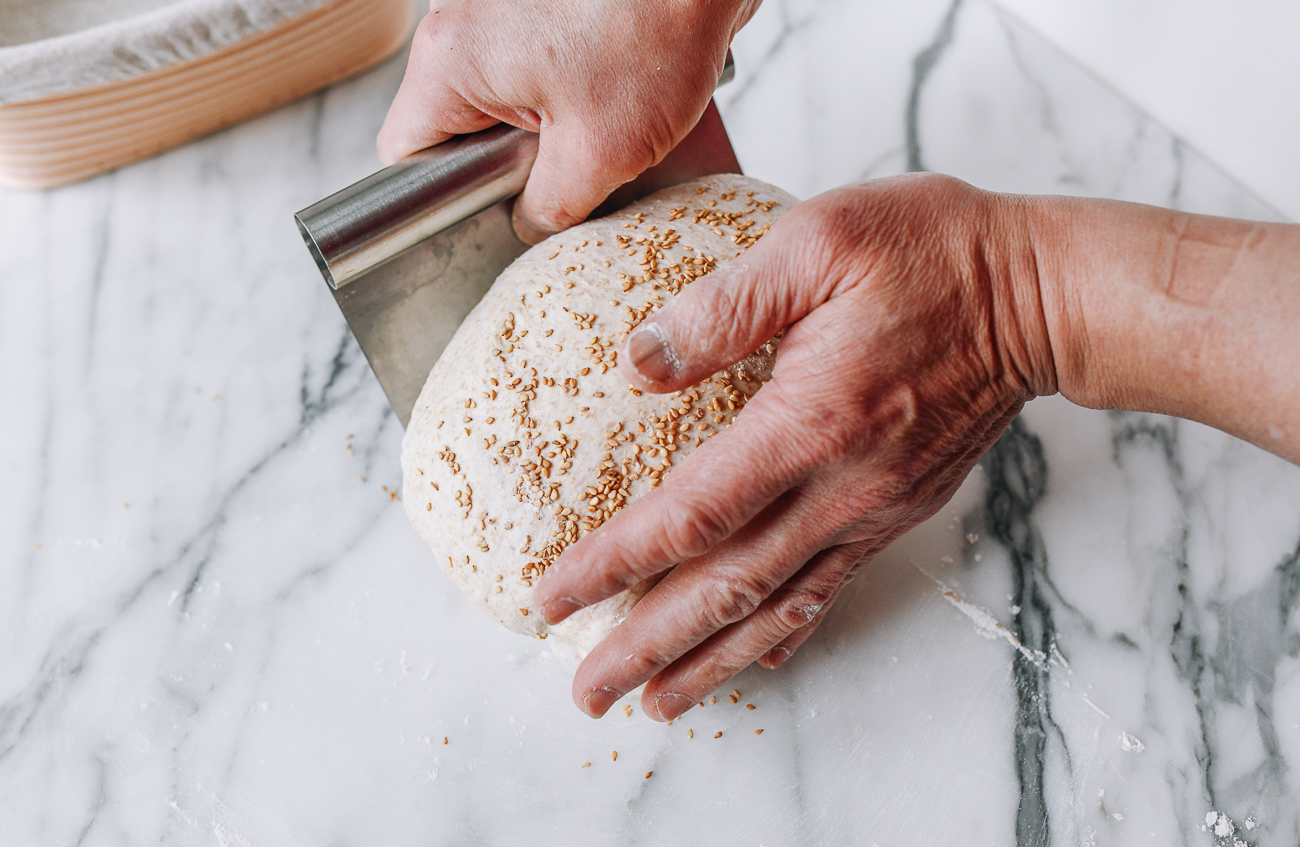
With your left hand lightly supporting the top of the loaf, carefully slide a dough scraper under the right side of the dough.
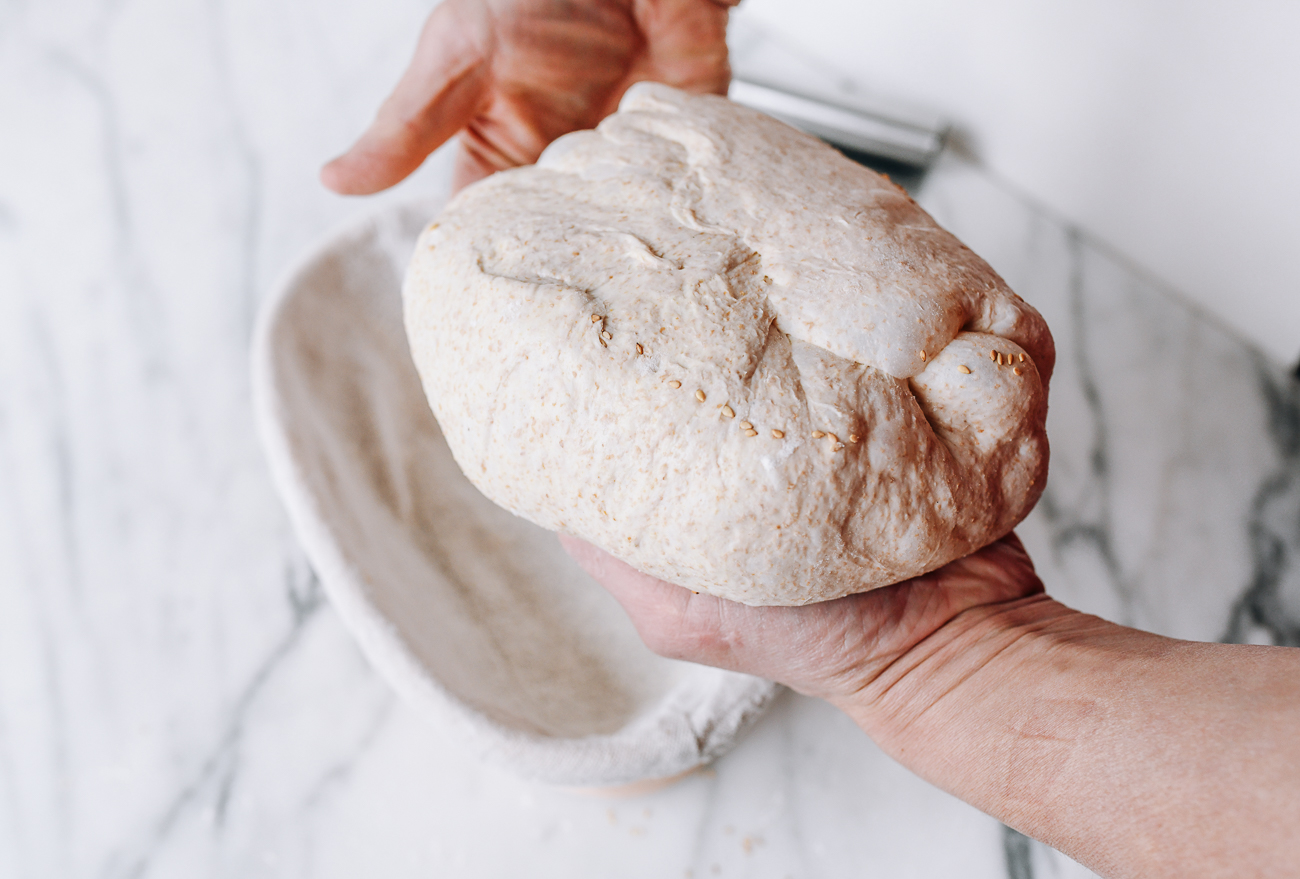
Push it into your left hand, lifting up the dough, and gently place it into the floured proofing basket upside down (the side with the seeds should be facing down).
Final proofing: 5:00pm
Cover the dough in the proofing basket with your plastic bag.
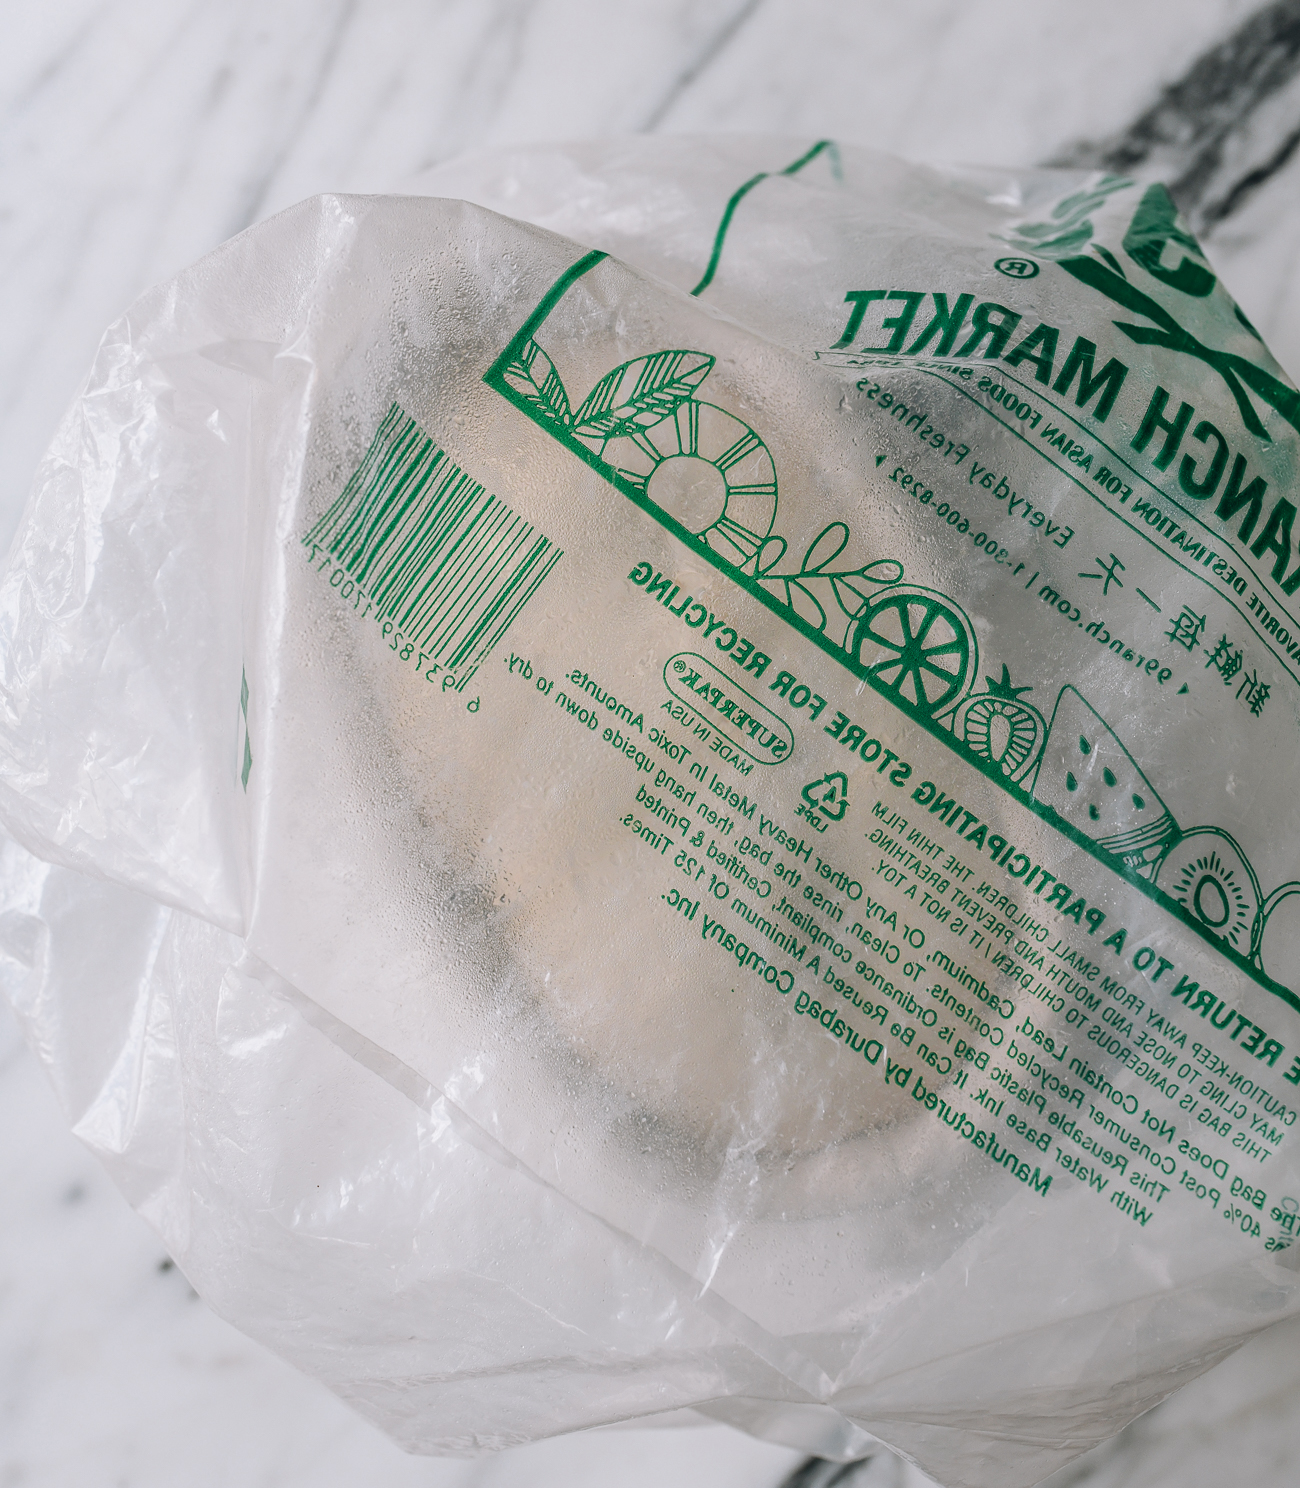
Proof for 90 minutes at room temperature (or ideally 75°F/23°C). It is ready to refrigerate when it passes the finger poke test.
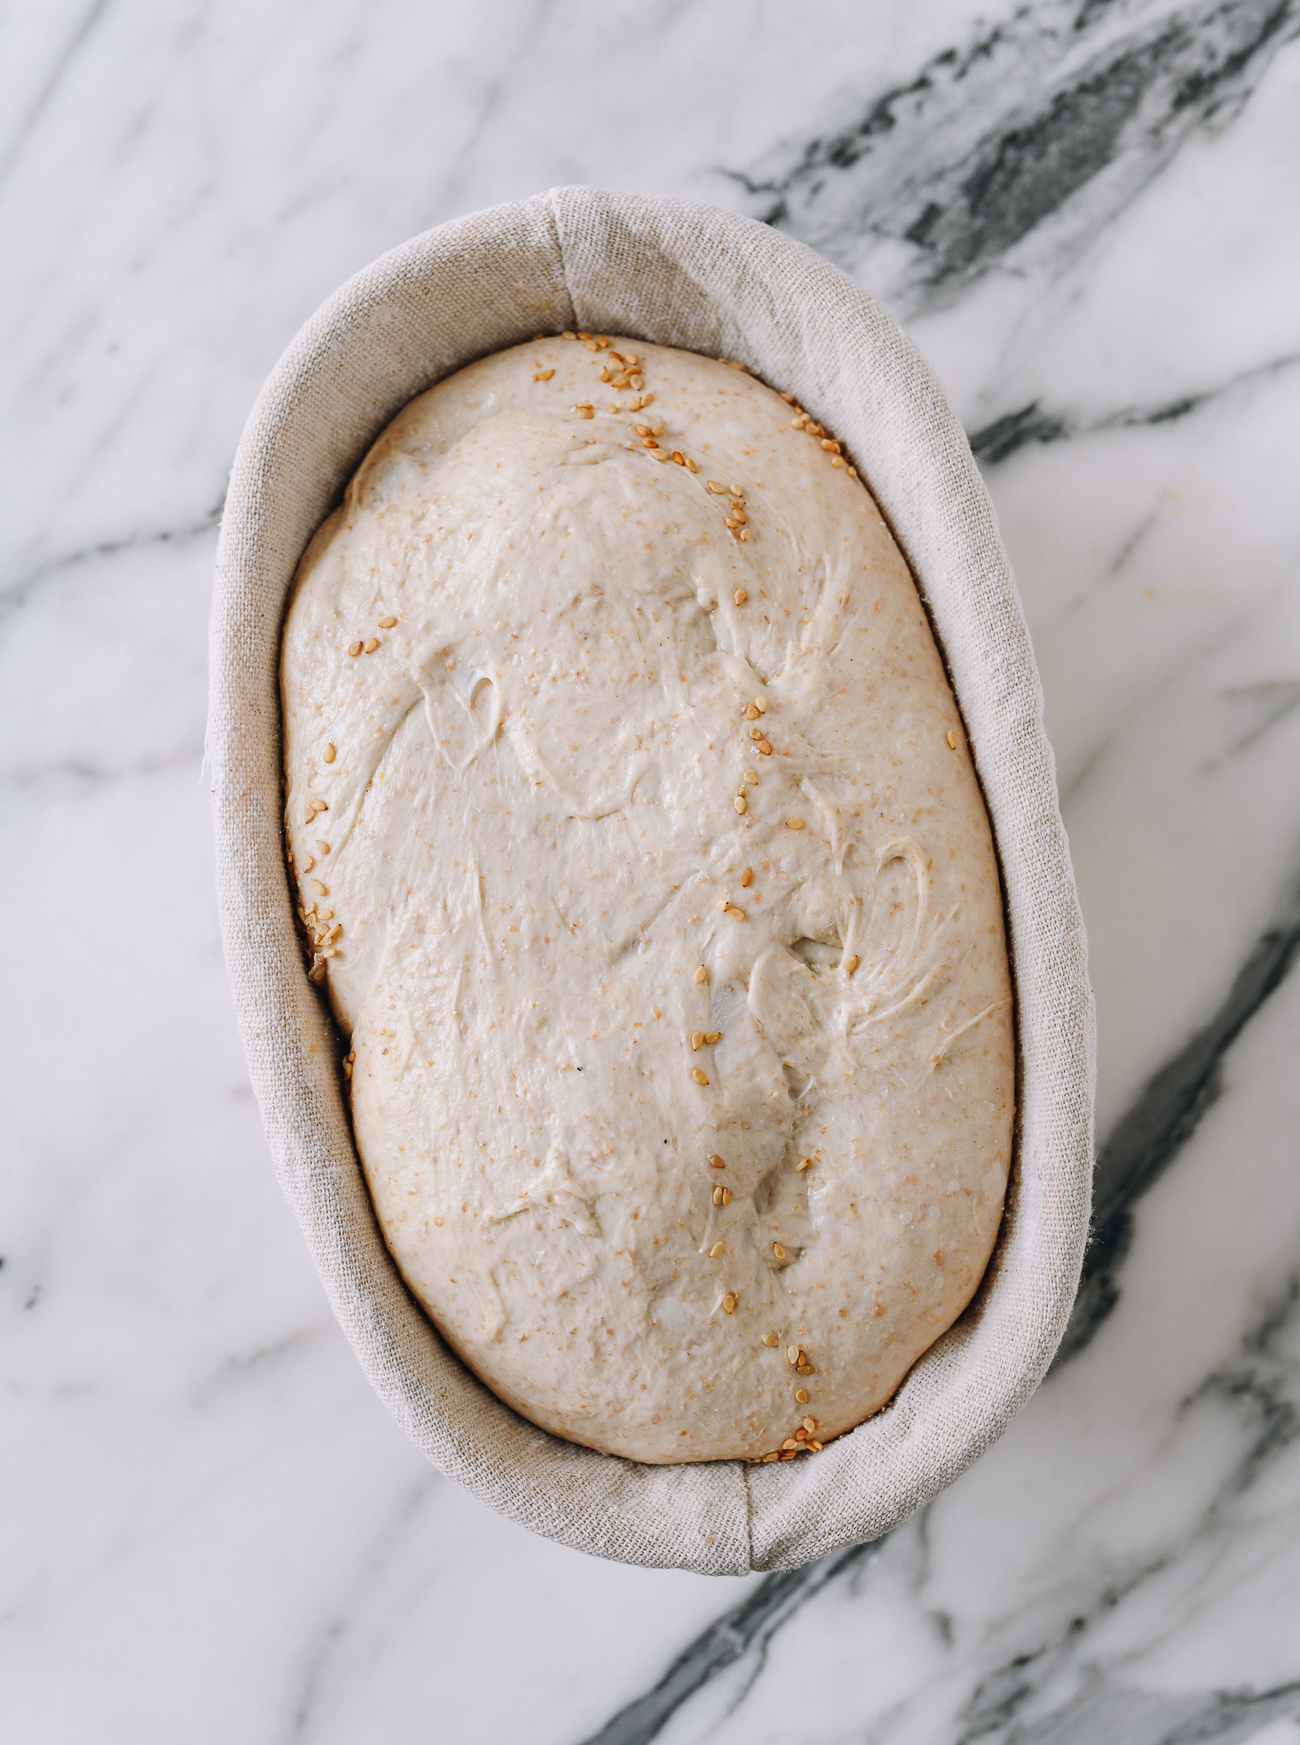
The Finger Poke Test!
Press the dough with a floured finger. If it springs back completely, it needs more proofing time at room temperature. If it springs back a little but still leaves an impression, it’s ready for the refrigerator.
Cold ferment dough overnight: 6:30pm
Place the dough in the refrigerator overnight or longer to cold ferment (still covered with a plastic bag). Cold ferment your dough for at least 8 hours. We have found that no more than 14 hours gives us the best results.
Once you have mastered this recipe, you can try longer ferments. We’ve heard of some bakers cold fermenting dough for up to 72 hours!
This develops flavor in your bread. If you want extra “sourness” or tanginess in your sourdough, you can experiment with cold fermenting for a longer period. But I usually bake my bread first thing in the morning so we have fresh bread for breakfast or brunch.
Friendly Reminder!
Again, these times are meant as a rough guide; don’t feel obligated to stick to it exactly! Things come up during the day, your dough may take longer to bulk ferment, or maybe you want to do a couple of extra lift, stretch, and folds.
You’ll find that this bread baking process is actually somewhat forgiving. You’ll start to recognize the look and feel of the dough at each stage, and use that as a guide. Sometimes, I start later in the day and put the loaf in the fridge at 12:00 midnight!
The next morning, bake your sourdough: 8:00AM
Arrange a rack in the middle of your oven. Place an empty Dutch oven in the center of the rack (with the lid on). Preheat to 450°F/232°C.
It should take at least 30 minutes to preheat both the oven and heavy cast iron Dutch oven inside. In other words, even if your oven says it’s preheated, you should allow 20-30 minutes for the Dutch oven to heat completely. I also highly recommend purchasing an oven thermometer to ensure accurate baking temperatures.
Cut a square piece of parchment paper large enough for the loaf, and for you to lift the loaf up by grabbing both sides of the parchment. Fold creases on all four sides of the parchment paper so it doesn’t curl. Set aside.
Prepare a square piece of heavy-duty aluminum foil. Take a rectangular piece, wrinkle it slightly to create some air pockets, and fold it in half into a square. You will place the foil in the bottom of the Dutch oven, and then place the loaf on top, so the bottom of the loaf does not scorch or bake into too hard of a crust.
Once the Dutch oven is fully preheated in the oven, take your loaf out of the refrigerator. I’ve found you get the best oven spring (i.e. rise while baking, just before the outer crust begins to form) when you place cold dough into a hot Dutch oven, so don’t take it out earlier.
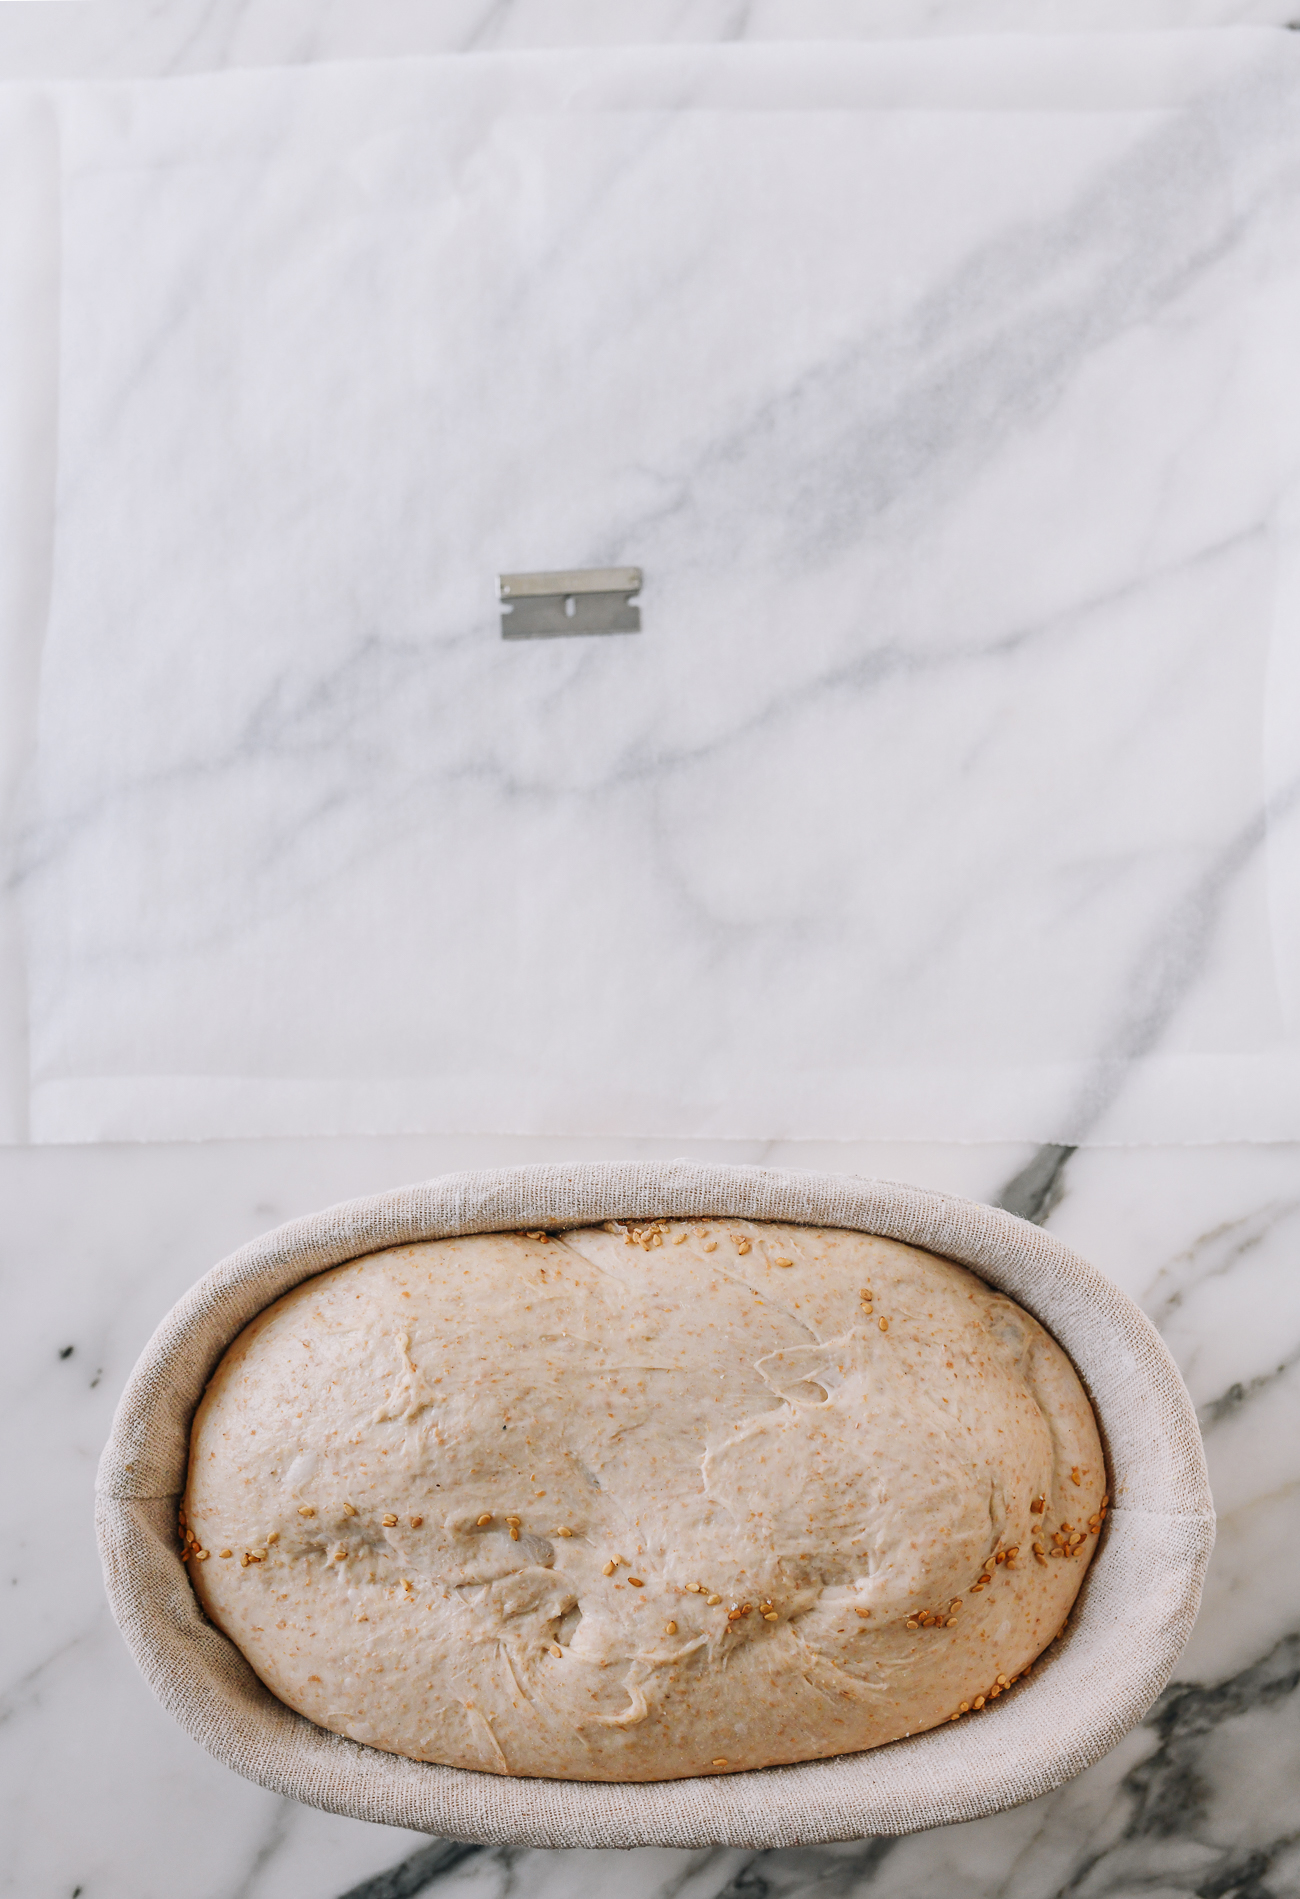
Now it’s time to slash (also known as “scoring”) the loaf to release steam while baking—and for a decorative effect.
Gently turn the chilled loaf over onto the center of the parchment paper. (The side with the seeds, if you used them, should be facing up.)
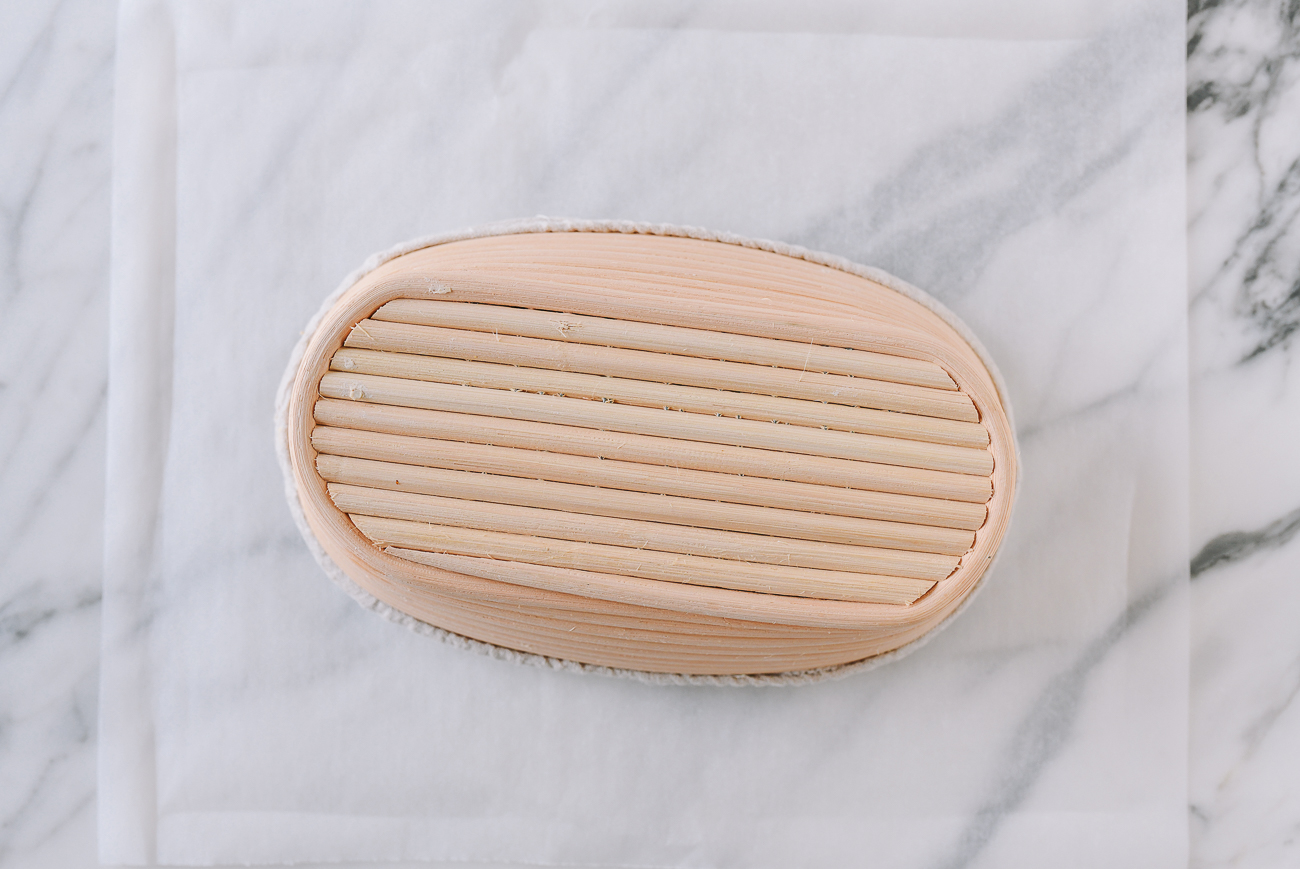
Very slowly and gently lift the banneton straight up, until the dough it is out of the basket.
Using a razor blade, make four shallow slits across the lower portion of the four sides of the loaf. This will release some surface tension, allowing it to spring better in the oven.
(See the VIDEO in this post to watch how I score the dough.)
Next, make a single deep slit along the top of the loaf. It should be about ½ inch (1 cm) deep and go from end-to-end, stopping 1 inch/2.5cm before each end.
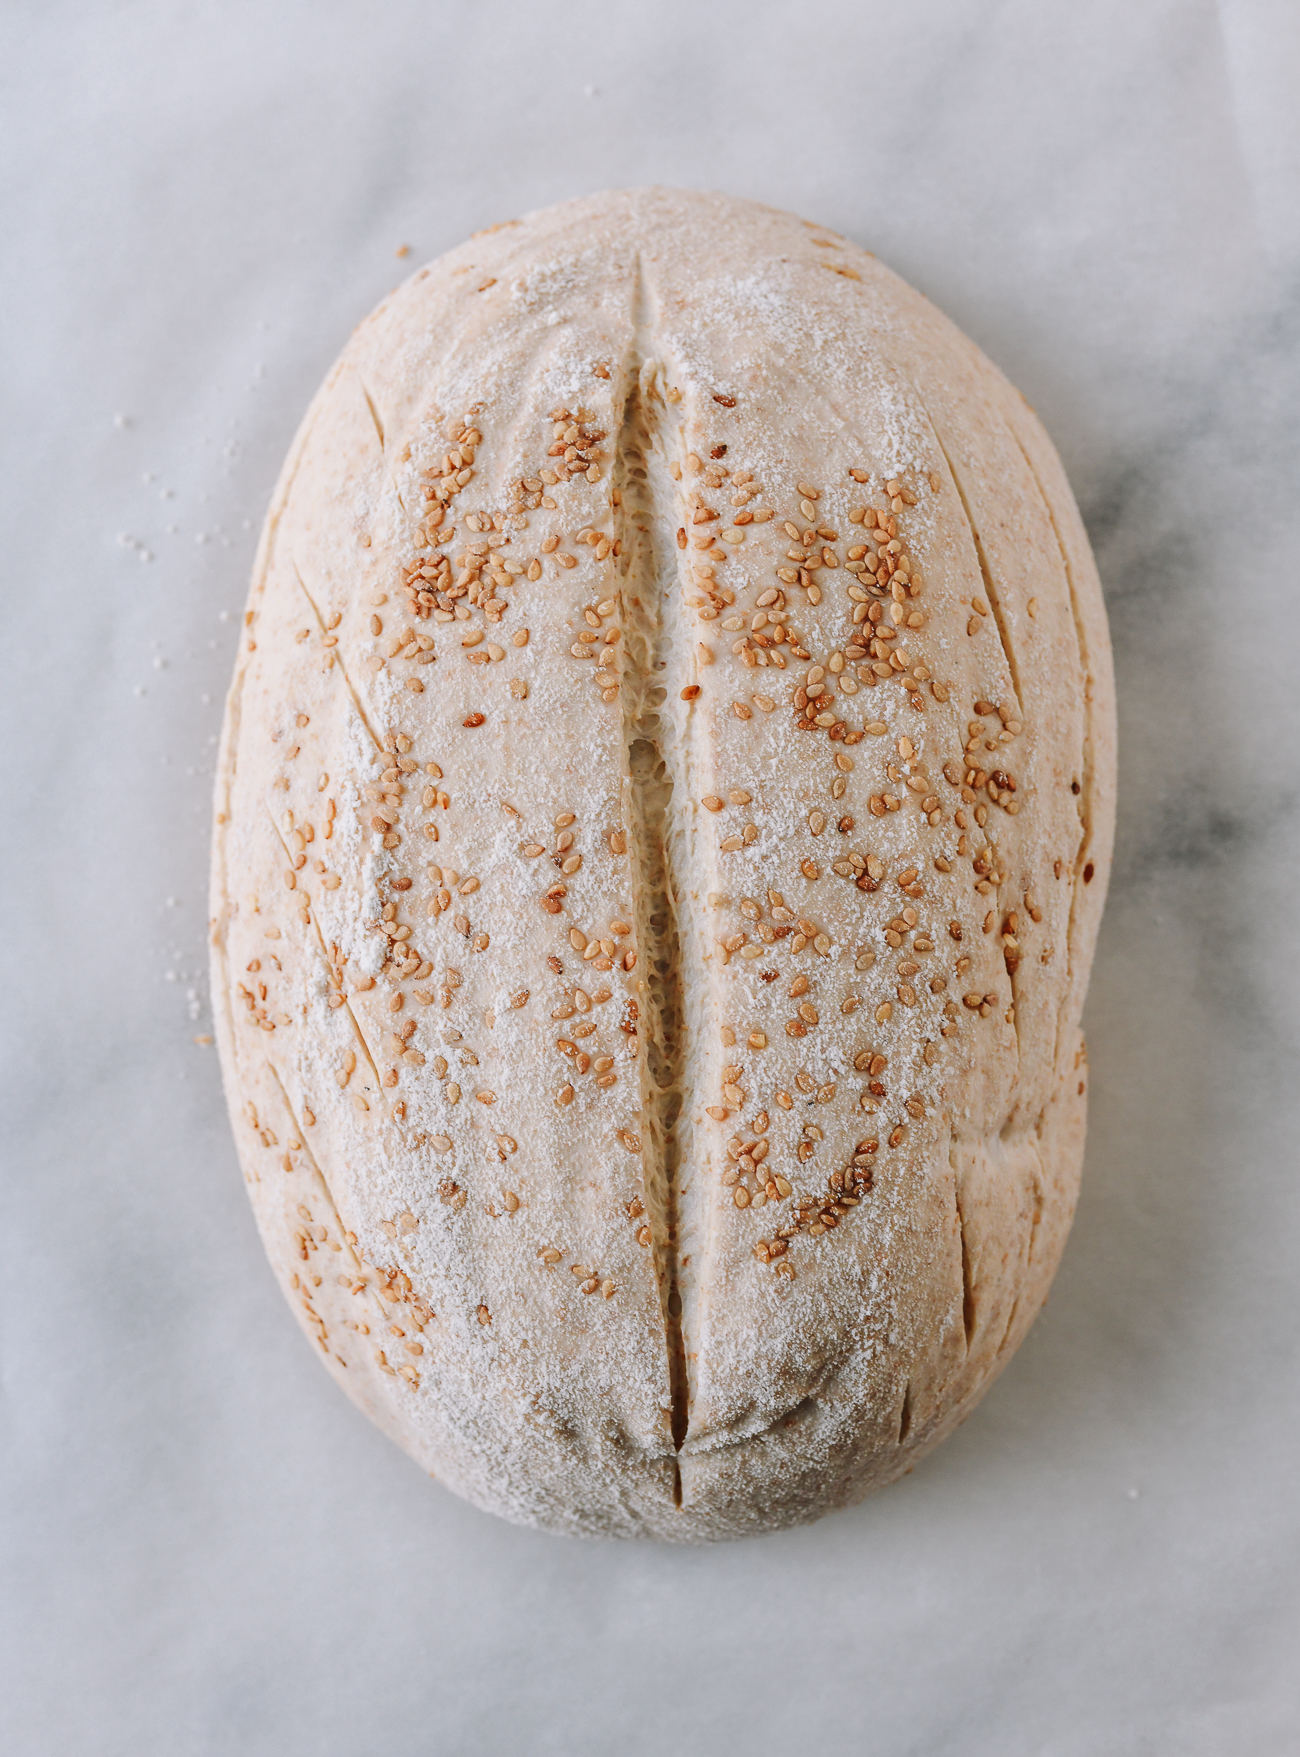
Slashing the loaf is an art. You can experiment with cuts that are aesthetically pleasing but also do the practical work of releasing pressure and fueling a good rise.
Use oven mitts to remove the preheated Dutch oven to your stovetop (remember to close the oven door to preserve heat!), and remove the cover. Place the wrinkled foil on the bottom of the Dutch oven.
Lift your loaf by both ends of the parchment paper, and lower it carefully into the hot Dutch oven.
The parchment paper will protrude out of the Dutch oven, which is ok. Check the cut you made on top of the loaf. If it has stuck together and closed up, carefully run the razor through it again, taking care not to burn yourself on the hot pot!
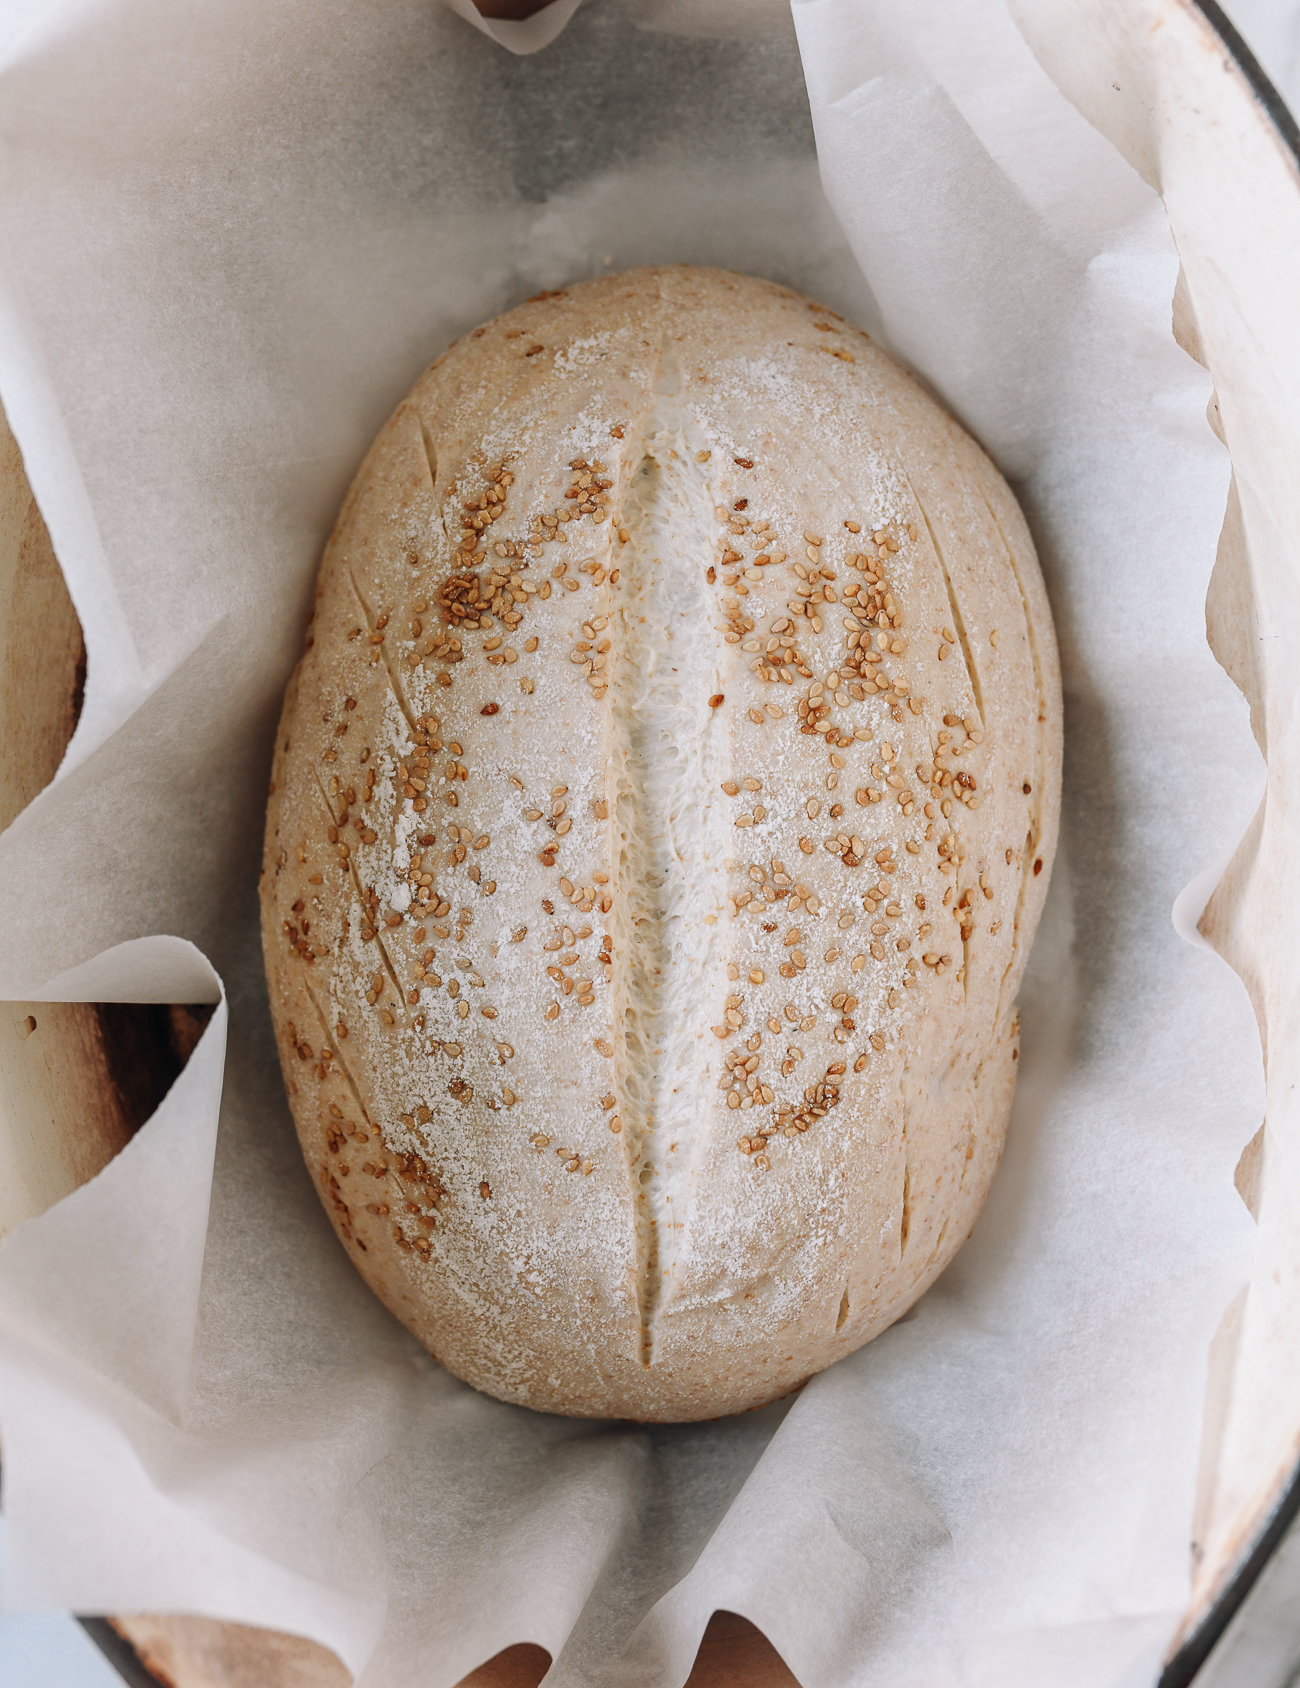
Cover the Dutch oven, and return it to the preheated oven. Bake your bread, covered, for 35 minutes.
After 35 minutes, remove the cover from your Dutch oven, and bake for an additional 10 minutes. (I’m sure you will be delighted by the sight of your beautiful bread!)
You can turn off the heat at this point and use the residual oven heat, or just leave the oven on 450°F/232°C the whole time. If you like a darker/harder crust, leave it in the oven for an additional 5 minutes.
Now the bread is done baking. Use oven mitts to transfer the Dutch oven to your stovetop.
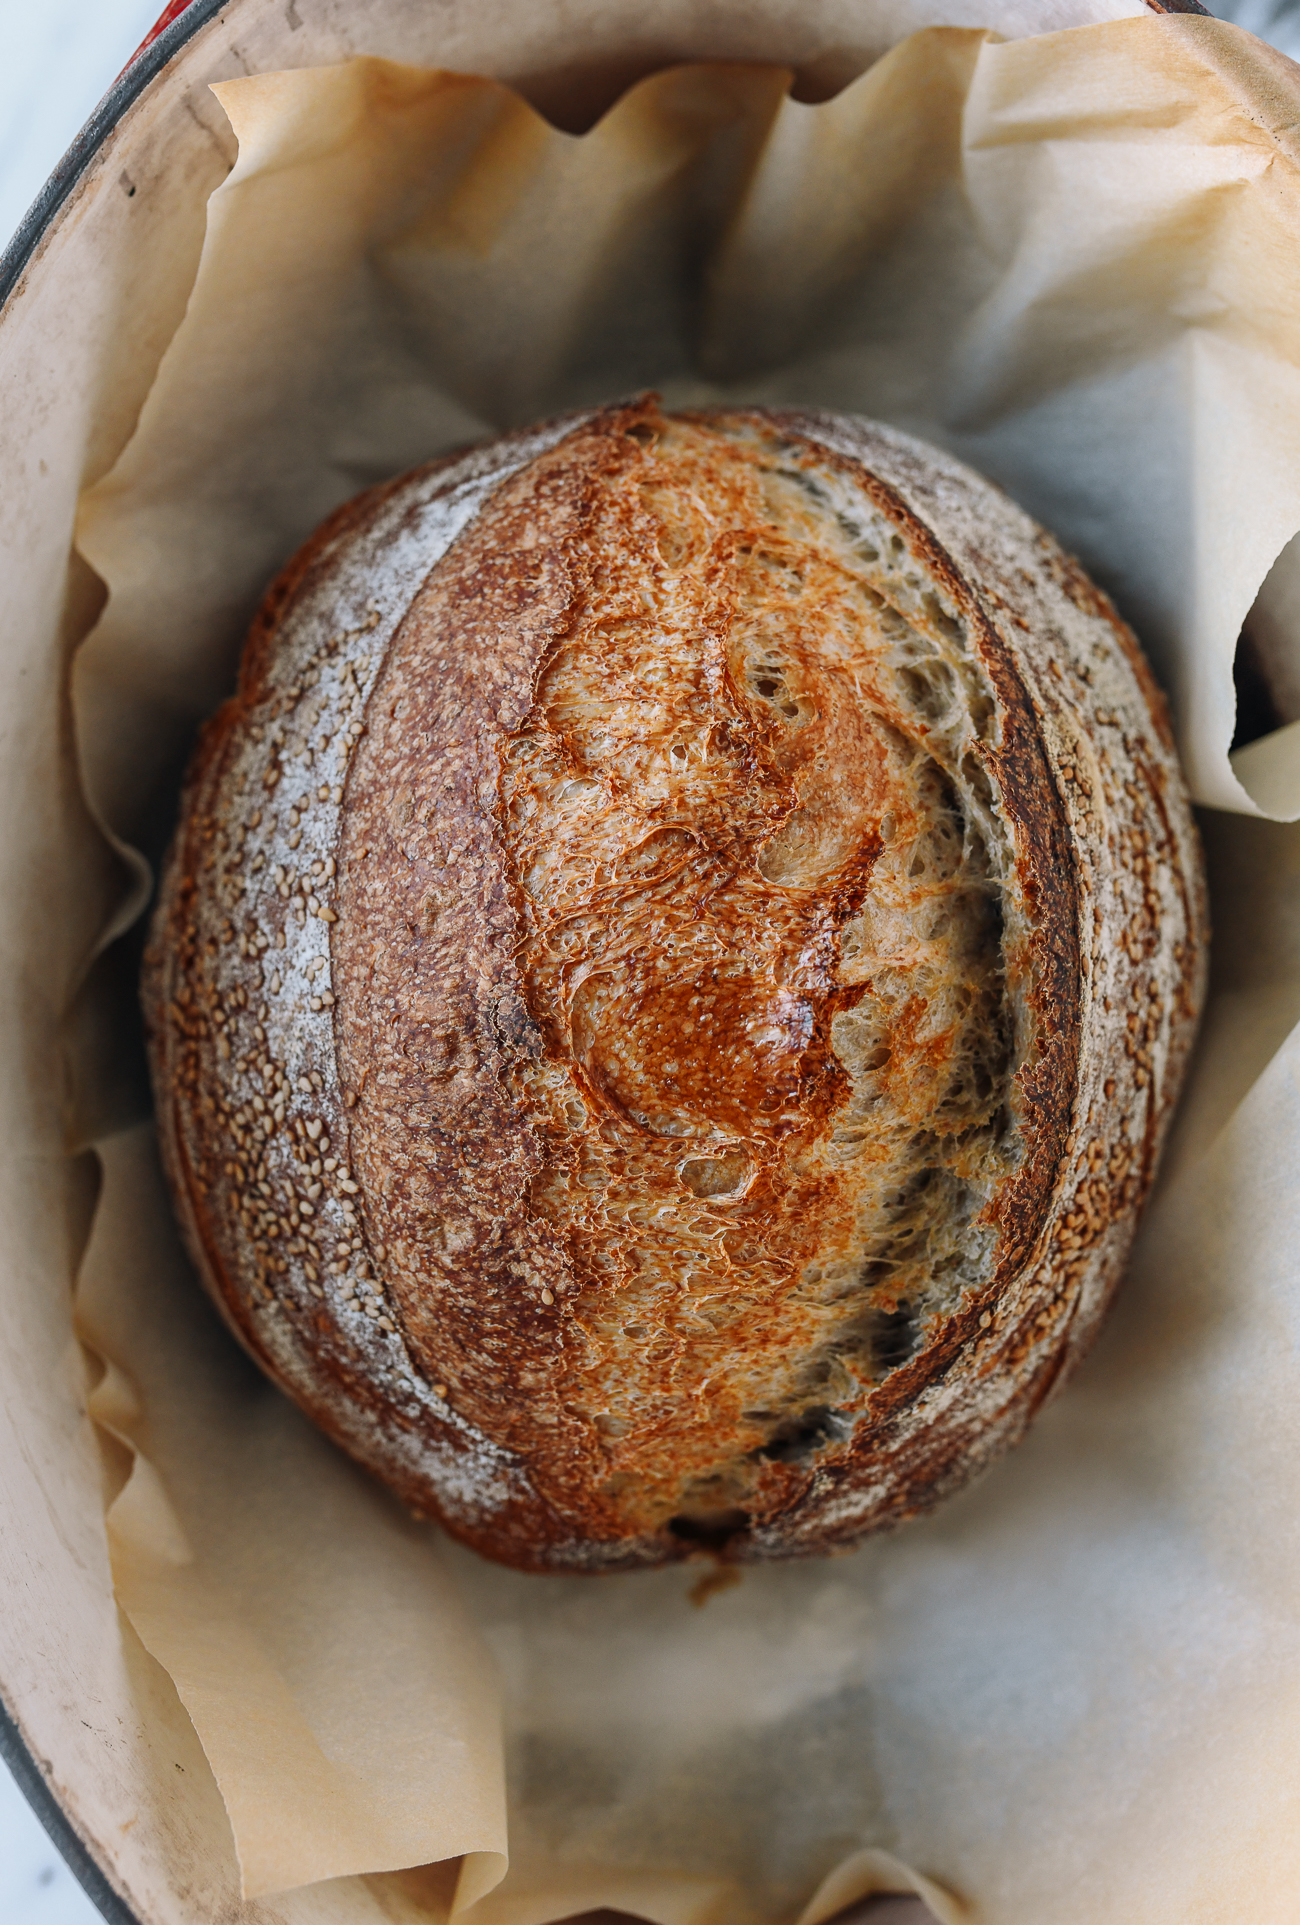
Lift the loaf out by the parchment paper, and transfer to a cooling rack. Cool the loaf for at least 30 minutes. 2 hours is better, and many say that 4-6 hours, or even overnight is ideal. Your bread is still baking as it cools, and slicing it too soon will yield a gummy texture. That said, we understand the impulse to cut into it early!
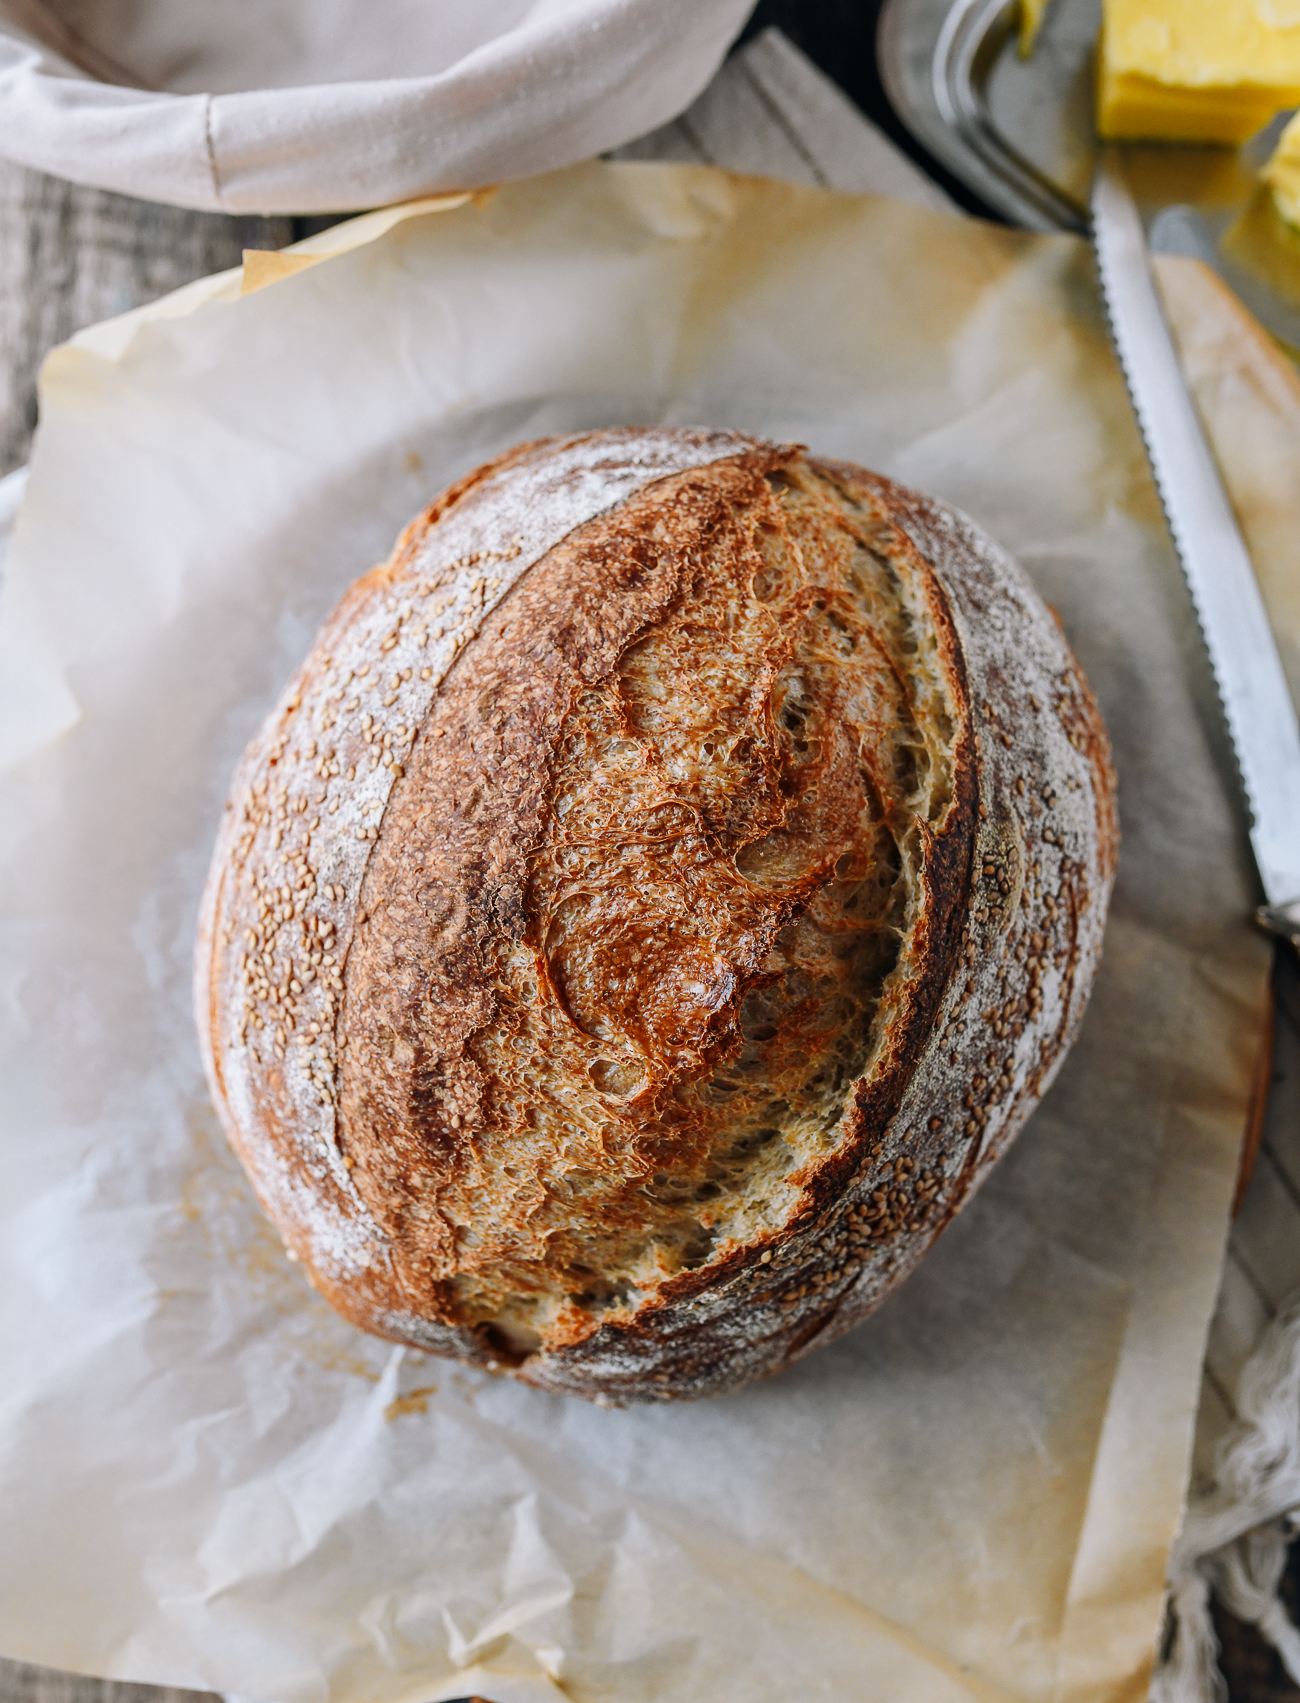
For best results, use a bread knife to slice your bread. It should be sharp and serrated, allowing you to cut through your bread with a sawing motion.
Do not press the knife down into your bread, or you will squish the air bubbles down! If you really want to be careful, cut into the side of the loaf rather than the top to avoid crushing the bread as you slice it.
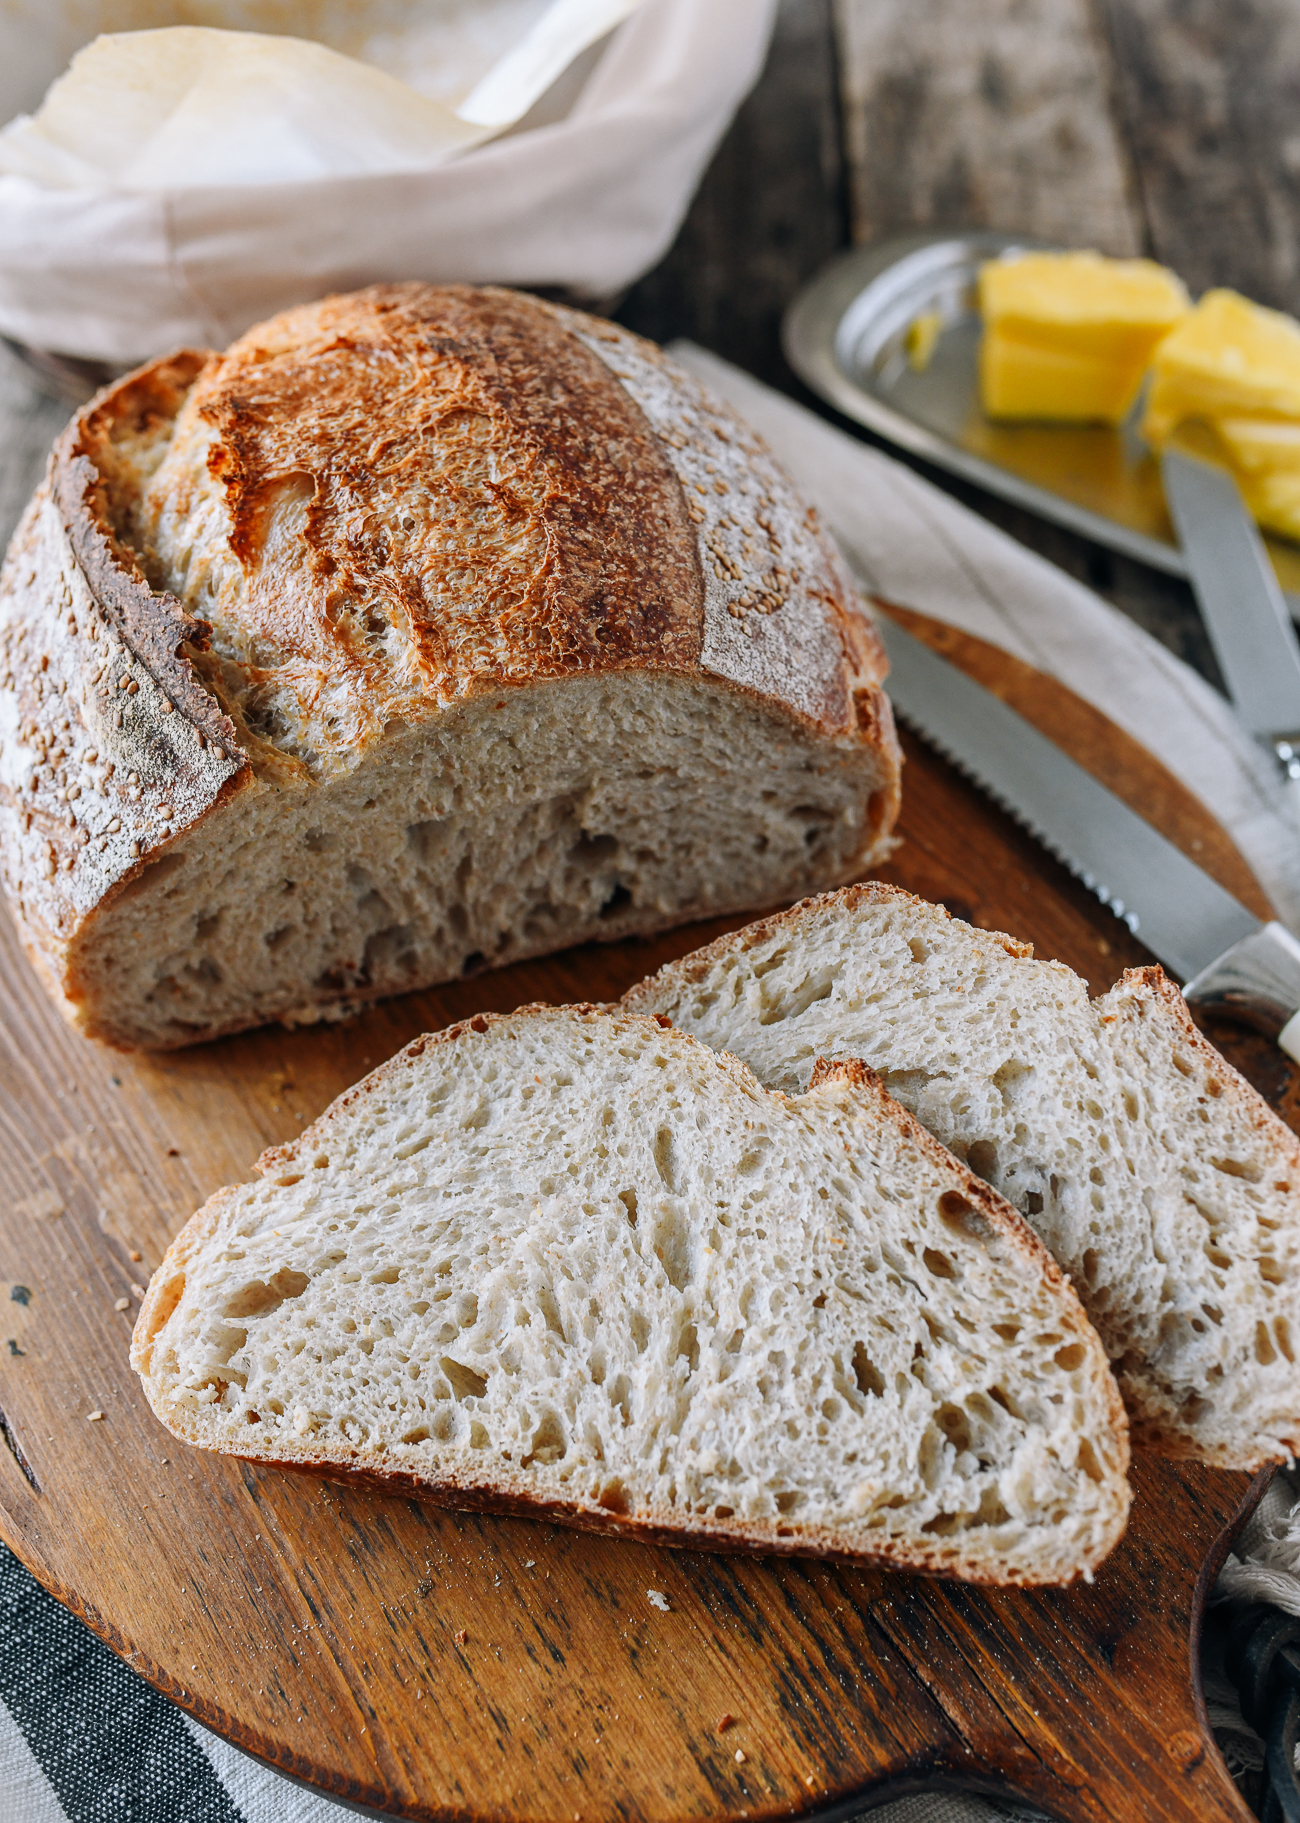
Once it’s completely cool, store the bread in a resealable bag. We also like to store it on our countertop under a cake cover. It’s our version of the old-fashioned breadbox.
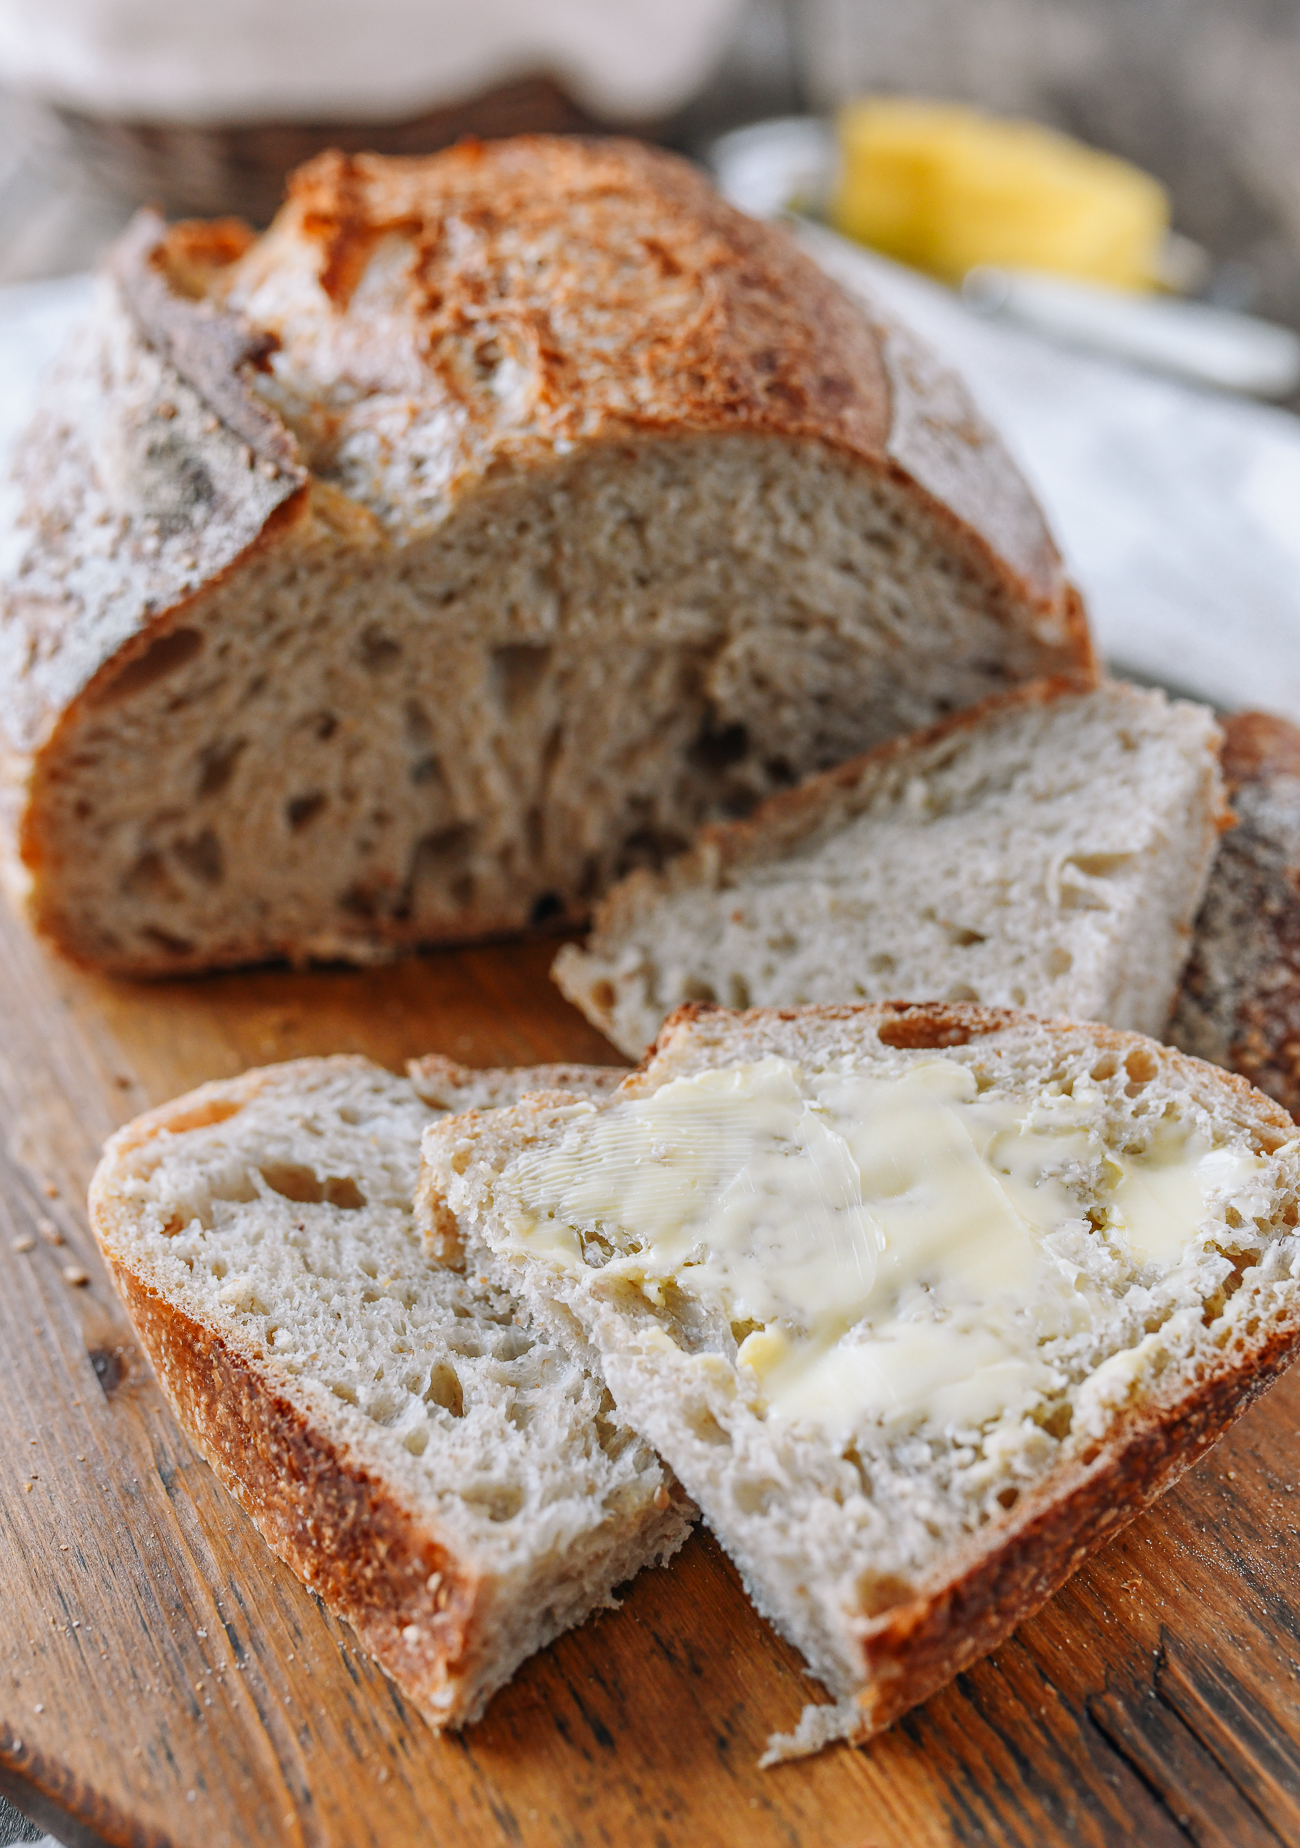
Grab some butter or olive oil, and ENJOY!
Watch Video: Shaping and Scoring the Loaf
Homemade Artisan Sourdough Bread
Ingredients
- 375 g unbleached bread flour (if measuring using cups, spoon the flour into the cup rather than scooping or packing it in)
- 125 g whole wheat flour (if measuring using cups, spoon the flour into the cup rather than scooping or packing it in)
- 120 g sourdough starter (100% hydration; this is about 1 cup of aerated starter; when you pour the starter into the measuring cup, the air pockets will collapse, and you’ll end up with a little over ½ cup of starter. This is why a digital scale is ideal!)
- 375 g water
- 13 g fine sea salt
- 1 tablespoon toasted sesame seeds (optional topping; can also use any combination of sesame seeds, oats, flax seeds, and sunflower seeds)
Instructions
Ferment Your Sourdough Starter: 8:00am
- The first step is to ferment your starter to bring it up to full strength. Take the starter out of the refrigerator, and stir in 60g lukewarm water and 60g of bread flour or whole wheat flour until well-combined. (For reference, I usually keep about 70g of starter as a baseline.)Update: If you store your starter in the refrigerator for a week, it's best to take the sourdough starter out of the refrigerator the night before and feed it with equal parts (25g) water and flour. This gives the starter the time to warm up and activate overnight, which will improve your bread's rise and drastically reduces the time needed the next morning.
- Cover it back up, and let it sit at room temperature for 4 hours, or until it doubles in size and just starts to fall again. This means it is at maximum strength.
- If you see a grey or light brown liquid floating on top of your starter when you take it out of the fridge, this is called “hooch.” This is the alcohol the yeast produces when it has run out of food (i.e. flour). If you bake bread regularly (and feed your starter regularly), hooch will not form. Just pour it off, or stir it back in for a more sharp-tasting (i.e. sour) sourdough. It’s a personal choice, but I recommend you pour it off before feeding, since the hooch can make your bread taste bitter.
Mix Flour and Water to Autolyse: 08:10am
- After your sourdough has been fed and has begun to ferment, measure out the flour. The easiest, most accurate way to do this is to place a mixing bowl on a digital scale, zero it out, then add 375g of bread flour, zero it out again, and then add 125 g whole wheat flour (500 g total).
- Use a stiff rubber spatula to mix the flours until combined. Add 375g of water, again using the scale if you can. Mix the flour and water until all the flour is moistened, and you have a scraggly dough. No need to overwork it at this point. Cover the bowl with your clean plastic bag, and let the dough rest for at least 90 minutes, or until your sourdough starter is ready (i.e. up to 4 hours).
Mix the sourdough starter with the rested dough: 12:00pm
- Once the sourdough starter has bloomed to its optimal state, pour 120g of it into the bowl with the rested dough. (Feed the starter with 15g each of water and flour to keep it healthy, cover it back up, and stash it in the refrigerator for future loaves.) Using a stiff rubber spatula, fold and mix the dough and starter for 2-3 minutes until combined. The dough will be very sticky. Cover the dough with your clean plastic bag, and let it rest again for 30 minutes.
Add salt to the dough & lift, stretch, and fold for the first proof: 12:30pm
- Sprinkle half the salt evenly on top of the dough. Wet your fingers, and use one hand to grab a piece near the edge of the dough, steadying the bowl with the other hand. Lift the dough vertically, stretching and folding the dough over to the other side. Sprinkle the other half of the salt over the dough and stretch and fold the dough again.
- Continue to repeat this lift, stretch, and fold motion 4-5 times, rotating the bowl each time. As you incorporate the salt, the gluten will tighten up, and it will not stretch as much.
- At this point, lift the dough ball off the bowl, drop it, fold it over, and press in a motion similar to kneading. Continue for 2-3 minutes, or until you feel the salt is incorporated into the dough.
- Cover with the clean plastic bag, and rest for 1 hour. This starts the first rise, or bulk fermentation stage. Your dough will do its best at 75°F/23°C, so if your house is cool, you can put the dough in the oven with a bowl of just boiled water to keep it warm and moist.
Lift, stretch, fold, and rest the dough 4x: 1:30 pm
- Remove the plastic, wet your fingers, and repeat the lift, stretch and fold motion 6 to 7 times until the gluten tightens up and the dough is no longer easy to stretch or lifts completely out of the bowl. This time, make sure the fold allows the dough to fall gently upon itself. Do not press and degas (punch air out of) the dough. Cover the dough with plastic and rest for 45 minutes.
- Repeat this stretch, fold, and rest process 3 more times, for a total of 4 times over the course of the next couple of hours. Each time, your dough will proof, ferment, and grow in size. It will get lighter/puffier, and become less sticky. By the 4th time, you should start to see bubbles forming. You’ll also know good amounts of gluten have formed when the dough stretches nicely without tearing.
- After the last lift, stretch and fold, cover the dough again to rest for 1 hour. The dough should end up about 1.5X to 2X its original size, and should have a puffy, light feel. If you are unsure, you can do another stretch, lift and fold, and continue to let it proof for another hour to be safe.
Shape the dough, and place it into the proofing basket: 4:45pm
- Once you have determined your dough is ready for the next step, lightly flour your counter or work surface, and pour the dough out of the bowl. Just let gravity do its work, letting the dough fall slowly onto the counter. Don’t rush it, and take care not to deflate air bubbles that have formed in the dough.
- Dust your hands with flour. With both hands, gently grab the side of the dough opposite you and pull it away from you slightly. Then fold it towards you onto itself, to the center of the dough. If the dough sticks to the counter, gently loosen it with a floured dough scraper.
- Next, grab the right side of the dough. Stretch it slightly to the right and fold it to the middle. The dough should be wet enough to stick to itself. Do the same with the left side, stretching it slightly to the left and folding it to the middle.
- Finally, use both hands to grab the bottom of the dough closest to you. Roll and fold it away from you, pulling it slightly towards you as you do (there should be some tension on the dough). After you’ve completed rolling, you can further shape your dough by gently sliding your dough scraper underneath the dough. This creates tension on the surface, allowing you to shape it into an oval shape or round boule.
- Sprinkle any seeds on top, or if not using seeds, lightly flour the top of the dough. Sprinkle all-purpose flour (about 2 teaspoons) into your proofing basket, preferably one with a cloth liner. With your left hand lightly supporting the top of the loaf, carefully slide a dough scraper under the right side of the dough. Push it into your left hand, lifting up the dough, and gently place it into the floured proofing basket upside down (the side with the seeds should be facing down).
Final proofing: 5:00pm
- Cover the dough in the proofing basket with your plastic bag. Proof for 90 minutes at room temperature (or ideally 75°F/23°C) until it passes the finger poke test. Press the dough with a floured finger. If it springs back completely, it needs more proofing time at room temperature. If it springs back a little but still leaves an impression, it’s ready for the refrigerator.
Cold ferment dough overnight: 6:30pm
- Place the dough in the refrigerator overnight or longer to cold ferment (still covered with a plastic bag). Cold ferment your dough for at least 8 hours. No more than 14 hours has given us the best results. Once you have mastered this recipe, you can try longer ferments to develop more "sour" flavor in your dough.
The next morning, bake your sourdough: 8:00AM
- Arrange a rack in the middle of your oven, with an empty Dutch oven positioned in the center (with the lid on). Preheat to 450°F/232°C.
- Every oven is different, but it should take at least 30 minutes to preheat both the oven and heavy cast iron Dutch oven inside. Even if your oven says it’s preheated, allow 20-30 minutes for the Dutch oven to heat completely.
- Cut a square piece of parchment paper large enough for the loaf, and for you to lift the loaf up by grabbing both sides of the parchment. Fold creases on all four sides of the parchment paper so it doesn’t curl. Set aside.
- Prepare a square piece of heavy-duty aluminum foil, wrinkling it slightly and folding it in half to create some air pockets between the two layers. You will place the foil in the bottom of the Dutch oven, and then place the loaf on top, so the bottom of the loaf does not scorch or bake into too hard of a crust.
- Once the oven AND Dutch oven are fully preheated, take your loaf out of the refrigerator. I’ve found you get the best oven spring (i.e., rise while baking) when you place cold dough into a hot Dutch oven, so don’t take it out earlier.
- Gently turn the chilled loaf over onto the center of the parchment paper (the side with the seeds, if you used them, should be facing up). Slowly lift the proofing basket/banneton straight up, until the cloth lining releases from the loaf and it is completely out of the basket.
- Using a razor blade, make four shallow slits across the lower portion of the four sides of the loaf. This will release some surface tension, allowing it to spring better in the oven. Next, make a single deep slit along the top of the loaf. It should be about ½ inch (~1 cm) deep and go from end-to-end (stopping 1 inch/2.5cm before the edge on both ends).
- Use oven mitts to remove the preheated Dutch oven to your stovetop, and remove the cover. Place the wrinkled foil on the bottom of the pot.
- Lift your loaf by both ends of the parchment paper, and lower it carefully into the hot Dutch oven. The parchment paper will protrude out, which is ok. Check the cut you made on top of the loaf. If it has stuck together and closed up, carefully run the razor through it again, taking care not to burn yourself on the hot pot!
- Cover the Dutch oven, and return it to the oven. Bake your bread, covered, for 35 minutes.
- After 35 minutes, remove the cover from your Dutch oven, and bake for an additional 10 minutes. You can turn off the heat at this point and use the residual oven heat, or just leave the oven on 450°F/232°C the whole time. If you like a darker/harder crust, leave it in the oven for an additional 5 minutes.
- Use oven mitts to transfer the Dutch oven to your stovetop. Lift the loaf out by the parchment paper, and transfer to a cooling rack. Cool the loaf for at least 30 minutes. 2 hours is better, and many say that 4-6 hours, or even overnight is ideal. Your bread is still baking as it cools, and slicing it too soon will yield a gummy texture. That said, we understand the impulse to cut into it early! Enjoy.
Tips & Notes:
- Conversions from grams to cups and spoons are approximate, so we highly recommend using a digital scale!
- For best results, use a bread knife to slice your bread. It should be sharp and serrated, allowing you to cut through your bread with a sawing motion.
- Wait until the bread is completely cooled before storing an an airtight container or zip lock bag.
